Wondering what to do when iMessage displays the wrong phone number? Several users report that the iMessage app keeps showing their old phone number after they changed or ported their phone number.
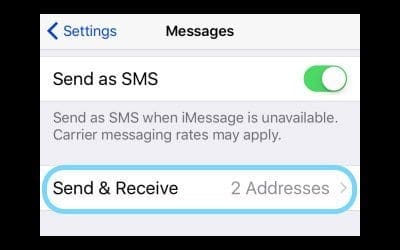
This problem often appears after updating to a new iOS or following the activation of iMessage and FaceTime activation when tapping on “Use your Apple ID for iMessage.” iMessage does not update with the correct number and the phone shows a wrong number in their Message Settings under Send and Receive!
Other causes for this problem include:
- Porting iPhone number from a different carrier
- Changing your iPhone’s phone number
If you encounter this problem on your iPhone, try these steps to attempt to resolve the issue. 
Related Articles
- iMessage Contact Names Missing, Shows Number?
- How to Delete or Update iMessage App, Games, and Stickers on iPhone
- How to Use the iCloud Message Sync Feature
Fix iMessage Displays the Wrong Phone Number
Check Your Balance
Since your iPhone uses SMS activation for iMessage, you must have credit with your carrier to send an SMS text to verify your phone number and other information with Apple.
Adding as little as one dollar fixed this problem for quite a few folks with pay-as-you-go iPhone plans.
Toggle Off and On iMessage
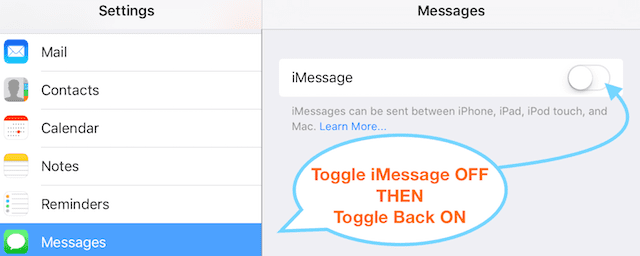
- Try turning off iMessage (Settings > Messages> iMessage).

- Turn Off your phone and wait 5-10 minutes
- Tap Settings > Phone > My Number and confirm that your phone number is correct
- Finally, turn iMessage back to On (Settings > Messages) and go to Settings > Messages > Send & Receive and see if the correct number is displayed under “Start new conversations from”
Sign Out and Back Into FaceTime
- Go to Settings > FaceTime and sign out of your Apple ID
- Wait 30 seconds
- Sign back into FaceTime

If you’ve never used FaceTime, toggle it on and sign in with your Apple ID
Turn Both iMessage and FaceTime Off and On
- Turn iMessage off
- Tap Settings >Messages and toggle iMessage Off
- Turn FaceTime off
- Tap Settings > FaceTime and toggle FaceTime Off
- Restart the device
- Toggle both iMessage and FaceTime back on
- This forces iMessage and FaceTime to re-activate with your iPhones current number
- Send a text message and see if the issue resolved
If the problem remains, follow these additional steps
- Go through steps 1 & 2 (turn off both iMessage and FaceTime)
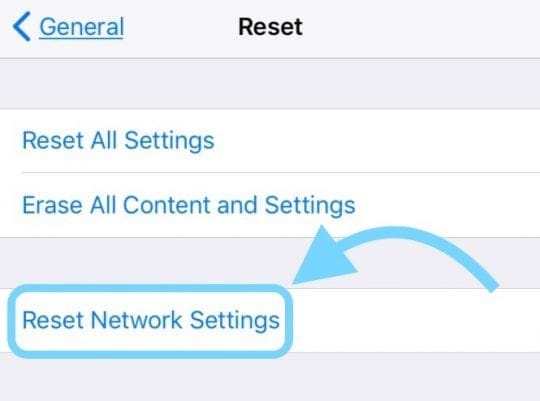
- Reset the network settings
- Go to Settings > General > Reset > Reset Network Settings

- This removes all saved WiFi passwords but does NOT delete any data
- Go to Settings > General > Reset > Reset Network Settings
- Toggle both iMessage and FaceTime back on
- Send a text message and see if the issue resolved
Update Send & Receive Settings
- On your iPhone, go to Settings > Messages > and tap Send & Receive

- Sign out of your Apple ID account
- Turn iMessage off and wait 30 seconds
- Toggle iMessage back on
- This forces iMessage to re-activate iMessage with your iPhones current number
- Sign in with your Apple ID, if requested
Sign Your Apple ID Out and Back In
- Manually backup your device using iCloud or iTunes
- Sign out of FaceTime
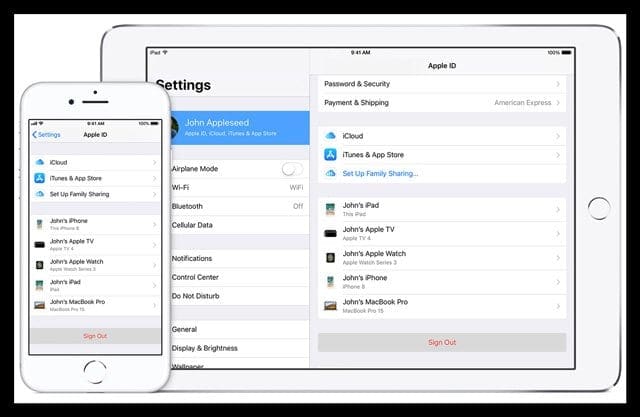
- Sign out of your Apple ID temporarily via Settings > Apple ID Profile > Sign Out (scroll down to the bottom to see this option)

- Toggle off iMessage and FaceTime
- Turn off your iPhone
- Remove your SIM card and reinsert it

- Use a SIM tool, safety pin, or paperclip to open the SIM tray
- Power your phone back on
- Remove your SIM card and reinsert it
- Reset the network settings by going to General > Reset > Reset Network Settings
- Toggle back on both iMessage and FaceTime
- Sign back in with your Apple ID
Change Your Apple ID Password
If the phone number that you want to remove belongs to an iPhone that you can’t access or don’t own anymore, visit the Apple ID website and change your Apple ID password
- Changing your password removes all phone numbers from your iPad, iPod Touch, and Mac
- Calls or messages for the removed numbers won’t appear on those devices anymore
After Updating Your Apple ID Password
- Go to Settings > Apple ID Profile
- If you’re signed out, enter your updated Apple ID and password
- If you’re signed in with your previous Apple ID, tap your Apple ID, then tap Sign Out. Then enter your updated Apple ID and password
- Toggle off and on iMessage and FaceTime and sign in with your Apple ID and updated password
Reader Tips 
- Reader EFP discovered the following for pay as you go iPhones:
- Turn off iMessage and FaceTime
- Call or go online to your iPhone carrier and recharge your iPhone in any amount, even as little as possible (I added only 1 dollar to my account)
- After the recharge takes place, turn on iMessage, then turn on FaceTime
- Both iMessage and FaceTime now working normally!
- I updated my phone number in the Payments Information for my Apple ID to my iPhone’s number and that helped sort things out
- What fixed it for me was going to Settings > Contacts and importing sim contacts from my accounts