Now that the latest version of OS X (called Yosemite) has been officially released, many of you will be eager to discover and use all the new features. Almost every application on the Mac has been updated with a “flatter” look and hundreds of new features such as Continuity, iCloud Drive and the new Today sidebar.
Mail has often been criticised as lacking features compared to third party mail clients such as Eudora, but it seems that Apple has finally taken heed and added some genuinely useful features like large mail attachments. But perhaps the most interesting of these is Annotations (also referred to as Markup) which lets you draw on and annotate images, as well as the ability to add a signature using the trackpad or even your Mac’s camera.
One particularly nice aspect of Annotations is the ability to create freehand annotations that are automatically converted into solid shapes such as squares, circles, arrows and so on. What’s more, it’s very intuitive to use with a minimal learning curve – you can be up and running with all sorts of fun in just a few minutes…
This guide provides step-by-step instructions to use some of the new markup features in Mail.
Contents
How to use Annotations
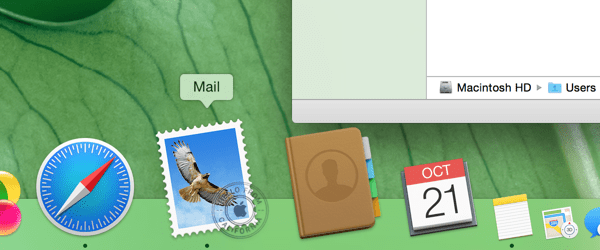
Step 1 – Launch Mail
The first step is to launch Mail as normal, either from the Dock icon or Spotlight (type CMD + Spacebar then type Mail).
Once Mail opens, click the Compose new message button to create a new message. Once the message window has opened, populate the usual fields such as the recipient and subject line as normal. Remember that Annotations only works with images, so in the next step we’ll add one.
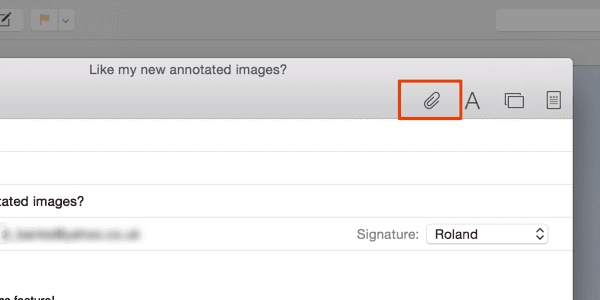
Step 2 – Attaching a picture in Mail
In your open message, click the paper clip icon as shown below to select an attachment. Note that you could also use the media browser button to select only pictures and videos.
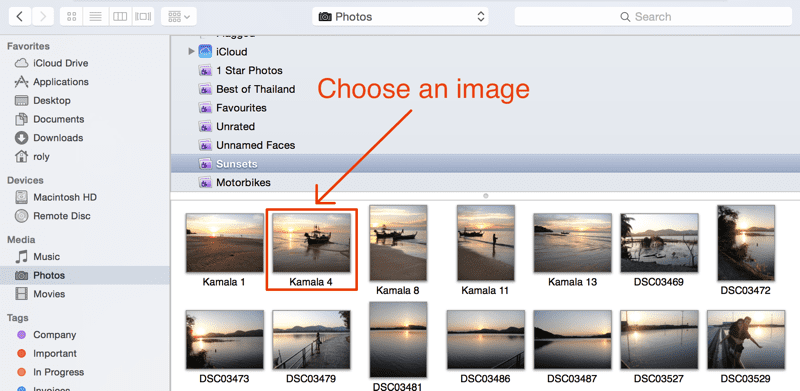
Once you’ve chosen a picture, just confirm your selection with the Choose File button. You will then be taken back to the mail message to continue editing.
Step 3 – Select the Markup option
The next step is to hover your mouse cursor anywhere over the image. You will notice a small dropdown arrow appear in the picture’s upper right corner.
Click this button to reveal a couple of options – Markup and More…
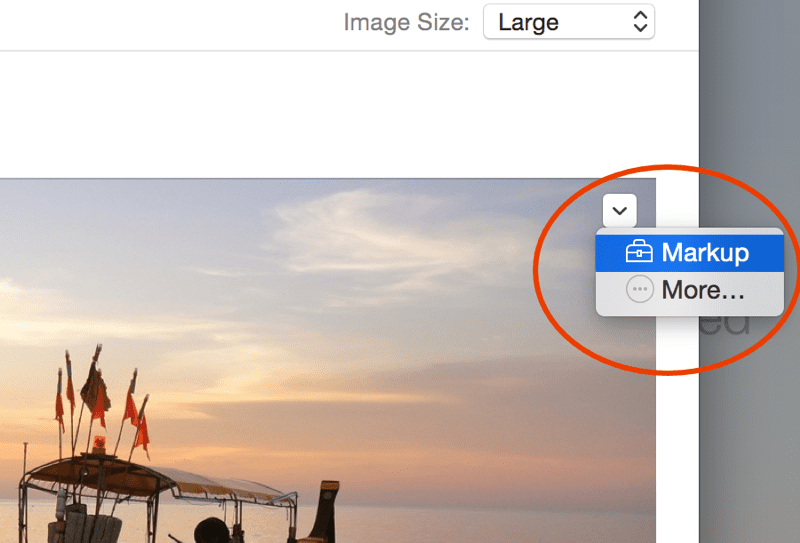
The More option takes you to the Extensions section in Preferences to configure any appropriate image editing extensions that you may have installed.
In this case just select Markup. The mail message then switches to a view that contains a row of icons as shown below.
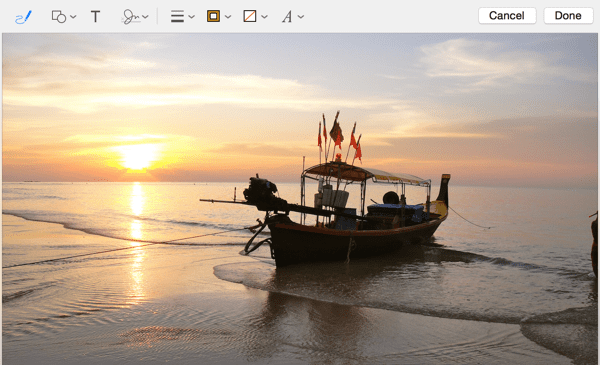
The options available are listed below. We’ll deal with each of these in turn.
- Sketch – freehand sketch
- Shapes – squares, arrows, callouts, stars and polygons
- Text – basic text shapes
- Signature – draw on the trackpad or captured by the camera
- Shape Style – for example to change the border brush
- Border Colour – the border applied to any shapes you draw
- Fill Colour – the fill colour applied to any shapes you draw
- Text Style – choose options such as the font, size, formatting and colour
Step 4 – Create annotations
Before we begin, a few points worth remembering are that after drawing a shape, you can click anywhere on the background to deselect that shape. If you select the shape again, you will see standard move and resize controls appear.
Create a freehand sketch
Select the sketch button, which is the first icon in the annotation toolbar. You can draw any freehand shape (see the image below, where I have sketched an arrow) and Mail will do its best to convert your drawing to one of its preset shapes as soon as you release the mouse.

A small additional toolbar then appears, which lets you choose between Mail’s preset shape and the original freehand one that you drew. Just choose the desired one from the popup menu.

If you kept the suggested preset, you will also notice some standard shape manipulation controls appear. In this case, blue circular grab handles let you move the endpoints, and the green grab handle lets you adjust the curve.
Draw shapes and set a style
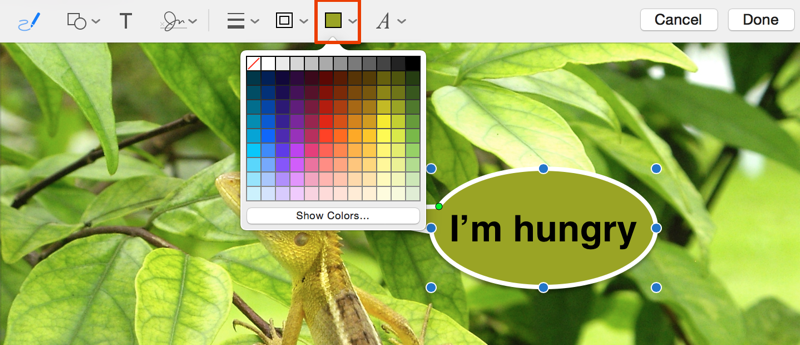
The next option in the annotations menu is Shapes. Click the small dropdown arrow which appears next to the icon, to view the available shapes. Besides the lines, arrows, squares and circles, there are also callouts (speech bubbles) that may contain text – create a callout and start typing, and your text appears inside the shape.
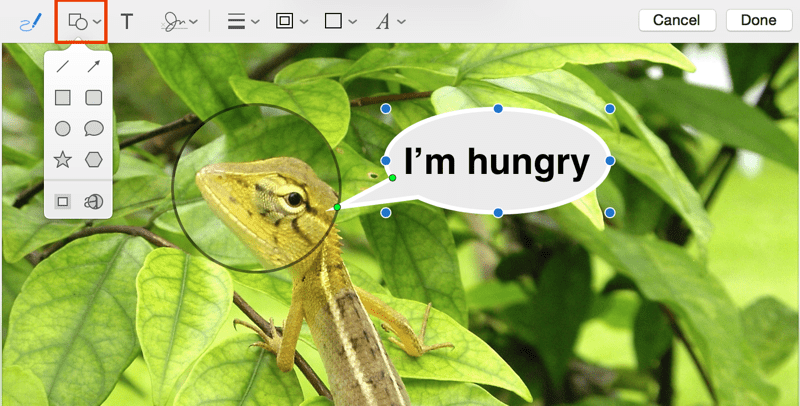
Once you’ve drawn a shape, you can also change its style (line width and style, arrowheads), border colour and fill colour. In the example below, I’ve changed the background colour on the callout, and adjusted the text size and colour.
It’s worth noting that both the star shape and the polygon shape in the menu can be used to create objects with a varying number of points. For example, if you want to create a star with 6, 8, or 10 points, you can adjust both the number of points and the depth of the points, as shown below.

You can play around with the various shape settings to achieve the desired look. There are dozens of options, and they are all fairly obvious. One particularly nice example is the magnifying glass option under Shapes.
Insert a custom signature
Perhaps the most useful annotation feature in Mail is the ability to insert a signature. You can draw one on the trackpad, or even take a photo. We’ll take a look at both methods.
First of all, click the signature icon on the annotations toolbar. If you haven’t previously created any signatures, you’ll see a popup window with two sections – Trackpad and Camera.

Method 1 – create a signature using your trackpad
To create a signature using the trackpad, click the button labelled Click Here to Begin. You can draw directly on the trackpad, but it’s important to realise that the drawing area corresponds directly to the physical layout of your trackpad. It might take a few tries to get it right, but you can take your fingers off the trackpad at any time and continue.
Pro tip: keep looking at the trackpad when you sign your name – it’s much easier to work out where your finger is and much easier if you want to lift your fingers off to move to another area of the trackpad.

To finish signing your name, just press any key and then hit the Done button to save the signature. You also have the option to Clear the signature and start again, or just Cancel.

Once a signature has been created and saved, it can be selected at any time from the signature menu. You can have multiple signatures, which are also saved between Mail sessions. In other words, if you’ve created a signature and quit Mail, it will still be there the next time you open it.
Note that any signatures you create in the image editing mode do not appear in Mail’s options under Signatures – for the moment it seems that it’s a completely separate feature.
You can also move and resize your signature once it’s been inserted into the picture.

Method 2 – capture a signature using your Mac’s camera
Creating a signature using the camera is almost identical to the previous method. This time however, select the Camera option and hold up a white piece of paper that has your signature on. I found that even red pen in fairly poor lighting could be detected quite accurately. It takes a few seconds to process the image, after which you can use it as already described.
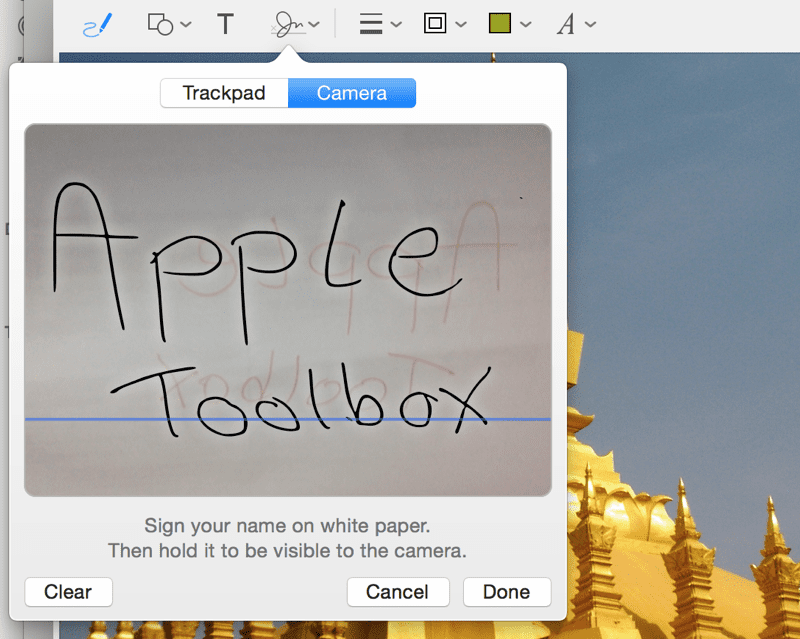
As you can see in the image below, signatures created by either method look great when added to the picture.

Arrange objects how you like
To delete an object, you can simply click to select it and hit the delete key on your keyboard. Likewise, to move objects around, simply select a shape and move it by holding the mouse button down. Every object also has various grab handles that can be used to resize them according to the object type.
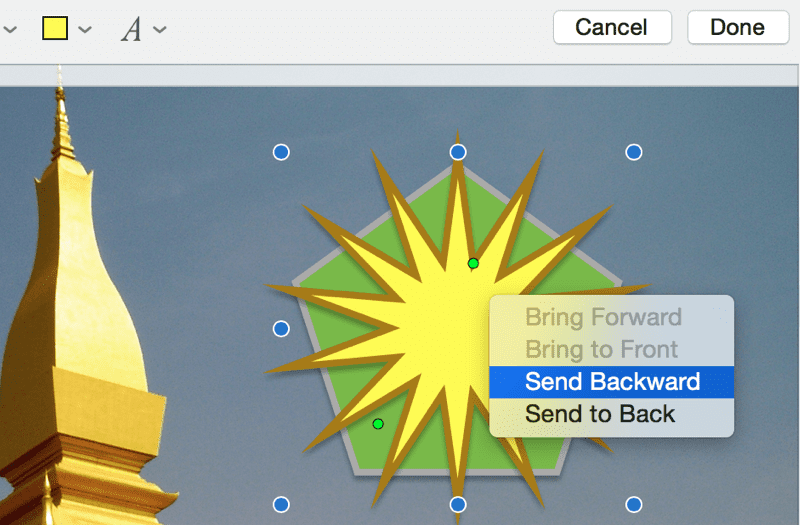
Besides moving and resizing, it’s also possible to move objects to the front or back to achieve some nice overlapping effects. To do this, right-click on any object to show the usual options to bring the object forward or back as shown below.
Crop your image
Before accepting all your annotations, you might like to crop your image to remove any unwanted areas. This is also fairly simple – move your mouse to the very edge of the image until blue grab handles appear, as illustrated in the screenshot below.

Just drag the handles to crop your image accordingly, and once you are happy with the final result, hit the Done button to return to editing your message as normal.
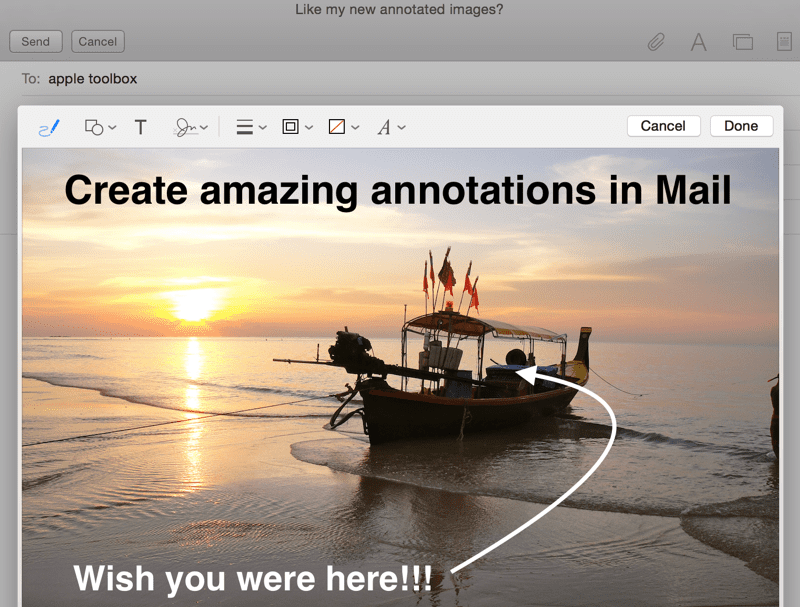
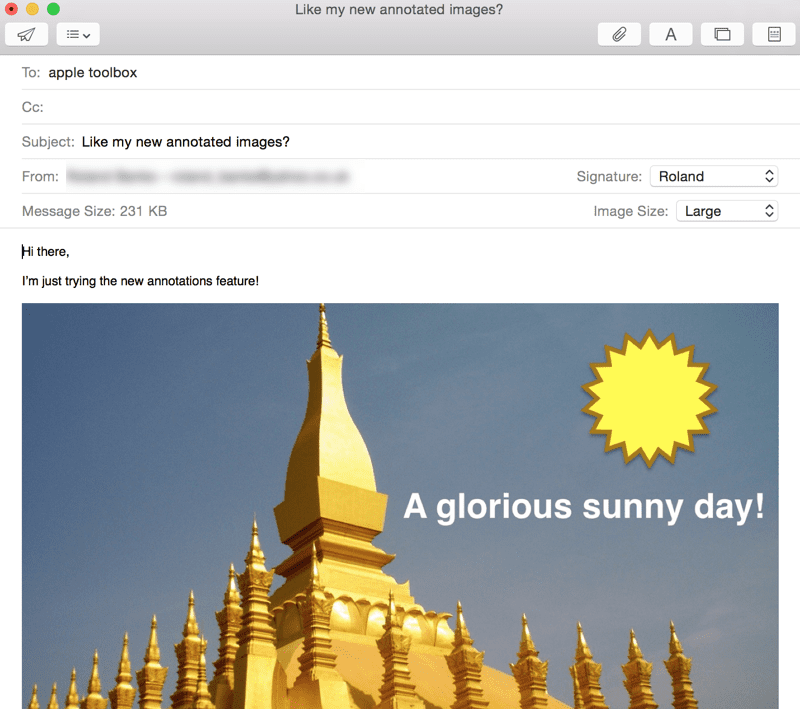
Here is an example of my completed image that I want to send within Mail:
Final Words
The new Annotations feature in Mail is incredibly useful, and lets you achieve great results in just a few minutes.
It’s particularly useful if you need to insert a custom signature into an email, but all the annotations features are also available in Preview and work in exactly the same way.
Emails that contain images need never look boring again, and it’s a very welcome addition to Mail on the Mac.
