Notifications are cool. Notifications keep us informed. They give us a quick snapshot of what’s going on in our lives and the lives of our friends, co-workers, and family members. Notifications let us know about everything that is upcoming (like meetings) and incoming (AirDrop, Calls, Software Updates.) For Mac users, notifications appear in the top-right corner of your Mac’s screen for a brief time or until you dismiss them, depending on set-up. So it’s important for all of us to know how to stop notifications on your MacBook and other Macs.
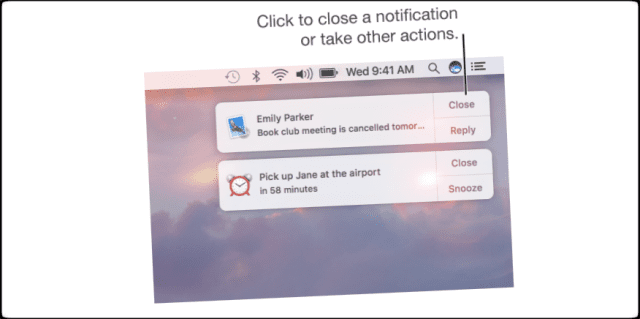
For those of us that use our MacBook at work and home, we sometimes forget to change our notification settings. But managing notifications on your MacBook is very easy. Setting notifications on or off comes in handy when you are sharing your MacBook’s or Mac’s screen. Maybe you’re at work conducting a presentation or collaborating on a shared project with co-workers. Or you’re watching a movie on your Mac (maybe even at work!)
Periodically turning off notifications also helps us focus and complete tasks while working on our computers, so we aren’t distracted by the latest news, gossip, or update. With notifications off, you can single-task! So another great reason to turn off your Mac’s notifications is to be more productive, at work and home.
What we all know is that no one wants an embarrassing notification popping up when conducting a presentation or other business with clients or co-workers (and maybe even friends or family.)
Related Articles
Contents
Fast Track 
- Option-Click, the Notification Center Icon, to turn ON or OFF Do Not Disturb
- Add Notification widgets through the Edit button in Notification Center’s Today view
- Open System Preferences > Notification Center to make changes to how notifications arrive
The Beauty of Meeting Mode
So, in this post, we show you how to temporarily stop ALL notifications on your MacBook without needing to go to system preferences each time you want to pause your notifications.
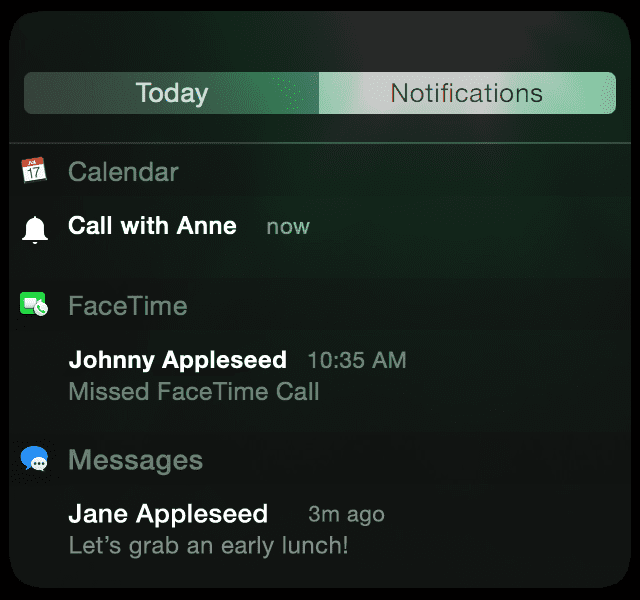
To prep your Macbook into a “meeting mode,” you will need to use the Do Not Disturb function much like how you use it on your iPhone. When Do Not Disturb is on, the Notification Center icon in the menu bar is dimmed to a light gray. You won’t see or hear any notifications as they arrive. However, all notifications are collected to review later.
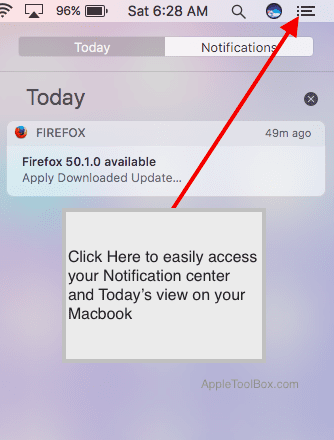
Step – 1 Start by clicking on the Notification icon in the top right corner of your MacBook.
For trackpad users, swipe left with two fingers from the right edge of the trackpad.
Step – 2 Turn ON Do Not Disturb
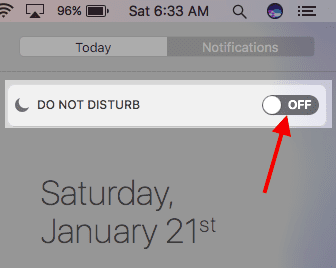
You see your Today’s view and your Notification Center tab. In Today’s view, scroll up to reveal the Do Not Disturb controls, and toggle the switch Do Not Disturb setting at the top of the screen. Turn the Do Not Disturb setting ON to stop notifications on your Macbook. Notice that the icon turns gray to indicate Do Not Disturb is ON.
Alternatively, Option-click the Notification Center icon to turn Do Not Disturb ON or OFF. The Notification Center icon turns light gray when Do No Disturb is on.
Step – 3 Toggle Do Not Disturb OFF
To turn on your notifications after your presentation, Option-click the Notification Center icon or open the Notification Center and toggle Do Not Disturb off.
These easy steps allow you to toggle your Do Not Disturb mode right on the main screen of your Macbook, using either Option-click on the Notification Center icon or the on-screen toggle.
More About Notification Center
Many Mac users do not know that Notification Center has widgets! And they are easy to get. Open the Today tab and click Edit at the bottom, select App Store, then buy, download, and install widgets from the store. The parcel delivery tracking widget is particularly useful as an on-screen notification for both work and home.
RELATED: Ten MacBook Tips Every Mac User Should Know
Set Do Not Disturb Preferences
Since we are on the subject of notifications, if you scroll down to the bottom of the Notification Center, and tap on the Settings icon (looks like a gear) on the right. Pressing the Settings icon allows you to customize your notifications.

Click on the Notifications icon to quickly access the system preference settings associated with notifications.
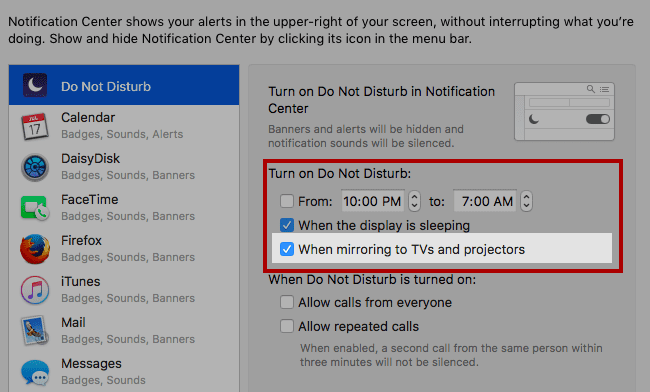
Here you set up your Do Not Disturb (DND) choices for your Macbook. You choose to set up the time during which you want the DND enabled on your MacBook. You also set up preferences to enable DND only when your MacBook is connected to an external monitor or via mirroring to Apple TV.
Notification Center for Individual App Notifications
Finally, the notification center also allows you to set up the notification styles for each app. Click on the app on the left-hand side of the window and choose your style, banners or alerts.
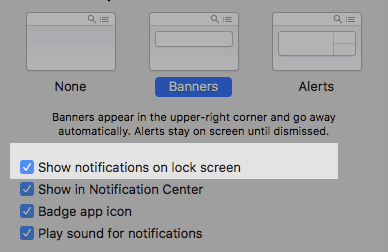
In this window, you also set on or off any notification messages appearing on your lock screen. This checkbox is handy. Particularly for the times when you are not in front of your MacBook, and you want your notifications to be private.
Wrap-Up
We are fortunate that our Macs offer such simple ways to turn on and off notifications. For times when you want to single-task with deep, innovative, and focused thinking, turning off notifications is a must. Even though we can choose to ignore on-screen notifications, their very appearance often leads to thoughts going off track and mind wandering. That of course, leads to making mistakes.
And for the times when we are presenting in front of a group, notifications most definitely disrupt everyone’s attention from the presentation to whatever’s popped up on screen. And that’s just any notification–not even an embarrassing one! So it’s critical to silence our on-screen notifications for these moments. And it’s easy. So what’ stopping us? Nothing!