Sometimes our MacBooks, MacBook Pros, or Macs don’t recognize our external drives or external thumb drives. This situation often occurs after you initially eject the external drive and unplug it from your computer.
When you try to plug in the drive again, your Mac no longer sees it. It won’t mount at all and acts as if it’s utterly invisible to macOS.
In many cases, the only way to solve this problem is to completely remove the external drives and then restart your MacBook or Mac several times until the drives finally show up again.
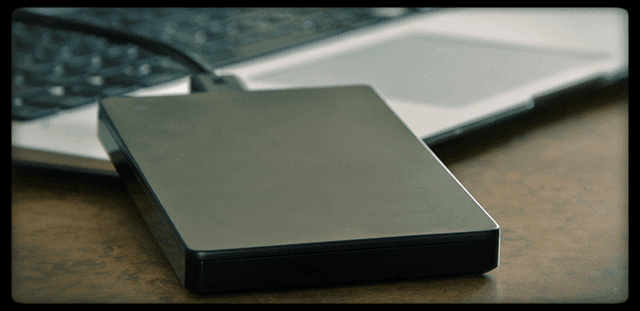
There are several reasons why your Mac won’t recognize a drive. If you have a disk already mounted and your system goes to sleep, it also powers down ports, including USB ports. When you wake your Mac up, for whatever reason, your external drive does not wake up.
Contents
- 1 Quick Tips
- 2 The Potential Causes
- 3 Power Problems
- 4 Rejecting the Ejecting
- 5 A Tight Fit is a Good Fit
- 6 Check Your Settings
- 7 Reset NVRAM
- 8 Run Disk Utility
- 9 Check Disk Format
- 10 Look at Your System Information
- 11 Terminal to the Rescue!
- 12 Does Your MacBook Shut Down When You Plug In Your External Hard Drive?
- 13 Inspect with Console
- 14 External Drives Very Slow after macOS Mojave Update
- 15 Let’s Have a Third-Party
- 16 Wrap Up
- 17 Reader tips
Quick Tips 
Follow these quick tips and get your Mac to recognize and mount your external drives
- If using a hub, try plugging into the Mac directly
- Check your USB connections for a snug fit or frayed cables, missing pins
- Connect the USB device to its own power source, if possible
- Update Finder Preferences to show external drives
- Perform an SMC & NVRAM reset
- Run Disk Utility to Mount, Verify, or Repair Drives
- Use Terminal Commands diskutil list, diskutil info disk, & diskutil eject disk
- Diagnose errors with Console
Related Articles
- BackUp iPhone to an External Drive with iTunes
- Download Photos from iCloud to USB Drive
- Encrypt BackUps for iPhones and iDevices
The Potential Causes
Connections Rule!
It’s easy to plug things in at random times, and usually, our Macs and MacBooks get it right and recognize everything. That’s why most USB devices are called plug-and-play. But this doesn’t always hold true. So it’s better to follow the recommended path to connect your external device(s) to your Mac.
The best (or least problematic) method for connecting external drives
- Turn ON your Mac or MacBook
- Plug in the USB cable into the Mac and to the device
- Do not use a hub–plug your drive directly into your Mac’s port
- THEN Turn ON the external drive when the USB cable is connected
Using a hub? Think again
A lot of readers discovered that their older model hubs no longer worked in macOS. So check if the hub is the problem by plugging directly into the Mac.
If the drive is now recognized, the problem is likely the hub. Replacing it (if necessary) usually fixes the problem. Just make sure you purchase a hub that is compatible with the latest macOS and is self-powered (i.e. has a charger.)
Try a Super Slow Jam
Strange but true, some users found that their thumb drives work when they plug it in exceptionally slowly.
When they try and plug in the USB flash drive normally, their PC’s don’t recognize the disks.
But if they gently slide them into the port in slo-mo, their drives are recognized! Go figure.
The same trick works for all types of computers, Windows or Macs, Desktops or Laptops!
Power Problems
This error frequently occurs when the hard disk is not receiving enough power from the port. If you instead plug the drive directly into a power source (if a power supply is available for your drive,) the external drive usually mounts on its own now that it has sufficient and steady power.
If your drive doesn’t allow for an external power source, try connecting the drive to another USB port. Or plug it into a self-powered USB hub.
Often, our MacBooks don’t put out enough power across the built-in USB hubs and so adding a self-powered hub sometimes solves the problem straight away. 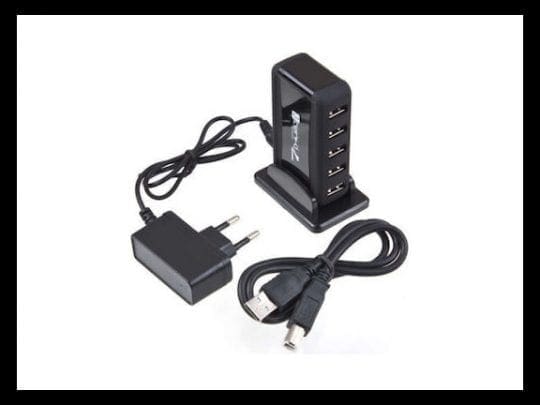
If your MacBook is not mounting an external hard drive or flash drive, try plugging in the power cable to the MacBook and reconnecting the drive. This tip often does the trick!
Rejecting the Ejecting
Another common reason is when you remove the drive without first ejecting. Instead of just pulling out drive connections, always perform a safe remove when ejecting external devices.
Options include right clicking on the icon of your external drive and selecting “Eject device.”
Or just drag the drive icon to the Trash, changing it to an Eject symbol.
The rule of thumb for external drives is always to shut down, eject, or otherwise disable before unplugging.
This process means that the software “turns” it off before the hardware.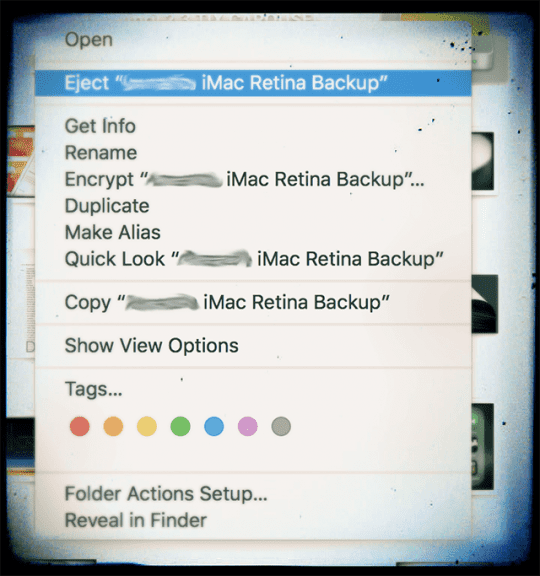
A Tight Fit is a Good Fit
Another reason for your Mac not recognizing external drives is a dirty or loose connection between your cable, USB-C multi-adapter, Thunderbolt 3, or other connecting ports.
So check your cable, your dongle (if used), any additional adapters, and the ports on both computer and drive to ensure that they are clear, clean, snug and fit tightly to each other.
Check that the cable connecting to the ports is indeed connected. Loose connections often lead to external drives not being recognized. Or even if they are recognized, they randomly disconnect without warning or prompting. A similar issue is frayed or worn cables, so make sure that your cable is in good condition.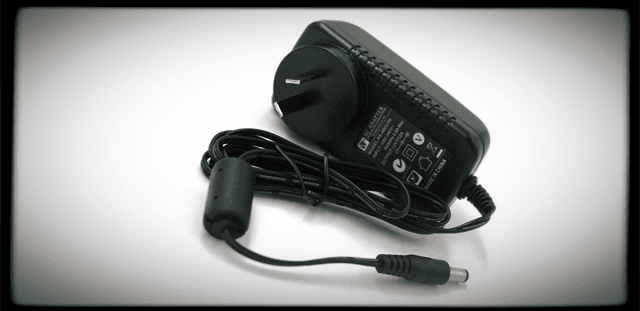
If you use a hub for your connections, if possible try to connect your external drives directly into your Mac–no intermediary.
Check Your Settings
Sometimes it’s the simple things that trip us up. So before performing any complex troubleshooting, let’s look at some settings.
Go to Finder > Preferences.
Under both the General and the Sidebar tabs, see the section “Show these items on the desktop: (or sidebar:)”
Now verify that External Disks and Hard Drives have a checkmark in the box. If not, click it to enable your external drive icons to show on your desktop.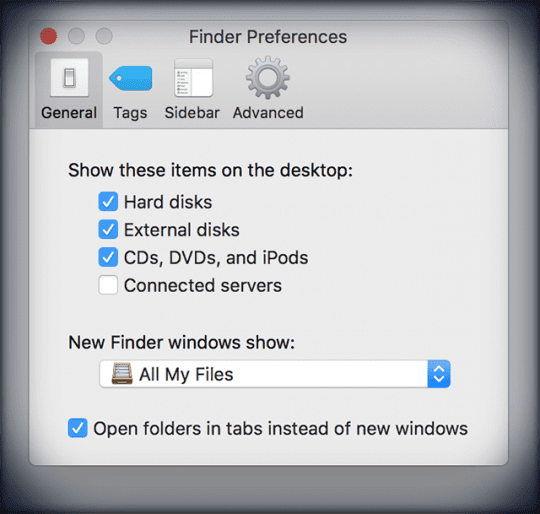
External hard drive won’t mount in macOS High Sierra or above?
When you are in Disk Utility, look in the upper-left corner and find the View option. Click on View, and you should get an option to Show All Devices.
Reset NVRAM
How to reset NVRAM
Shut down or restart your Mac, turn it on and immediately hold down these four keys together: Option, Command, P, and R. Keep pressing these keys for a minimum of 20 seconds. It might look like your Mac restarts.
And if your Mac plays a startup chime when you turn it on, release the keys after hearing a second startup sound.
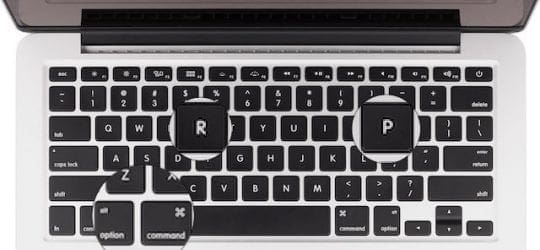
Also, you might reset the System Management Controller (SMC.) See these steps under the section “Does Your MacBook Shut Down When You Plug In Your External Hard Drive?”
Run Disk Utility
Open Disk Utility and see if your external drive appears here. Find Disk Utility in Applications > Utilities > Disk Utility. If your drive shows up but is not mounted, select the mount option which should mount that disk.
To verify, click on the Apple logo in your screen’s top left corner and select About This Mac. Select the Storage tab and see if you drive appears here.
If not, return to Disk Utility and select your external drive from the left sidebar.
Now choose First Aid or verify (repair) disk. This process should find and correct any minor errors with your drive.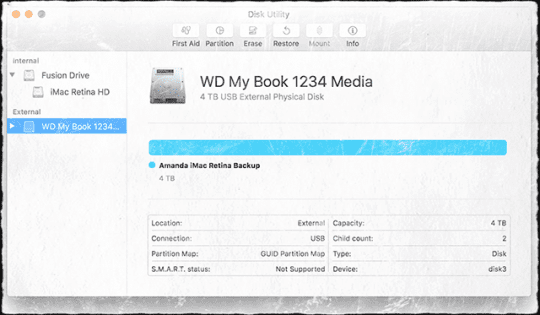
Check Disk Format
If you can see your drive in Disk Utility but were not able to mount and use it, you might have a disk format problem.
Look and see if your external drive is listed as NTFS format, if so you want to reformat the drive using the erase function in Disk Utility and format it as exFAT, FAT, or Mac OS Extended.
Look at Your System Information
Let’s go to System Information and see all the USB devices connected to your Mac. Navigate to the Apple in the upper menu > About this Mac > Storage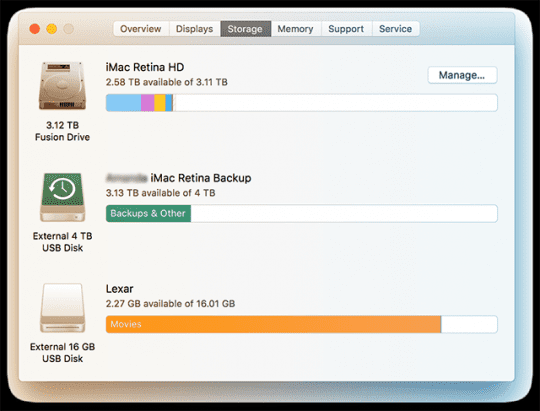
For more details, go to the Apple Menu> About this Mac > and select System Report below the information about your Mac and its OS.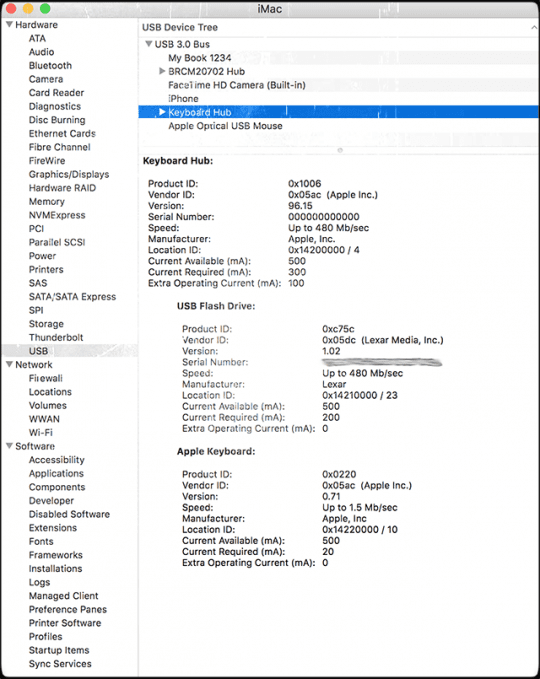
Terminal to the Rescue!
If System Information recognizes your USB external drives, but they continue not to show up, try disconnecting them and then remount the drives via Terminal.
- Find Terminal in Applications > Utilities > Terminal.
- Once open, type in the command diskutil list
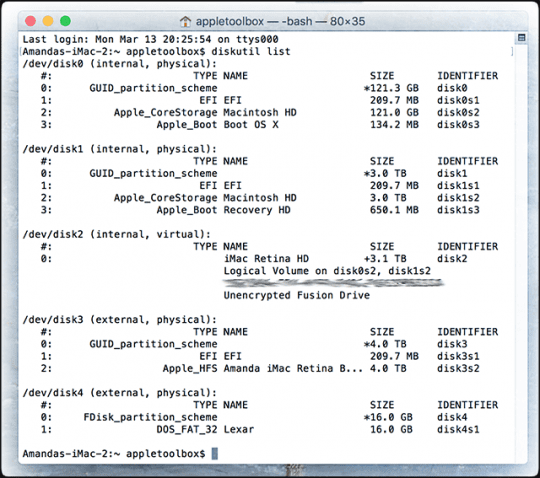
The diskutil list command displays basic information about all available volumes and drives attached. So it’s a good command to use when checking if drives are really connecting to your computer.
Once you type in the command, you see a list of all your disks.
Look for the section labeled /dev/disk_ (external, physical). 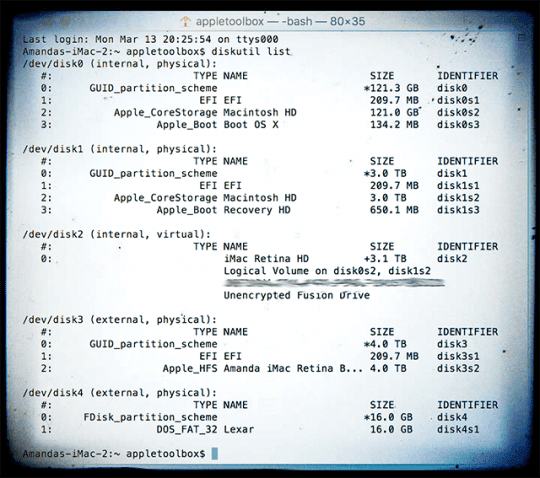
The disk_ part is the physical disk identifier, and the underscore is whatever number or digit is assigned to this drive–make a note of that whole line including the numbers or digits following the word disk.
For partitioned drives, an “s” follows the disk identifier. The number following the letter “s” represents the partition number.
So, if a disk has two or more partitions, the total disk identifier looks something like this:
- disk3s1
- disk3s2
- disk3s3
Now, put in another command into Terminal diskutil info disk_. Make sure to add the number or digit assigned to this drive at the end, in place of the underscore.
For example, my external thumb drive is listed as /dev/disk4 (external, physical) so I type in the command diskutil info disk4. This command opens up detailed information about the drive, including its manufacturer name, the size, if it’s removable and further facts.
Once you establish that the drive is known by your system, use Terminal to eject that disk thru command diskutil eject disk _.
Remember to use the disk identifier number that associated with your drive in place of the underscore. Once you execute that command, type in diskutil list again to see if your disk is now gone from that list.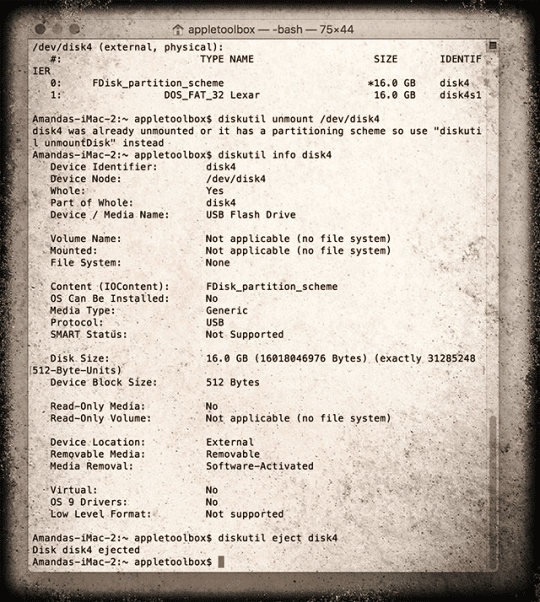
Once the drive is gone, physically remove it from your computer and then reinsert it — hopefully, your drive mounts and works as usual.
Terminal commands not working or seeing “operation not permitted” in macOS Mojave and above? 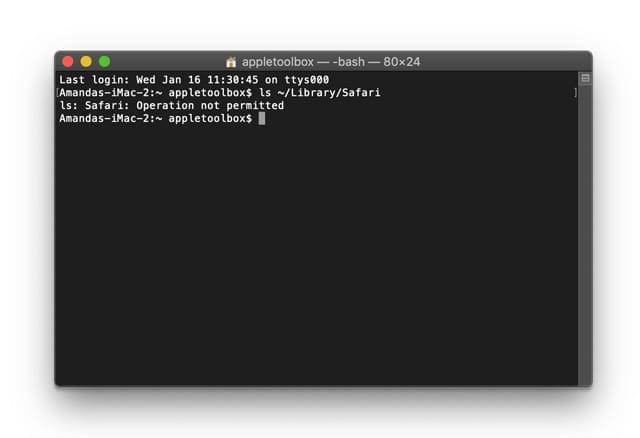
If your Mac is not allowing you to enter and execute Terminal commands, you need to grant the Terminal app full disk access.
Please see this article for details on how to grant the Terminal app access to your full disk.
Does Your MacBook Shut Down When You Plug In Your External Hard Drive?
This happens when your hard drive draws too much power or an ‘incorrect’ amount of power from the USB. Your Mac’s SMC shutdowns the computer to protect itself.
If this happens frequently, connect the drive to its own power source if possible, so it’s not siphoning power from the USB port.
If that’s not feasible (like thumb drives), try a different USB port or if applicable, a different USB cable. Also, reset your Mac’s SMC.
Resetting SMC
If the battery is nonremovable
- Shut down and unplug the power adapter
- Press Shift-Control-Option on the left side of the keyboard AND press the power button at the same time. Hold these keys and the power button for 10 seconds
- If you have a MacBook Pro with Touch ID, the Touch ID button is also the power button
- Release all keys and reconnect your Mac to the power adapter (plug it into an outlet)
- Press the power button again to turn on your Mac
If the battery is removable
- Shut down your Mac and disconnect the power adapter
- Remove the battery
- Press and hold the power button for 5 seconds
- Return the battery and reconnect your Mac to the power adapter (plug it into an outlet)
- Push the power button to turn on your Mac
Inspect with Console
For most of us, Apple’s Console app is a confusing list of logging messages and errors that make sense to an everyday user. But in times of trouble, Console is really quite useful, especially when you can’t figure out what the heck is going on!
In a nutshell, Console displays log information that helps you or a service provider troubleshoot problems on your Mac. Console won’t fix the problem, but it does provide information to diagnose the problem.
It’s never been easy to work with Console, but the good news is that starting with macOS Sierra, Apple retooled Console to make it a bit more user-friendly or at least DYI technician friendly.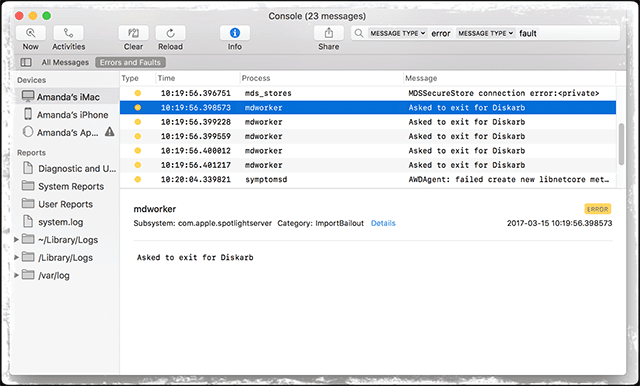
So, let’s use Console to check that your USB port is detecting your devices. Find Console in Applications > Utilities > Console.
The console utility lets you know if your external USB devices are detected and if there are any errors. Before you attach your USB drive, open Console and select the Error and Faults Tab, now plug in the drive and look to see if it detects your device or if there’s an error.
If Console shows that nothing happened and no errors pop up, then your problem is not the USB device.
External Drives Very Slow after macOS Mojave Update
Many readers have recently reported that they are experiencing slow down issues with their external drives after updating to macOS Mojave.
If you are experiencing issues with your external drives after updating to macOS Mojave, your best bet is to reset the SMC and then try connecting to the external drive.
Reset SMC on MacBook
- To do the SMC reset, start with Shutting down the Mac.
- Press Shift-Control-Option on the left side of the keyboard, then press the power button at the same time.
- Hold these keys and the power button for 10 seconds.
- After the 10 seconds, release all keys. Then press the power button to turn the Mac on.
Resetting SMC on Mac Mini
- If you are using a Mac Mini, simply shut down the Mac.
- After your Mac shuts down, unplug the power cord.
- Wait 15 seconds then plug the power cord back in.
- Wait another 5 seconds, then press the power button again to turn on your Mac.
Now, try to connect the external drive and see if it is more responsive with your macOS Mojave based Mac.
Let’s Have a Third-Party
A lot of Mac users and lovers recommend using the third-party app Kext Utility to solve their problems recognizing external drives. Readers who could not mount their USB 3.0 and 2.0 FAT and FAT 32 External Drives on their Macs ran the program Kext Utility and after rebooting these USB drives worked!
Kext Utility runs on Mac OS X 10.5 or later. For macOS users, make sure you run the latest version.
Wrap Up
Sadly, Macs not recognizing external drives is nothing new. It’s a perpetual problem, especially after updating your Mac’s operating system to the latest macOS or OS X. But the good news is that quite a few solutions are available to fix this temporary issue (hopefully, it’s just that!)
Reader tips
- If you use a hub for multiple external drives, try removing your hub or switching to a different (and newer model) hub. For me, when I used my hub, my drives didn’t show up or work. But when I plugged the disks directly into the iMac via USB, everything worked fine! No matter what I did, the hub would not work. So I purchased and installed a new multi-port hub (self-powered) and everything is working again. As an FYI, this happened after updating to macOS Mojave and even Apple Support could NOT identify the problem or explain why the hub that worked with High Sierra stopped working after the update to Mojave
- I need to update my external disk’s driver. So you might want to contact the external drive’s manufacturer support department and see if there is an update for that drive and for the macOS or Mac OS X version you use
- Go to System Preferences> Spotlight and deselect everything that shows up in that list. After you untick all the boxes, plug in your external HDs. Once your external drive(s) is recognized, go back to System Preferences > Spotlight and set it back to the default spotlight search preferences by ticking all the boxes
- Solved the problem by going to Preferences within Disk Utility and checking “Automatically Open Read-Only Images.” It turns out my USB thumb drive was read-only because it’s natively formatted as NTFS. That particular preference was off and prevented the drive from even showing up. Just do a quick reformat (if nothing is on the drive or nothing important), and all is well
- If you changed your Mac’s system icons as Trav did, the solution is relatively simple and involves changing icons back to normal
