How to change, increase or lower the LCD screen density on the LG G3. Screen density or as it is called else DPI, is a measure unit which shows how many dots can be placed in a line within the span of 1 inch, hence the name dots per inch. Modern smartphones which have high-resolution displays have a higher screen density than other devices.
The LG G3 has a stock DPI of 640. It is a lot higher than every other Android device. This is expected because it has a QHD display with resolution of 144 x 2560. In comparison, the Samsung Galaxy S5 with a Full HD screen has a DPI of 480.
Also Read: Remove Carrier Logo on LG G3 Boot & Shutdown Animation
The higher the screen density is, the smaller icons and everything displayed on the screen will be. This is a negative thing about smartphones with high-resolution displays. The resolution and screen density is higher while the screen size stays the same. This means everything will be smaller and you have to move your phone closer to your face.
This is a bad thing because you can damage your eyes but moving the phone closer to you. That’s why it is a good idea to change the DPI of your LG G3. If you want to make every element of the screen bigger, you need to lower the density.
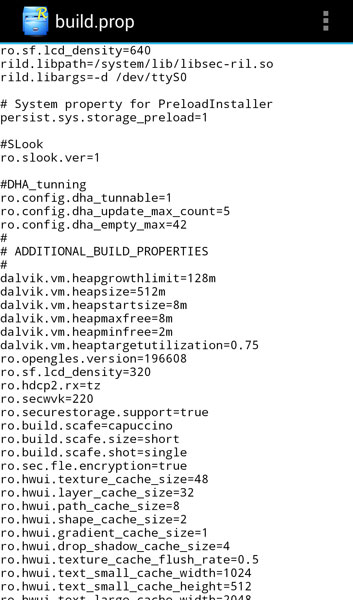
To do so on your LG G3, you need root access and a special file manager like Root Explorer. Open your file manager and go to Root directory > System and find a file called build.prop. Open it using text editor. Scroll down and find the following line:
ro.sf.lcd_density=640
Also Read: How To Fix Keyboard Lag On LG G3
Change the value to whatever you want. Save the file and reboot your phone. If you want to revert, download the original build.prop file and replace it with the one which has .bak extension. This file will be automatically created when you edit build.prop file.
