The latest generation of iPhone is coming soon to an Apple Store near you. And yes, I really want it. I mean yes, I NEED it. So what to do with that soon to be OLD iPhone? You could sell it, or better yet, you could repurpose it and turn your iPhone into iPod Touch for the whole family to use!
Can you guess what the difference is between an iPhone and an iPod Touch? It’s just one thing and one thing only…the cellular network!
An iPhone can make phone calls, connect to data, and send text messages (SMS) all over a cellular network…everything else the iPod Touch has!
Contents
- 1 Here’s how to turn your old iPhone into a shiny (or maybe not so) New-To-You iPod Touch
- 2 iPhone into iPod Touch Step 1: Insert a different SIM Card
- 3 iPhone into iPod Touch Step 2: Insert SIM card into old iPhone
- 4 iPhone into iPod Touch Step 3: Turn ON WiFi and Turn OFF Cellular
- 5 Need to Set Up iPhone as iPod Without SIM Card?
- 6 Want To Turn iPhone into iPod for Child?
Related Articles
- Prepare for Buying or Selling a Used iPhone
- 7 Sustainability Tips for Apple Fans
- Your iPhone’s Final Destination, a 29-Armed Robot?
- How to Set-Up a Used iPhone, iPod, or iPad
Here’s how to turn your old iPhone into a shiny (or maybe not so) New-To-You iPod Touch
It’s not rocket science, but there are a few small steps we need to take before we can use our old iPhone without a mobile plan. Fortunately, it isn’t nearly as painful as the asking price for that really shiny new iPhone we really want (I mean, NEED.)
Basic Requirements
- Be sure that your new iPhone is up and running, that you have a backup in at least two locations (cloud and local) and that you are harmoniously enjoying your new iPhone before you take any of the actions below.
- Check out our article on backing up iPhones to make sure you have this one thoroughly wrapped up
- And note, if you are handing (or even selling) your old iPhone over to a friend, charity, or maybe even a family member, you should turn off iPhone activation lock and reset the device so that none of your private and personal information is unintentionally shared.
- This action ERASES all the data
- Before you erase your iPhone, turn off Find My iPhone and sign out of iCloud. If you don’t, your device might remain in Activation Lock
- On your iPhone, go to Settings > General > Reset. Then tap Erase All Content and Settings
Turning off iPhone Activation Lock & Reset and Erase All Data
In iOS 10.3 or later:
- Tap Settings > Apple ID Profile > iCloud
- Scroll down and tap Sign Out
- Enter your Apple ID password, and tap Turn Off
- Go back to Settings
- Tap General > Reset > Erase All Content and Settings
In iOS 10.2 or earlier:
- Tap Settings > iCloud
- Scroll down and tap Sign Out, then tap Sign Out again
- Tap Delete from My iPhone and enter your password
- Go back to Settings
- Tap General > Reset > Erase All Content and Settings
So let’s get to it!
iPhone into iPod Touch Step 1: Insert a different SIM Card
Any card from any previously activated iPhone will do—it does not need to be active.
Some of our readers suggest that it’s better to use a SIM card from the same wireless carrier as was used when the iPhone was active.
If your iPhone is still locked to a carrier, it’s often just easier to use a SIM from the same network. We haven’t noticed a difference (mainly because we unlock our iPhones), but it’s good to know just in case you run into problems (if so, try a SIM from the same carrier.)
If you don’t have a SIM card lying around, ask family/friends, or you can find them on eBay (what don’t they have on eBay?)
And don’t worry, just because you are adding in a SIM card doesn’t mean you are adding a mobile service plan.
So no monthly service charge, thank you.

SIM card trays are located either on the side of the iPhone opposite the volume control (for generations 4-current) or the top of the iPhone (for models original-3G.)
To pop open the tray, insert a paperclip or a SIM-eject tool into the hole beside the tray.
Can I Just Not Use a SIM Card?
Yes, you can just remove the SIM card from the iPhone.
But a pretty annoying pop-up message appears all the time.
So for that reason, we think it’s best to have a deactivated SIM card installed on the iPhone you want to turn into an iPod Touch.
iPhone into iPod Touch Step 2: Insert SIM card into old iPhone
- Connect old iPhone to your computer
- Launch iTunes
- iTunes now sees your old iPhone as a new device. It’ll start the setup process, and ask for your Apple ID and password to connect to your iCloud, iTunes, and other Apple services
- If the passcode lock screen or the Home screen appears, the device hasn’t been erased–perform those steps again by going to Settings > General > Reset > Erase All Content and Settings
- If you’re asked for your Apple ID & password (or a previous owner’s Apple ID and password), the device is still linked to that account.
- If it’s another person’s Apple ID, ask them to remove the device from their account by signing in to iCloud
- Choose your options, wait for it to update, and it’s ready!
Don’t Want To Use a SIM Card?
You can use your old iPhone without a SIM card but be warned that an annoying pop-up message will surface each time you boot up, reminding you that “! No SIM Card Installed.”
If you choose this option, you won’t be able to restore the iPhone should you ever need to. The choice is yours; my suggestion is to opt for the SIM card. 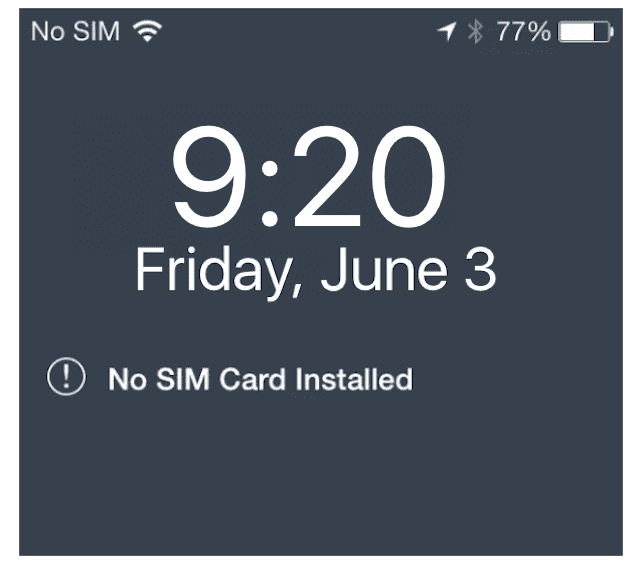
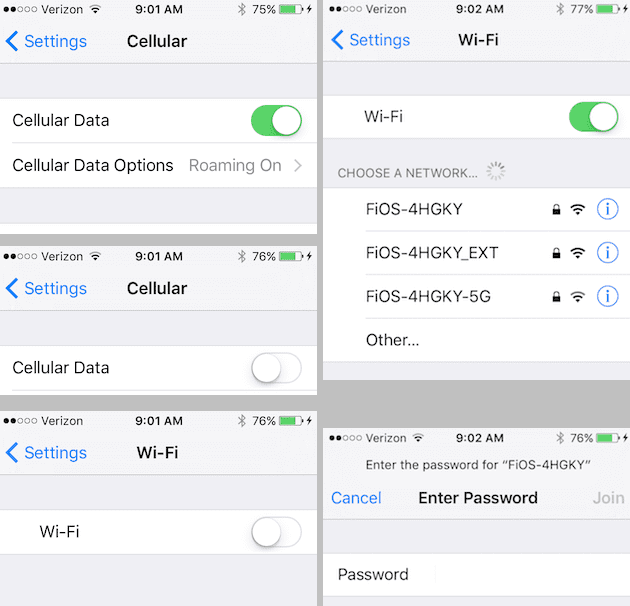
iPhone into iPod Touch Step 3: Turn ON WiFi and Turn OFF Cellular
You don’t have or want a monthly plan, so best to turn this option OFF so the device isn’t searching for a signal and you save a little battery life.
- Open Setting > Cellular
- Toggle Cellular to the OFF position (should turn gray)
- Go to Settings > WiFi
- Toggle WiFi to the ON position (should turn green)
- Select your WiFi network and enter the password if not done previously
And you’re at the finish line!
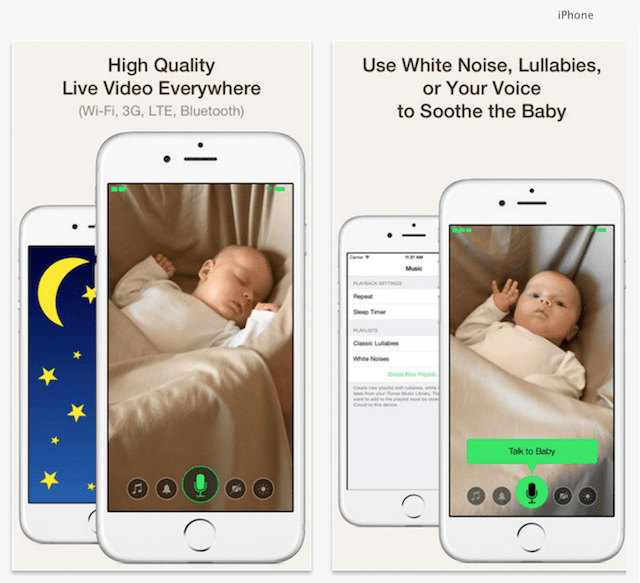
There are lots of fun ways to reuse your iPhone as an iPod Touch—use it as a music player, alarm clock, and even as a baby or health monitor.
It’s really just an iPhone that doesn’t actually make any calls (and sometimes that is an excellent thing indeed). Keep it for yourself or give it to friends, family, or even to charities.
Remember, if you are gifting your old iPhone to someone else, turn Find My iPhone OFF and Erase All Content and Settings so that you don’t unintentionally share any of your private and personal information.
Need to Set Up iPhone as iPod Without SIM Card?
If your iPhone is not locked to a carrier, it’s fairly easy to transition your iPhone to an iPod Touch.
So before anything, make sure your iPhone is unlocked.
Once unlocked, follow these quick steps to use your old iPhone as an iPod Touch!
No SIM, No Problem for Unlocked iPhones
- Update iTunes to the latest version and open it
- Connect your OLD iPhone to your computer
- If you see the prompt “There is no SIM card installed in the iPhone you are attempting to activate,” that phone is still locked to a carrier
- Either unlock it or borrow a SIM card from someone who uses that same carrier
- You only need to use that borrowed SIM for activation
- If no prompt about the SIM, your iPhone is unlocked! Just follow the on-screen directions to activate your iPhone
- Once activated, connect your iPhone to a WiFi network and use it as an iPod Touch
Want To Turn iPhone into iPod for Child?
If your planning on giving your old phone to your child or another’s child, there are a few more things to set-up.
First, set-up some restrictions so your kids, especially the youngest ones, aren’t able to access everything and anything!
Learn how to place restrictions by following the steps in our article on setting up kids mode. This isn’t just for kids; I use it for my elderly grandma too!
Next, set-up and Apple ID for your child
Setting up an Apple ID is a critical step because it allows us, as parents or guardians, to perform that crucial process of backing up automatically via iCloud using that free 5GB iCloud account!
At this time, you might also want to create an iCloud email address for your child—it’s useful to use for apps like FaceTime, iMessage, and similar apps.
Once the child’s iCloud account is set-up, go to Settings > Apple ID Profile > iCloud and turn on Backup and Find My iPhone.
Turn on any other iCloud settings you feel are appropriate like Photos, Game Center, and so forth.
Now, turn on both FaceTime and Messages by going to Settings > FaceTime (and then Messages.)
You need to use your child’s Apple ID for both of these to work—this is where that iCloud email address comes in handy. To learn how-to setup FaceTime, check out this article.
Add Some Contacts
Next, add some family and emergency contacts into the Contacts app. Open Contacts and add in your name, relationship, phone, and email.
And then add in a few other folks for good measure, like grandparents, other family members, and neighbors (ask first.) Make sure to add in a few contacts just in case an emergency happens. 
Finally, set up Family Sharing and decide if you want your little one to have access to make purchases on the iTunes and App Stores. Check out Roland’s article on how to get started with Family Sharing.