The iPhone has without a doubt changed mobile photography forever. Since the iPhone was released in 2007, Apple hasn’t been shy about sharing the fact that more photos are taken on the iPhone than any other camera in the world. With the massive amount of iPhones in the wild, this isn’t all that surprising.
It’s also unsurprising that the cameras Apple stuffed inside the iPhone 6s and 6s Plus, and now the iPhone SE, are the best the company has ever released. However, there are still a number of iPhone users who still don’t get great results when using their iPhone camera.
The old photographer’s adage, “the best camera is the one you have with you”, is absolutely true but it’s certainly preferable get the most out of that camera. Here are a few tips to help you get the most out of your iPhone camera.
Contents
Focus & Exposure
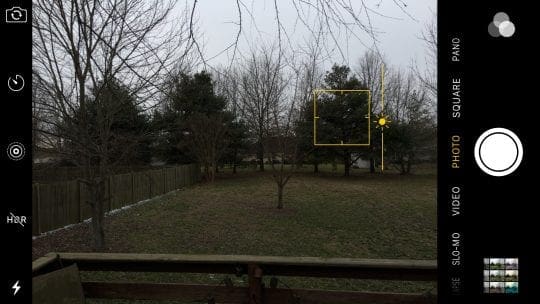
There are no two things more important to shooting photos than focus and exposure. By itself, the iPhone camera does a good job of automatically setting focus and exposure, however, there are some things you can do to get a more creative look. Sometimes, the camera will set focus and exposure on something other than what you want. If you simply tap on the subject of your photo, the camera will automatically adjust both focus and exposure to optimize both for the subject you want to zero in on.
You also have the option to get more creative if you wish. To manually adjust the exposure, you can drag up and down on the sun icon located on the right of the yellow focus box, which appears after to tap on the subject in your photo. You can also lock both focus and exposure by holding down on the subject. After holding down for a few seconds, the focus box will remain on the screen and you will see “AE/AF Lock” pop up towards the top of the display. This features is great because it allows you to recompose your shot without the camera automatically readjusting. Also, you are still able to manually readjust the exposure after it’s locked using the same method described above.
Use Volume Buttons to Take Pictures
It is disheartening than taking a photo you thought was perfect only to discover later the shot went out of focus when you tapped your thumb on the screen to take the picture resulting in a blurry photo. On the iPhone, even a slight movement can ruin a shot, especially when you’re shooting in low light.
A better method of shooting photos is to use either one of the volume buttons on the iPhone. Both buttons function like a shutter button on a traditional camera and will help stability while taking photos.
An even better way is to use the volume buttons on a pair of iPhone compatible headphones to snap photos. This almost eliminates your chances of throwing a shot out of focus.
HDR (High Dynamic Range)
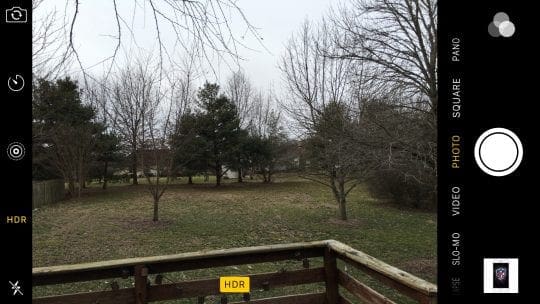
You’ve probably noticed the yellow letters “HDR” pop onto your iPhone’s screen before while you were shooting photos and wondered what it’s for. HDR stands for high dynamic range and when it’s on, the camera will take multiple photos at different exposures and combine them to deliver a single photo with better color reproduction and more details in both the background and foreground. HDR is primarily used when the background of a photo is either much lighter or darker than the foreground. HDR mode is set to automatic by default, but turning it on manually is another way to experiment with more creative shots.
Avoid Using Flash
Apple regularly boasts the LED camera flash included on its iPhone cameras as the best in any smartphone. While that may be true it’s still best to avoid using it if you can. The flash is nice to have when a photo would otherwise be worthless, but using more natural light creates a much more pleasing image. Normally, using the camera flash will cause your subject to appear overexposed and washed out.
However, there are times where using the flash is beneficial. One of the few times is when you are shooting a photo of someone outside with the sun behind them. In this scenario using both HDR mode and flash is a good idea. The flash helps remove shadows from the subject rather than leaving them appearing as a silhouette.
Ultimately, photography is all about exploring personal creativity and capturing memories. On the iPhone, there are few things more important to users than the camera, and hopefully these tips help you enjoy using your iPhone camera and get better results.
Another major part of photography on the iPhone is being able to share your photos. For help with that check out our article covering how to share photos and videos via iCloud.