When Safari works well, it’s really an excellent browser, given all the integration features between macOS, OS X, and iOS. But when it doesn’t work it’s often a real pain to figure out and fix.
Safari on macOS Mojave-Sierra and OS X El Capitan come with some pretty interesting features. Much like Chrome, now you pin tabs in Safari. You now also send YouTube videos to your TV via airplay without sharing the whole page. And Safari also lets mute tabs now.
With all these new and fantastic features, it’s really disheartening when users are not able to use them! We like Safari new features and want to make sure that you can use them as well.
Contents
- 1 Quick Tips
- 2 Safari Problems Diagnosis
- 3 FIRST and FOREMOST BACKUP
- 4 Safari Slow after macOS Mojave Upgrade?
- 5 Troubleshooting Safari: Step 1 Restart & Disable Extensions
- 6 Step 2 Check User Files
- 7 Step 3 Check for Adobe Flash & Delete Safari’s Cache
- 8 Step 4 Remove Corrupt Files
- 9 Safari Problems – 5 General Tips
- 10 Safari Not Working After iTunes Update? Seeing Error Message that Safari Won’t Load Because of a Problem?
- 11 macOS is Optimized for 64-Bit Processes
- 12 Reader Tips
Quick Tips 
- Quit and relaunch Safari
- Remove all website cookies
- If using ad blocking extensions, disable or remove them, close Safari (restart your Mac if necessary) and try Safari again
- Disable all Safari extensions and test
- Look at your DNS Settings
- Try using Google DNS or another third-party DNS
- Use Terminal and flush Safari’s DNS
- Delete or isolate Safari’s Cache (com.apple.Safari) from your user library
- Remove or isolate Safari’s plist (com.apple.Safari.plist) from your user library
Related Posts
- Mail Not Working After macOS Mojave Upgrade? Fix it today
- App Store Not Working After macOS Mojave Update, How To Fix
- Handoff from macOS Mojave to iOS 12.1
- macOS Sierra Safari Problems
- On MacBook Safari Unresponsive
- Safari Slow on El Capitan
Safari Problems Diagnosis
Recently, AppleToolBox’s received numerous emails from our readers who upgraded their macOS and are now experiencing Safari related problems.
Safari Problems are unfortunately related to numerous issues and are not the easiest to spot and solve.
Consequently, this troubleshooting guide works through various aspects of your Mac system in an attempt to resolve common and not-so-common Safari issues. ![]()
General Requirements
- Please make sure that your machine is connected to the Internet, and the connection is working. You can try to send a test email or iMessage etc. to confirm this
- Please make sure to check that you are running macOS or OS X El Capitan, although the steps highlighted in this article should work for prior OS X versions as well
- A startup disk that’s extremely low on disk space (12GB or less) leads to slowdowns. Check that you don’t have this issue. If you do, you may need to find space by deleting bigger files and deleting download folders and other cache files
- Try disconnecting any new USB devices that you may have added to the machine after your last upgrade. Sometimes new USB based devices can cause issues on your Mac
Options provided in this article are ordered from the least invasive to most invasive approaches.
- The first section of the article focuses on Safari crashing and not being able to start when launched
- In the second section, we have tried to address some other Safari experience issues by providing you tips
- In the next section, we address some of Safari other issues
- And lastly, we provide you with an index of our articles on Safari problems over the years for macOS, OS X, and iOS
FIRST and FOREMOST BACKUP
It doesn’t matter how you do it, just make sure you back up your Mac before performing any troubleshooting.
Use Time Machine for ease within Apple’s recommended workflow. Or choose your backup method.
Whatever the method, perform a backup before you move to the next steps.
Safari Slow after macOS Mojave Upgrade?
Many users have noticed that Safari performance is terribly slow after upgrading to macOS Mojave. Apple had made multiple changes when it comes to Safari Extensions and Mojave.
This is one of the reasons why many users are experiencing sluggishness and other issues with their Safari.
Check the following tips to resolve any slow Safari Issues after updating to macOS Mojave
- Evaluate the Ad Blocking software that you are using, if any. This is particularly true if you are using a standalone program such as Adblock Plus
- Users have reported that Ublock Origin, which can be downloaded by Apple Store and applied as a Safari extension is a better performing blocker for Safari on macOS Mojave. Safari disables extensions that are not downloaded from the app store with the latest macOS Mojave update. We recommend trying Safari without any ad-blockers including Ublock and checking the performance.
- Try reducing the webkit standard display time and check if it helps. To do this, open terminal session and type in the following command. defaults write com.apple.Safari WebKitInitialTimedLayoutDelay 0.1
Troubleshooting Safari: Step 1 Restart & Disable Extensions
Restart Safari. Sometimes restarting the application resolves the issue and can improve application speed.
If Safari starts but is unresponsive, you will have to Force Quit it. 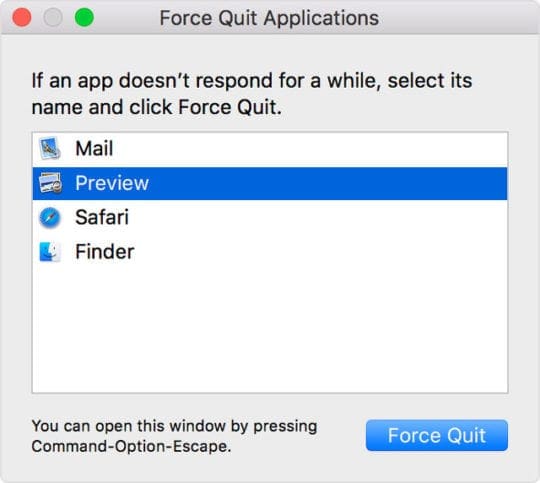
There are a few ways to Force quit applications on Mac
- You can force quit from the Apple Menu or press these three keys together: Option, Command, and Esc (Escape) and then choose Safari from the list (see example above but choose Safari instead of Preview)

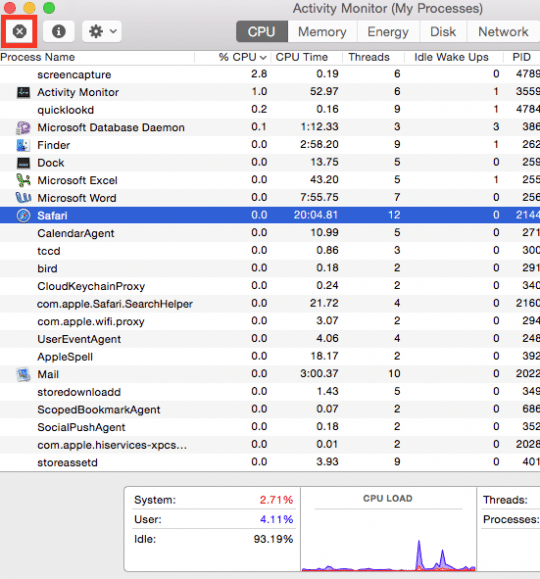
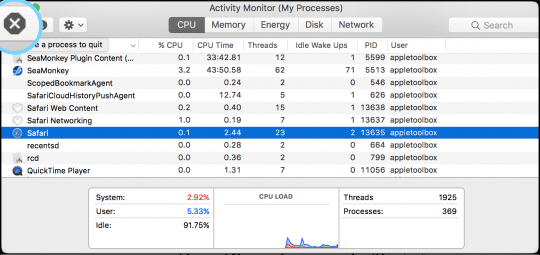
- One of the ways is via “Activity Monitor”
- Open Finder > Applications > Utilities > Activity Monitor
- Select Safari and use the “X” button
Next, Disable All Safari Extensions
- Go to Safari > Preferences > Extensions
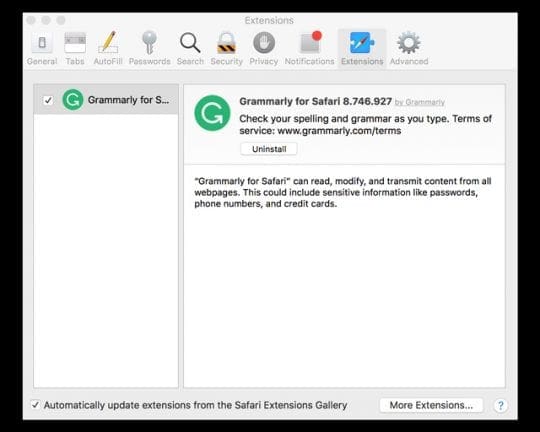
- Uncheck all boxes beside Enable Extension and test Safari again (may need to close and relaunch it)
If Safari Now Works
- Enable Extensions one by one and test after each one to determine the “bad” extension causing the problem
- Delete (uninstall) the problematic extension(s)
- To uninstall an extension, select it and click the “Uninstall” button
Step 2 Check User Files
If Restarting Safari did not solve your problem, the next step is to make sure that your user-specific resource files are in good shape. A corrupt user resource file can create Safari Problems.
To rule out the possibility of a corrupt resource file, create a new user on your Mac. You can delete it after the troubleshooting exercise.
To create a new user on your Mac
- Apple > System Preferences > Users and Groups and create a new user by following the prompt

- Once you have created a new user, shut down your Mac
- Start back again and log in using the new user credentials. Launch Safari
- If it starts/launches successfully, then you have an issue with your user resource files
- If it does not start, we have ruled out the possibility of a corrupt user resource file
For more information on corrupt user accounts and how to deal with them, see this article.
Step 3 Check for Adobe Flash & Delete Safari’s Cache
In this step, we attempt to delete all Cache files related to Safari. While at it, we will examine any browser extension files and remove them as well.
In prior OS X upgrades, we have noticed that browser extensions can become a major headache for safari. One plug-in or extension that does not behave well with the new OS X can bring down the entire web browser.
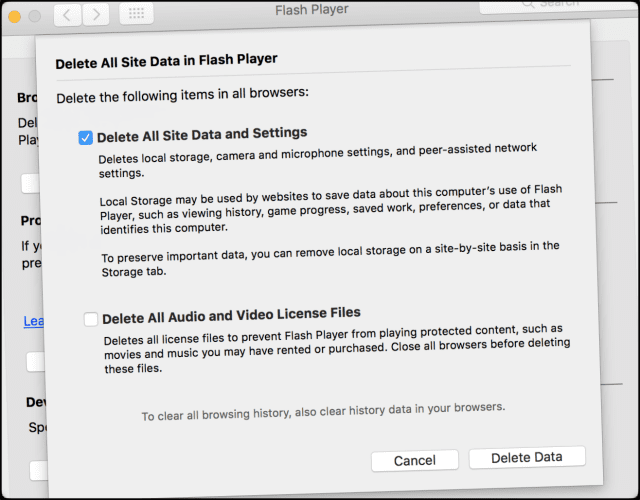
Before moving on, check if Adobe Flash Player is installed on your Mac
Go to System Preferences >Flash Player > Advanced > Delete All > Check the Box for Delete All Site Data and Settings and select Delete Data button at the bottom of the window.
Deleting Safari’s Cache
We give you two options for completing this step, using two different ways.
The first path described below is for users who can get Safari Launched, but then it crashes shortly. In the Second path, we will continue with ways to get it to launch successfully.
The second path is targeted at users who cannot even open their Safari browser to get to the settings.
Path 1: Preferences & Settings for Safari
- Open Safari. Click on Safari > Preferences > Advanced and enable the Develop menu.
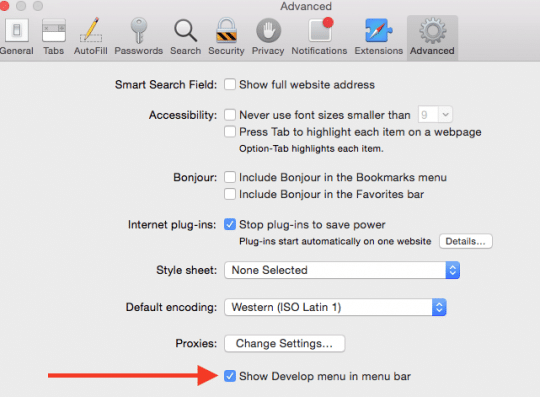
- Once you do this, you will see “Develop” as an option in the Safari menu
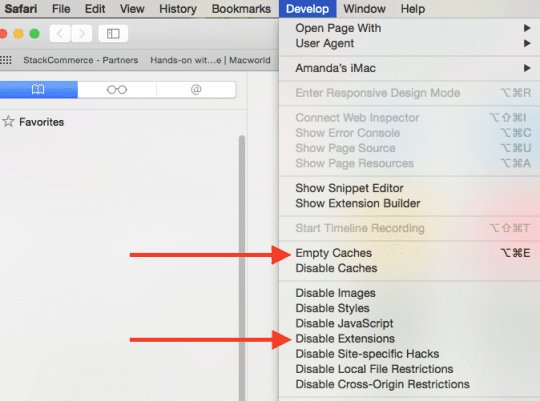
- Click on this menu path and Empty your cache as well as Disable your extensions. Also, delete all your history. Safari >History > Clear History
- Go to Safari Preferences > Extensions and make sure to turn all extensions off
- Open Safari > Preferences > Privacy > Remove All Website Data
- Open Safari >Preferences > Security and Deselect “Allow all other plug-ins”
- Make sure to turn off any ad-blocker programs such as Adblock plus that you might be using. If you are using other applications such as Avast or Norton, please uninstall the program
Another Option to Delete Safari’s Cache
- Close all windows and quit all applications
- Hold Option key down and select the Go menu in the Finder menu bar
- Select Library from the dropdown
- If you don’t see your User Library, see this article
- Locate the file Library > Caches > com.apple.Safari
- Right-click that file com.apple.Safari file and select Move To Trash or isolate this file on your Desktop instead
- Close windows and relaunch Safari
It is entirely possible that Safari doesn’t give you enough time to do any of the steps above and crashes before you can take care of the above.
If you are experiencing this symptom, proceed to Path 2. If your Safari is stable up to now, quit and restart to test the application.
Path 2: If your Safari app is not stable enough to do any of the tasks above, proceed as follows:
- Open your Finder App
- Click on Go > Go To Folder
- Type in “ Library/Safari/Extensions.” Drag the folder out to your desktop. If you don’t have any extensions installed, it will say file not found. Proceed to the next step

- Next, we will tackle the cache files
- Type in “ Library/Caches/com.apple.Safari”. In the folder locate the db file and drag it to trash
- Don’t worry about putting the file to trash, as the application will create a new set of cache files when it starts
Now that you have tackled the Extension files and the Cache files, go ahead and give it a try with Safari. If your extensions were the culprit, this should pretty much resolve your issues.
If it works, it means that one of your extensions/plugins is causing the issue.
The only way to find out the one is to enable one extension at a time till you find the culprit. It is painful, but we don’t know another way to tackle this issue.
Step 4 Remove Corrupt Files
We hope that you don’t have to read this step, but oh well, let’s try one more step before you have to read and analyze the diagnostic reports using the console application.
Our thinking around this step is that there is a chance that your preferences file for Safari is somehow corrupted. This step will remove the corrupt files. Please note that this is pretty safe and will not cause any problems on your Mac.
A corrupt preference file also can cause other Safari experience problems. The most common one is that it will not allow you to use the “Share” feature in Safari
- Open your Activity Monitor Utility by following Finder > Applications > Utilities > Activity Monitor
- Click on View > My Processes
- Sort the processes by Process name or you can also use the Search field to make sure that you do not have Safari Running
- If Safari is running as a process, please quit it by selecting it from the list and then clicking on “X” button inside the octagon
- Next, Select “cfprefsd” in the process list and click the quit process button “X” on the left top. OR you can also
- “killall cfprefsd” in Terminal which flushes all settings to plists and relaunches the cfprefsd agent. All apps trying to access cfprefs during this time are blocked.
- A new csfprefsd process will immediately launch, and it can happen so fast that you may not notice it.
- Open your Terminal Application and enter the following command to make your Library folder visible.
- chflags nohidden /Library/
- Use your Finder now to locate Library > Preferences and look for the preferences file for Safari
- The exact path for the plist file is /Library/Preferences/com.apple.Safari.plist
- Drag the file to your desktop. You lose your Safari Settings, but the system creates a new Preference file when Safari is started. Additionally, it’s best to rename the file and save it so that you can put it back once you are done with these steps. Just add a suffix like “.crpt” (corrupt) for now.
- Once you have removed the preferences file and make sure you kill the “csdprefsd” process
- Restart your machine and Launch Safari
- If Safari is working, move that .plist file to the Trash. When Safari’s not working, move that .plist back to the Preferences folder
If you still have problems with launching Safari or Safari crashing, please contact or set-up an appointment with an Apple Genius or Support.
We hope that you don’t have any hardware problems such as a failing boot drive. You can run the Apple Hardware Test, which is a special utility just to make sure that your hardware is not failing before you go to the Apple Support.
Safari Problems – 5 General Tips
In our experience, third party extensions and plugins are often responsible for sluggishness in your Safari experiences; here are a few general tips that you can check.

Remove AdWare
If you can get the Safari up and running, but experiencing general sluggishness, the chances are that the machine might be infected with some adware. You can use a free adware removal tool like www.Adwaremedic.com/index.php.
Install the tool, open and run it by clicking “Scan for Adware” button to remove any adware. Once done, quit the app and try running Safari again.
Speaking of free Apps, another good app to explore and evaluate is “MacClean.” You can use the app to enable, stop or remove Safari plugins very easily. It also helps you clean up junk files as well.
Update DNS Settings
Sometimes, the problem might reside in your DNS settings.
Verify or Update Your Mac’s DNS Setting
- From the Apple menu, choose System Preferences. Then click Network
- Chose how your Mac connects to the Internet, usually Ethernet or WiFi
- Click the Advanced button
- Click the DNS tab
- In the DNS Servers section of the window, click the Add (+) or Remove (–) button to add or remove the IP address of a DNS server

- If you have more than one DNS server, drag the IP addresses to change the order
One symptom of this issue is that your Safari starts on macOS (any version) or Mc OX S El Capitan, but when you type in any URL, you will see a very slow Safari.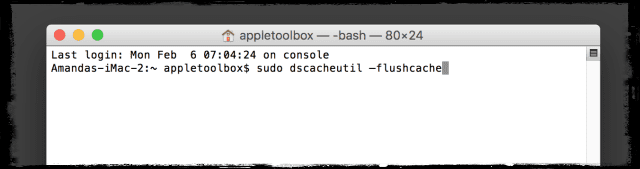
Flush Your DNS cache
- Open Terminal and enter the following command
- sudo dscacheutil –flushcache
- If you are using Yosemite, then use the following command to flush the DNS Cache
- sudo kill -HUP mDNSResponder
- Also, try to disable DNS prefetching to see if that helps to speed things up.
- To disable DNS prefetching, open Terminal and use the following command:
- defaults write com.apple.safari WebKitDNSPrefetchingEnabled -boolean false
If you see the error “operation not permitted” when using Terminal, see this troubleshooting article to grant Terminal Full Disk Access.
For more information on how non-responsive DNS servers or invalid DNS configurations can cause a long delay before web pages load, see this Apple knowledge base.
Remove Safari History Files
Close the Safari App. Then look in the user folder /Library/Safari and isolate any files that start with “History” in those folders to your desktop. 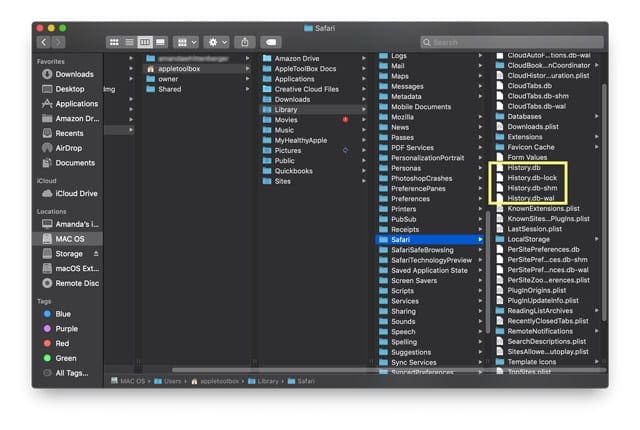
If you cannot see your user library, please check out this article for a step-by-step guide to show your Mac’s User Library.
Once you have moved the files to your desktop, please start your Safari and check.
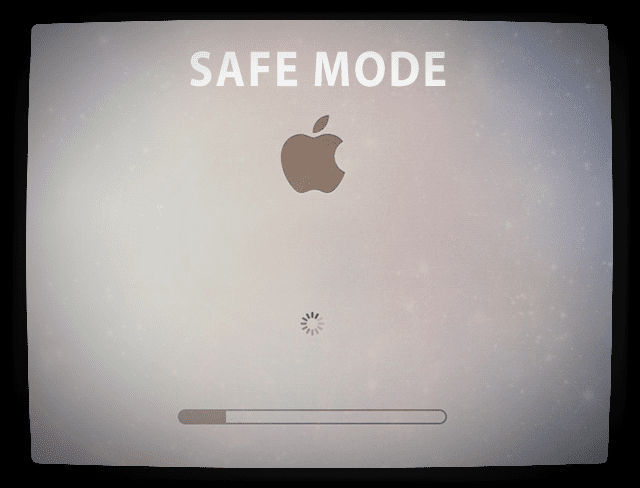
Safe Mode
If none of the above steps work for you, try starting Safari in Safe mode. Enter Safe Mode by restarting your Mac and pressing the Shift key when restarting.
Safe mode prevents your Mac from running any third party programs and extensions that you installed in the past.
If it works well in safe mode, consider running a diagnostic tool like EtreCheck, a free tool that explains what is going on inside your Macintosh.
Additional Troubleshooting Resource
Lastly, over the years, we have tried to evaluate Safari related problems and created an index of Safari troubleshooting tips for both iOS and OSX that will be a helpful reference for you.
Please refer to this guide.
Safari Not Working After iTunes Update? Seeing Error Message that Safari Won’t Load Because of a Problem?
Some folks report problems with Safari after updating to a newer version of iTunes. People running Mac OS X versions like Yosemite seem to be most impacted by this error.
In particular, folks see the following message: “Safari will not load because of a problem.”
Check with the developer to make sure Safari works with this version of OS X. You may have to reinstall the application. Be sure to install any updates to the application and OS X.”
Update iTunes…Again!
Before you troubleshoot, make sure you try again to update iTunes. Some readers report that they needed to update iTunes a few times before everything worked again!
Make sure you restart your Mac after any update–even if it automatically restarted. Performing a final restart appears critical to getting Safari (and iPhoto) to work normally.
If you continue to see this error on your Mac, try the following:
- Move the file into a folder on your Desktop to isolate it (or keep it in place by renaming it): MobileDevice.framework/Versions/A/MobileDevice
- (navigate to: /System/Library/PrivateFrameworks/MobileDevice.frameworks/Versions/A/MobileDevice)
- Open a Finder window and along the top menu choose Go
- Select Computer. Then choose Macintosh HD (or whatever you name your main hard drive)
- Next, select System and then choose Library
- Locate Private Framework
- Find Mobile Device.framework
- Open Versions folder
- Isolate by moving into a new desktop folder or rename the file MobileDevice_OLD–we do NOT recommend deleting this file
- Restart your Mac
- Check if Safari starts working again
- If not, try moving the entire folder /System/Library/PrivateFrameworks/MobileDevice.frameworks to a separate folder on your Desktop or renaming that folder
We’re not experiencing this issue ourselves, so we are unable to verify.
You may not be able to do local backups of iDevices with iTunes after deleting, moving, or renaming MobileDevice files or folders.
Are You Backing Up Your Mac? 
If you back up your Mac regularly using Time Machine or another tool, you could also try and restore (or copy) this file: System/Library/PrivateFrameworks/MobileDevice.framework/Versions/A/MobileDevice
from your backup and replace the current file with this backup version.
Make sure the back up is from a time BEFORE your Mac updated iTunes.
If you don’t back up (and yes, this is something you really should do), you could also copy that same file from a Mac that uses the same operating system and doesn’t have this issue.
Or Just Update Your OS!
Another workaround, if you don’t want to mess with those files, is to update your macOS or OS X to a later version—this appears to solve this particular issue.
Folks who had this issue and updated to El Capitan or macOS (any version) found that it instantly disappeared after the macOS/OS X upgrade.
macOS is Optimized for 64-Bit Processes
In MacOS and most of Mac OS X, almost all of the applications are designed to run in 64-bit mode (the major exception is DVD Player, that is if your Mac even has one.)
Often older and legacy programs or extensions that were written for 32 Bit mode cause problems, especially for macOS High Sierra and above. Starting with High Sierra, apps do not use 64-bit processes show an alert when opened. Apple intends to make 32-apps incompatible with macOS in the future. 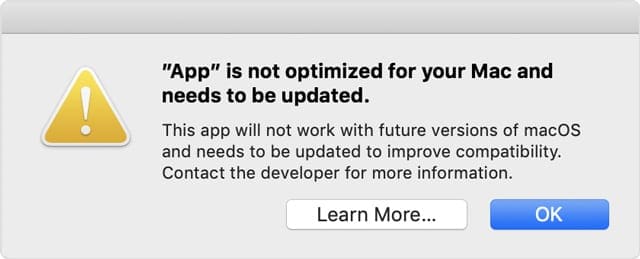
Check if a macOS app is 32-bit or 64-bit
From the Apple menu, choose About This Mac, then click the System Report button.
Scroll down to Software in the sidebar and select Applications.
Look at the individual application and locate the field titled 64-bit (Intel). “Yes” indicates 64-bit; “No” indicates 32-bit.
If you’re using macOS Mojave, select Legacy Software in the sidebar to see all applications that have not been updated to use 64-bit processes.
So take a look at Apple’s list of compatible applications for your macOS or Mac OS X version just to make sure you are running the most compatible software for your Mac.

Reader Tips
- We heard from one of our readers who said that every time he opened safari, it would always open the last page from his prior session and he wanted a way out of it.
- This is easily managed in your settings. Go To Safari > Preferences> General and make sure to check the drop-down box ‘Safari opens with’ to make sure it isn’t set to ‘All Windows from the last session”.
- Some users have noticed a funny looking Youtube page when they open it in Safari. Unfortunately, this happens when you have ad-blocking software running. Disable AdBlock plus or other ad blocking software programs that you run, and you should be able to see YouTube in its former glory!
We wish you luck, as Safari is one of the hardest Apps to troubleshoot. Please keep us informed via your comments and let us know if you are experiencing any other issues related to your macOS and other OS upgrades.