Several iPad Air owners have reported a variety of iPad Air 2 WiFi problems. These include wireless network (Wi-Fi) connectivity issues, ranging from slow Wi-Fi to dropping connections. If you are having Wi-Fi connectivity problems while using your iPad Air, here is how you can troubleshoot. 
Contents
Related Articles
- Safari or Browser Not Working on Airport, Hotel, or Public WiFi? Fixes
- WiFi Dropping Out or Not Available After iOS Update? How-To Fix
- WiFi Problems on iPads and iPad Pros? Help is Here!
- Make Safari or Any Browser Faster with Open DNS or Google Public DNS, Here’s How To Do It
Fix Your iPad Air 2 Wi-Fi Problems: Easy Steps
- If you use a WiFi Booster, Repeater, or Extender, turn it off and see if that makes any difference.
- Restart your iPad. To do so, simply press and hold the on/off button until you see the red slider, then slide the slider then again press and hold the on/off button until you see the Apple logo.
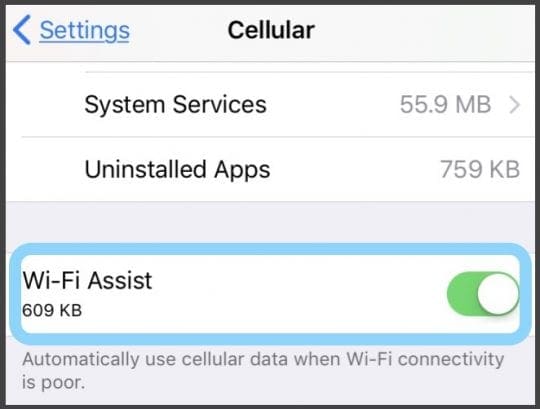
- Turn OFF Wi-Fi Assist in Settings > Cellular > WiFi Assist (scroll down past apps to find this setting)
- If you enter the correct password and see an unable to join the network message or an incorrect password message, even when the password is correct, restart all of your devices, then try to enter your password again.
- Turn off and back on your Wi-Fi by going to Settings > Wi-Fi.
- Tap Settings > Wi-Fi and locate your Wi-Fi network from the list and tap on the (i) button then Forget This Network.

- Reset network settings by tapping Settings > General > Reset > Reset Network Settings. Please understand that resetting network settings will erase your saved passwords.
- Try the “Other…” option in your WiFi Settings. Go to Settings > Wi-Fi > Select Other… Then manually type in your WiFi Network’s Name and security passcode.

- How-To Join WiFi with Other…
- Select ‘Other’.
- Enter the network name (SSID)
- Select the security type
- Enter the security code/password
- Select ‘Join’
- How-To Join WiFi with Other…
Fix Your iPad Air 2 Wi-Fi Problems: Advanced Steps
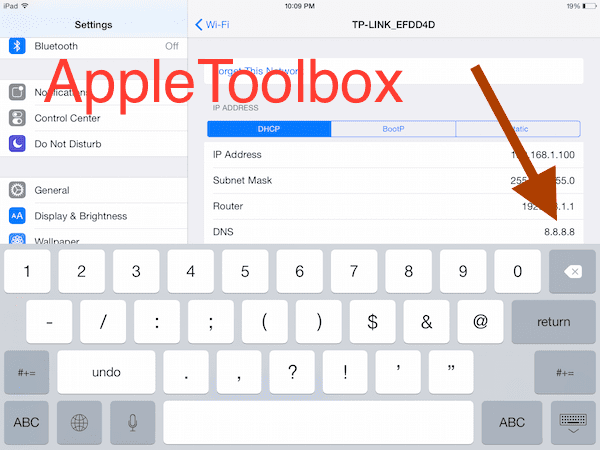
- Try changing the DNS servers on your iPad. You may try Google DNS. Simply tap Settings > Wi-Fi then find your Wi-Fi network and tap on the (i) icon, & tap on the DNS numbers to edit and enter 8.8.8.8, 8.8.4.4
- Disable Wi-Fi networking services by going to Settings > Privacy > Location Services > System Services > Wi-Fi Networking.

- Restart (or Reset) your Wi-Fi router.
- Shut down your WiFi Router for at least 1 minutes with no power cable attached. Plug it back into power and power it up. Wait another 2-3 minutes and then try and connect your iPad.
- Log into your router control panel and the wireless control setup panel. Change the setting of your WiFi network security to None. Try logging in to the iPad without any password. If that works go back to the wireless control setup and change the security option back to WPA2 (or whatever you had before.) Then log back into WiFi on the iPad, using your password. (If this doesn’t work, remember to turn those security options back ON–you don’t want free access to your network, even if it’s not working for you!)
Reader Tips 
- Reader Andy discovered a different way to get his iPhone working on his home WiFi network. First, he accessed his wifi router and manually added a device by looking at devices in the router’s set-up page and then using “add a device manually.” Finally, he added the name of his iPhone and its wifi address (find this in Settings > General > About > WiFi Address) and lastly, save all changes. Once Andy went back to wifi selection on the phone and re-entered the password, he successfully connected to his wifi network!