Contents
What is an Instant Hotspot
Sometimes, especially when travelling and you don’t have access to reliable Wi-Fi, the only way to get online with your Mac is to connect to the Internet through your iPhone’s cellular data connection.
The iPhone already has a built in Personal Hotspot feature, which basically turns your iPhone into a Wi-Fi hotspot that can be used by any device – that includes laptops and other mobiles.
In iOS 8 and OS X Yosemite, Apple has improved the Personal Hotspot in several ways to make it even easier to use.
This new, improved functionality is now known as Instant Hotspot, and it means that you don’t even need a Wi-Fi password if both of your devices are signed into iCloud. Additionally, your Mac will automatically disconnect when it’s not being used, in order to save bandwidth and minimise data charges.
Apart from those new features, using the Instant Hotspot is almost identical to before – the main difference is not having to enter a password each time you use it.
How to use the Instant Hotspot
This guide provides a brief description of how to turn on and use your iPhone’s Instant Hotspot.
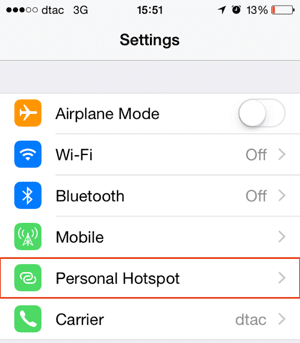
Step 1 – Find the Personal Hotspot settings
Open Settings on your iPhone and tap on the section called Personal Hotspot. For some reason, it’s still called Personal Hotspot, despite the fact that in the Apple keynote and at WWDC earlier this year, it was referred to as an Instant Hotspot. This naming mismatch is perhaps because it can also be used as a plain old hotspot.
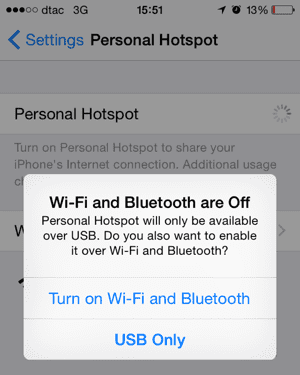
Step 2 – turn on Personal Hotspot
Tap the Personal Hotspot slider to the On position. If you haven’t already got Wi-Fi and Bluetooth enabled, a popup window opens asking for confirmation. It also gives the option of using USB, but we’re not interested in a wired connection this time.
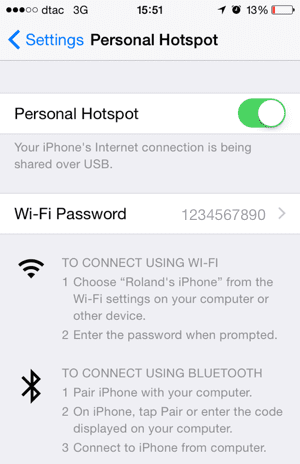
You should now see a screen like that shown below with Personal Hotspot enabled. In my case, I had previously used Personal Hotspot in iOS 7 and hence my (not very secure) password is still shown in the Wi-Fi Password section.
Note that if you’re signed into iCloud (most iPhone and Mac users normally are) you don’t need this password at all, as you will be able to connect to your iPhone without it.
Step 2 – Turn on Wi-Fi on your Mac
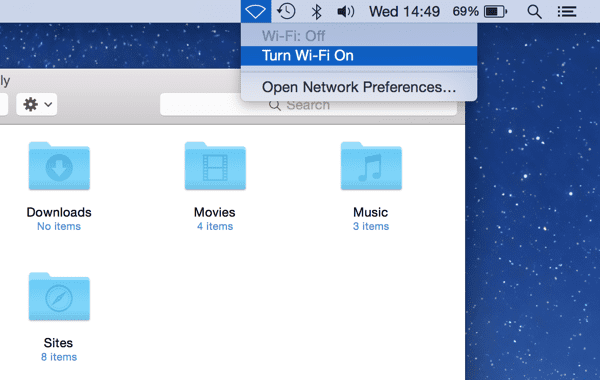
The next step is to enable Wi-Fi on your Mac, if it’s not already on. As usual, it can be found in your Mac’s status bar as shown below.
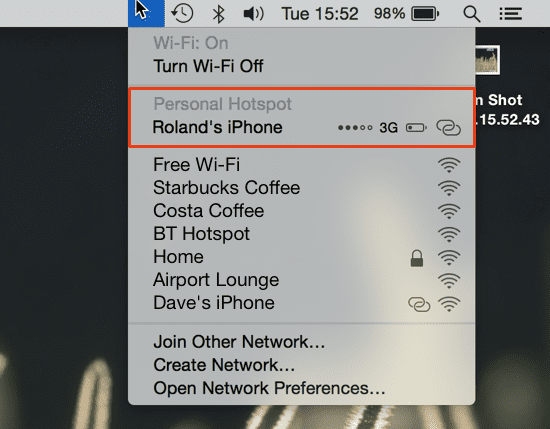
Once a Wi-Fi scan has been performed, you will see the available hotspots nearby as usual. There is a new Personal Hotspot section at the top of the menu that shows any available Instant Hotspots. As you can see below, the iPhone is listed along with its signal strength, network type (3G in this case), battery meter and a special link icon to indicate that it’s an iPhone hotspot.
All the other plain old hotspots in the area are shown below the iPhone. Notice the other iPhone in the hotspot list (“Dave’s iPhone”) – that device is not an Instant Hotspot so will require a password just like all the others.
Step 3 – Get connected
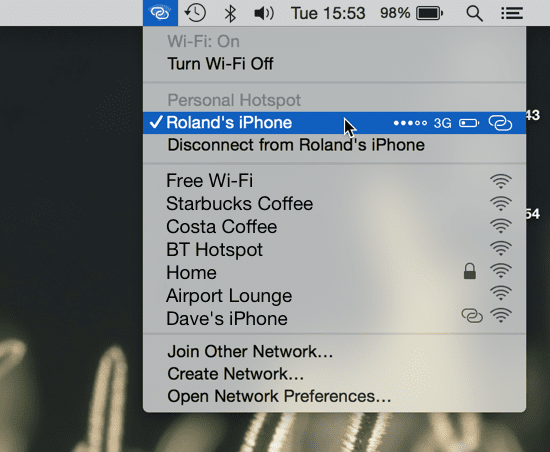
Next up, select your iPhone in the list to connect. You should not need to enter any password, as your Mac and iPhone both know they are signed into the same iCloud account and so are safe to connect automatically.
At this point, you should be online and sharing your iPhone’s data connection with your Mac’s Wi-Fi. Note that, occasionally, you might see an error appear saying that it was not possible to connect. In that case, the easiest thing to do is to turn Wi-Fi off then on again to solve the issue. This problem does not seem to happen very frequently, but in my case, while I was writing this article using an Instant Hotspot, I experienced several failed attempts to connect.

Step 4 – check how many devices are connected
It’s worth checking your iPhone when your computer is connected, just to confirm that it actually has an active connection. In this case, you will notice I had just one connection – my Mac.
Tip: Apple says that the Instant Hotspot will automatically disconnect if you’re not using it for a certain length of time. However, Mac App Store updates do still happen so it’s a good idea to disable Mac App Store updates temporarily to make sure your data allowance is not used up unexpectedly.
Finally, once you have finished using your iPhone’s hotspot, open your Mac’s Wi-Fi menu and choose Disconnect to close everything.