Most people carry a lot of sensitive data on their devices. If somebody steals your device, not only will your personal data be lost, but also you may seriously suffer from the consequences.
Adding some security measurements for your iOS devices is always a good idea!
These security measures are also crucial if you are sharing your device with other people; you may not want other people to access your personal data easily.
You can increase the security of your device (iPad, iPod, and iPhone) to ensure the protection of your personal information.
Here’s How!
Contents
Quick Tips 
- Use a passcode and Face ID/Touch ID on your devices
- Turn on Location Services and Find My iPhone on all devices, including Macs
- Add restrictions if you share your device with family and friends
- Use a third-party Mail App instead of iOS Mail App
- Encrypt your iPhone backups
- Don’t jailbreak any device!
Related Articles
- Why iOS 12’s Security Code AutoFill is Risky + How to Protect Yourself
- The Complete Guide to Apple’s New Data Privacy Portal
- How To Clear Your Search History on Your iPhone and Protect Privacy
- Here are the new Security & Privacy features in macOS Mojave and iOS 12
- iDevice Security and Privacy in the wake of NSA’s PRISM Report
1-Set up a Passcode Lock
You can configure a passcode for an iPad, iPod or iPhone by merely tapping Settings > Face ID (or Touch ID) & Passcode.
You may set a four-digit or six-digit password, add Face ID or Touch ID, or use longer passcode with numbers and letters. 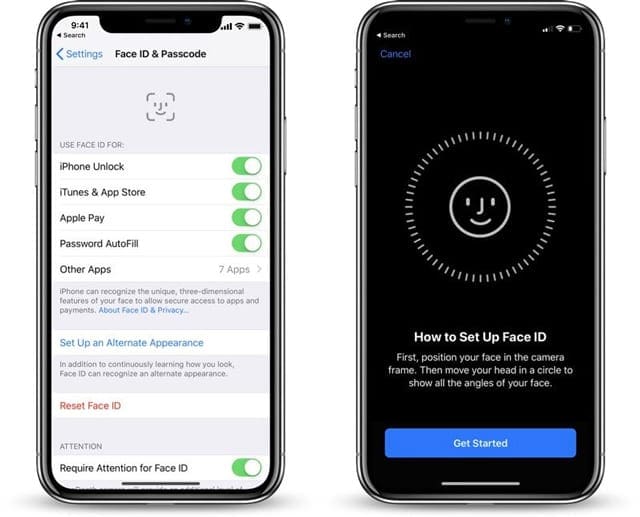
Also, it’s a good idea to turn the Erase Data option on 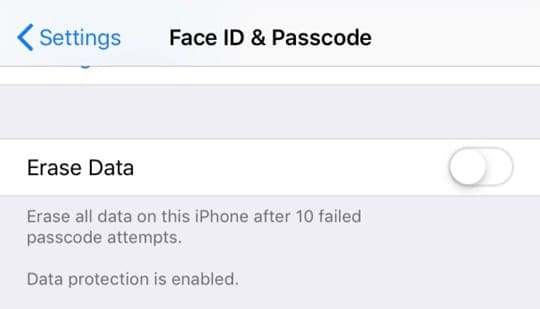
This option deletes everything after ten failed attempts.
2-Turn on and configure Location Services
Location services allow applications to determine your approximate location.
Go to Settings > Privacy > Location Services and toggle it on.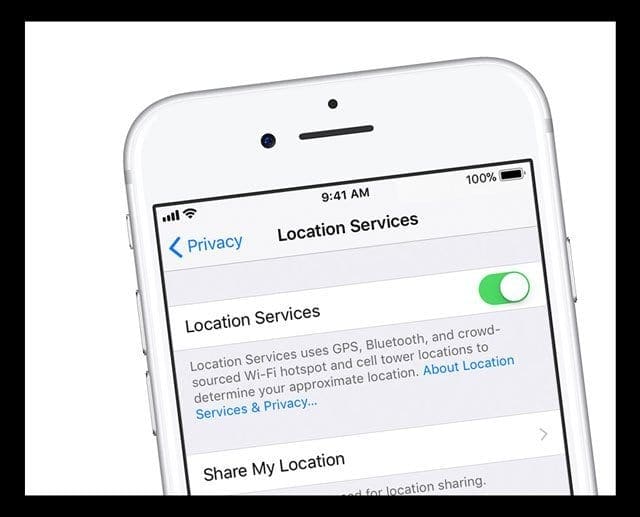
Make sure that you turn on Find My iPhone/iPad/iPod/ so that you can locate your device when lost, missing, or stolen.
Find My iPhone helps you locate all types of devices, including iPhone, iPad, iPod touch, Mac, Apple Watch, and AirPods. If one of your devices ever goes missing, you can use Find My iPhone to help get it back!
How to set up Find My iPhone, iPad, iPod touch, Apple Watch, AirPods
- Start at your Home screen.
- Tap Settings >Apple ID Profile > iCloud
- If you’re using iOS 10.2 or earlier, go to Settings > iCloud
- Scroll to the bottom and tap Find My iPhone
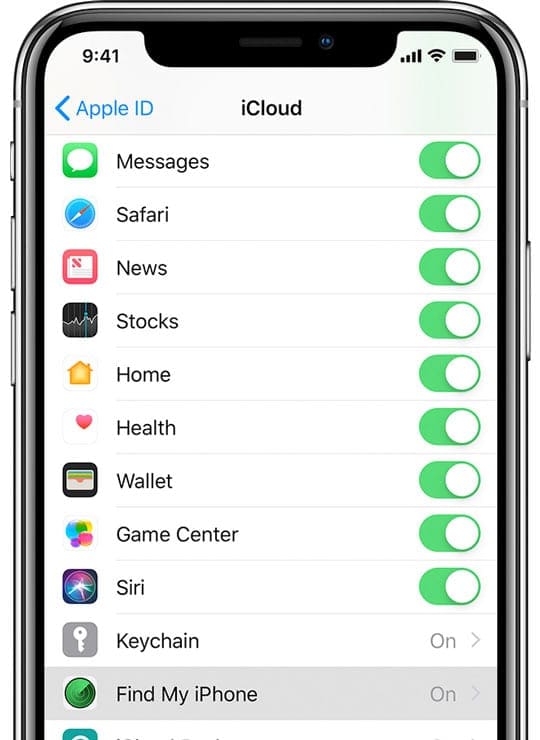
- Toggle on both Find My iPhone and Send the Last Location
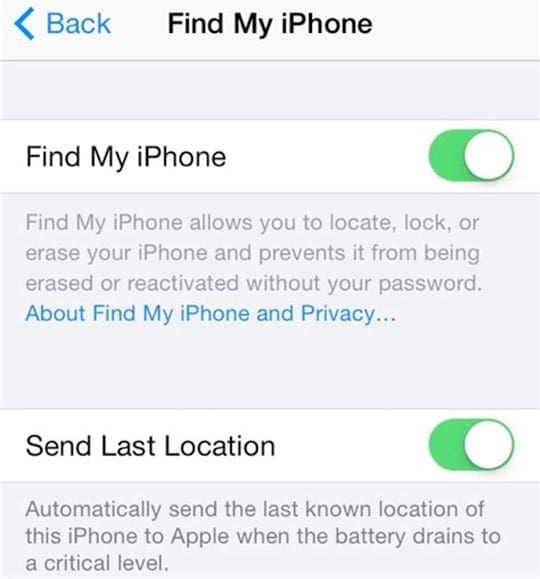
- Repeat these steps on all iDevices and Macs
Please see this article regarding how to configure Find My iPhone on your Mac and other iDevices.
3-Adjust restrictions
You can enable restrictions to prevent access to specific features (this article explains restrictions in more details).
Set this feature up if you want to restrict access to different apps (such as YouTube, Safari, Camera, FaceTime, iTunes) along with the installation or deletion of apps.
Another option is to allow or disallow Location and Accounts changes.
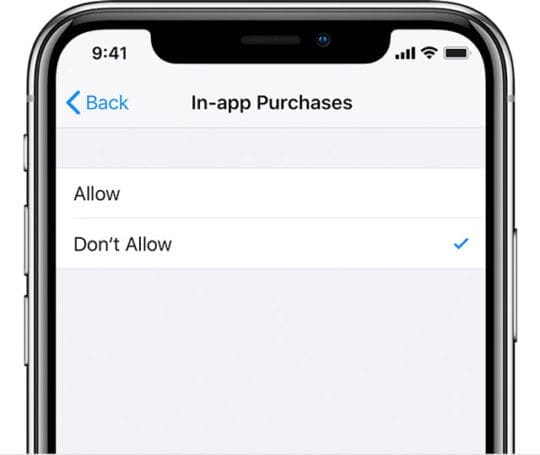
For maximum protection, set up Content & Privacy Restrictions to “Don’t Allow Changes”
- For iOS 12 and above, look for Restrictions in Settings > Screen Time > Content & Privacy Restrictions
- When using iOS 11 and below, find Restrictions in Settings > General > Restrictions
- Tap on iTunes & App Purchases, Location Services, Passcode Changes, Account Changes, and any other settings and update those to Don’t Allow Changes
4-Do not use the built-in Mail app
The built-in Mail app works great, but there is no easy way to sign out, and anybody using your iPad/iPhone/iPod can check/send emails easily via your email account. 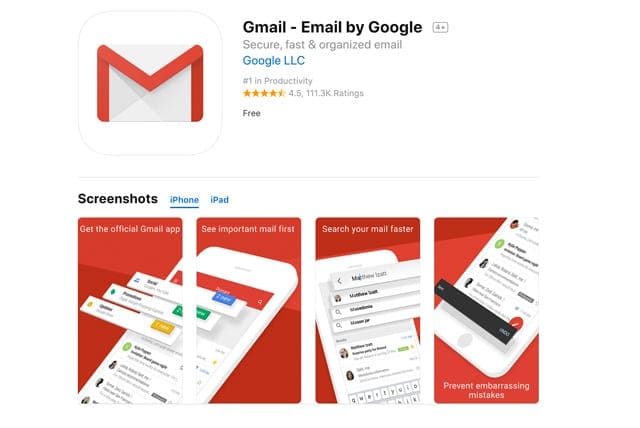
Instead of using the built-in mail app, get a separate mail app from the App Store!
- For instance, if you are using Gmail as your email service, download the Gmail app and use this
- Gmail app allows you to sign out and next time you want to check emails, it asks username and passwords
- This way nobody but you can check your emails even if you share your device with somebody
5-Encrypt Your iDevice Backups
The most secure way to back up your device’s data is by encrypting that data using iTunes.
The Encrypt backup feature in iTunes locks and encodes your information. And, when you encrypt your backups with iTunes, you can also include information that unencrypted iTunes backups don’t include!
Things such as:
- Your saved passwords
- WiFi settings
- Website history
- Health data
How To Turn On The Encrypt Option For Your iTunes Backups
- Open iTunes
- Connect your device to your computer with the included USB cable
- Select your iPhone, iPad, or iPod touch when it appears in the upper-left corner of the iTunes window
- On the Summary screen, select Encrypt backup in the Backups section
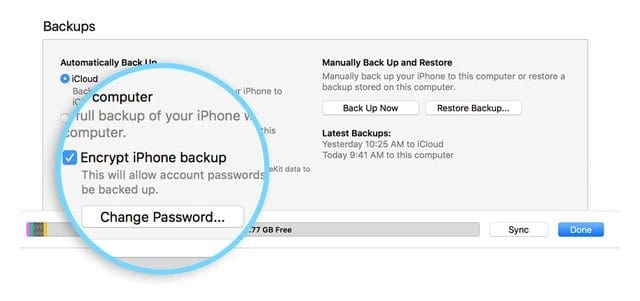
- When asked, make a password
- Create a password that you will remember or write it down and store it somewhere safe and that you have access to
- You cannot use your encrypted iTunes backups without this password
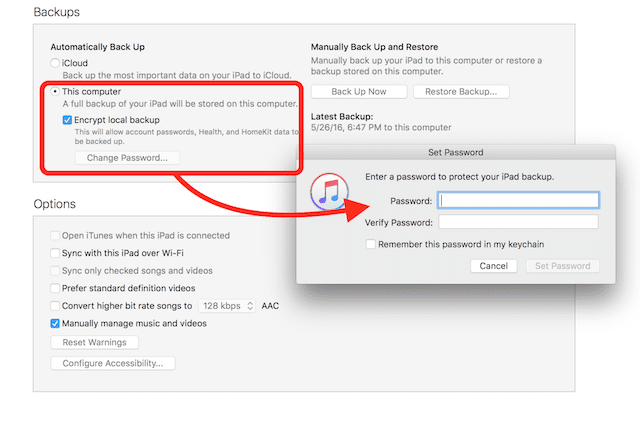
- After you confirm your password, iTunes starts backing up and immediately overwrites and encrypts your previous backups
- When done, verify it via these methods
- For Mac: From the menu bar at the top of your computer screen, choose iTunes > Preferences
- For Windows: From the menu bar at the top of the iTunes window, choose Edit > Preferences
- Click the Devices tab.
- You should see a lock icon to the right of your device’s name and the date and time that iTunes created the backup

- Click OK to close iTunes Preferences