With the iOS 10.3.3 update out, many users are in the process of updating their iPhones and iPads. If you’re installing iOS11, see this article instead. Unfortunately, some users encounter the message “Unable to Install Update – Error occurred installing iOS.” If you are one of these few unlucky users receiving this message, please continue reading this article for tips to tackle this issue. While you might not have experienced this error before with a previous update, it isn’t that uncommon in the early days of an iOS release because so many people around the world are trying to update at the same time. Sometimes, all we need is patience–just wait a few hours and try again.

Related Articles
- Error Occurred Installing iOS 11 on iPhone or iPad, How-To Fix
- Check for App Compatibility in iOS 10.3 & get Ready for iOS 11
- Password Required After Update?
- iTunes Could Not Backup Because of Corruption? Tips to Fix
- Apple File System-The Biggest Feature No One’s Heard About
- Find My AirPods and How to Find My AirPods Case
- Manage Your Apple ID Account & iCloud with New iOS 10.3 Features

Contents
Apple ID Required!!
If you forgot your Apple ID, don’t update to iOS 10.3.2 until you get your Apple ID credentials (ID and passwords.) The update requires your Apple ID after updating. After updating, you see a Hello screen and swipe to complete the upgrade. You are then prompted to enter your Apple ID password to complete the installation. If you know your password, just enter it to unlock your iDevice–that’s it. BUT if you forget or do not know your Apple ID or password, you must reset it at iforgot.apple.com before proceeding with this iOS update.
What’s this iOS 10.3-10.3.3 update anyway?
First thing first, with iOS 10.3, Apple introduces a brand new file system. The almost thirty-year-old file system that Apple used since the beginning of iPhones and iPods (called HFS and HFS+) is being replaced with Apple’s own Apple File System (APFS). Before you install the iOS 10.3 update, we highly recommend that you backup your device on both iCloud and iTunes.

Do I Really Need to BackUp?
In the case there is an issue during the install, backups are there to get your iDevice back into working order. With a backup, you can recover all your old data. So yes, it’s worthwhile to backup your iDevice, using both iCloud as well as iTunes. For specific information on how to backup, please refer to our complete step by step guide that shows you how to do a full backup of your iDevice.

Before You Update Your iOS
Please make sure that your iPhone or iPad is connected to power (preferred) or has sufficient charge to make it through the upgrade. If you’re unsure, charge your device before attempting to upgrade or just plug it in and then update.
Error Occurred Installing iOS 10.3.3: How-To Fix
Now, that you finished your backup let’s tackle this install error. For users who encountered this error while performing an OTA (over-the-air) update for your iDevice, the best path forward is to use iTunes when installing iOS 10.3-10.3.3
If you are not a big fan of iTunes, try the following tips and check if your iPhone updates to this latest iOS without any hiccups using OTA.
Tip # 1 – Toggle AirPlane Mode
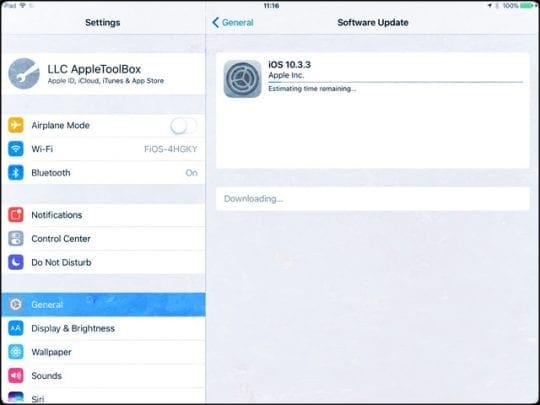
Tap on Settings > Enable Airplane Mode. Switch Off your iPhone. After 10 seconds or so, turn it back on and disable the Airplane mode. Next, try to update your iPhone as you would normally do by using Settings> General >Software Update
Tip # 2 –Update Your Network Settings
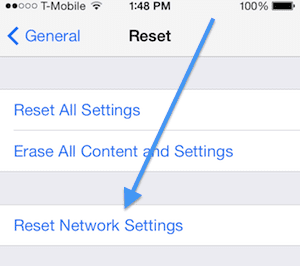
If updating via OTA gives that all too familiar “Not connected to the Internet” error, two things often help with that issue: A) Resetting the Network Settings on the iPhone & B) Changing your DNS settings to 8.8.8.8 for your WiFi. Give it a try and see if that resolves your issue.
Tip # 3 –Force a Restart
Some readers tell us that when they see this message or if their update fails, a forced restart followed by a reinitiation of the update does the trick. Depending on your iDevice, there’s different ways to force a restart.
How-To Perform a Forced Restart on iPhone models
- On an iPhone 6S or below plus all iPads & iPod Touches, press Home and Power at the same time until you see the Apple logo
- For iPhone 7 or iPhone 7 Plus: Press and hold both the Side and Volume Down buttons for at least 10 seconds, until you see the Apple logo
- On an iPhone X or iPhone 8 or iPhone 8 Plus: Press and quickly release the Volume Up button. Then press and quickly release the Volume Down button. Finally, press and hold the Side button until you see the Apple logo
Tip # 4 –Close Settings App
Refreshing your Settings app just might do the job. Double tap your Home button then swipe up on the Settings app until it slides out of view. Next, tap Settings again and go to General >Software Update. Try to install the update again.
At this point, if you are not successful, your best bet is to move forward with using iTunes to do the update.
Tip # 5 –Try Adding the SHIFT KEY when updating with iTunes
If you experience updating issues or other problems/errors after an OTA update, connect to iTunes and press and hold the SHIFT KEY and click on UPDATE. This method installs iOS 10.3.3 via iTunes without any data loss.
Delete Failed iOS Update Files
For some users who attempted to install the update wirelessly (OTA), the software update may still exist on your iPhone’s storage. So go ahead and delete the OTA version from your iPhone before proceeding with the iTunes steps below. In order to check this issue, Tap on Settings > General > Storage & iCloud Usage.
To check for a failed iOS update file
- Tap on Settings > General > Storage & iCloud Usage
- Tap on ‘Manage Storage’ under Storage section at the top. (Not under iCloud). On the next screen, scroll down
- On the next screen, scroll down to the list of apps and check if you have the new iOS 10.3 update listed. If so, tap on it and delete it. This action removes the unpacked OTA from your iDevice

The step to remove the unpacked iOS Update from your iPhone is critical before you move forward with the iTunes steps. Users who bypass this may encounter the error “No Updates Found” when they check again for iOS updates.
And don’t forget to try quitting iTunes, rebooting your computer, and restarting your iDevice, if iTunes isn’t updating.
Problems Updating iPhone 5 or 5C or 4th generation iPad?
Despite Apple claiming that iOS 10.3.2 update works on iPhone 5 and later, iPad 4th generation and later, and iPod touch 6th generation, some readers report problems upgrading their iPhone Models 5, 5C, and fourth-gen iPads. When they go to Settings > General >Software Update to upgrade to iOS 10.3.2 via OTA, their iPhones say that there is no update needed. Specifically, it says that their current iOS is up to date when checking for an upgrade. Other readers report that their iPhone 5, 5C, and 5S models won’t update even after trying multiple times, deleting and re-downloading. And still, other users with older model iPhones report that their phones get stuck in verifying the software and ultimately shut down and restart without updating.
If you’re getting this same result on your iPhone 5 or 5C (or any other model that’s supported) try updating your iPhone using iTunes and see if that works. Or wait a few more days, and the update should show up for OTA updates in your iDevice’s Settings. All iPhone 5 and 5C owners should be able to update their iDevices!
If you know the OTA update is out for 32bit, perform a hard reset by pressing and holding the Home and Power buttons until the Apple logo appears. This action might force your iOS updates to show up on your older iPhone!
End of the 32bit era?
The 4th generation iPad and iPhone models 5 and 5C uses 32bit iOS architecture. These were the last iDevices to use the A6 system-on-chip and the last built with a 32-bit architecture. All new iOS versions and iDevice hardware (post-2013) are 64bit. Consequently, the 32bit version releases later than the 64bit version for OTA (over-the-air) updates. However, iPhone 5C owners can get immediate access to the iOS 10.3.2 update by just connecting their phones to iTunes and updating from there.
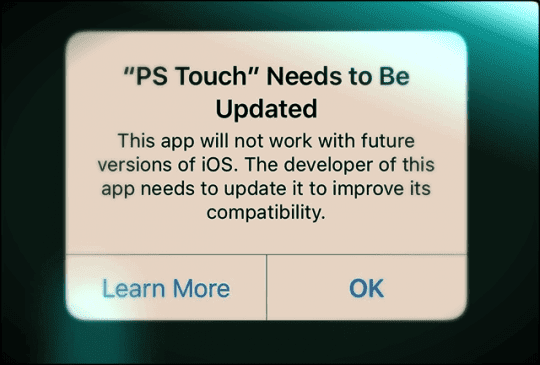
iOS 10.3.1 thru 10.3.3 also includes a warning when opening 32-bit apps, letting you know that “This app will not work with future versions of iOS.” Additionally, the latest developer release of iOS 11 no longer supports 32bit hardware. All signs point to 32bit obsolescence when the latest major iOS version ( iOS 11) arrives later this year to mark the 10th anniversary of iPhone.
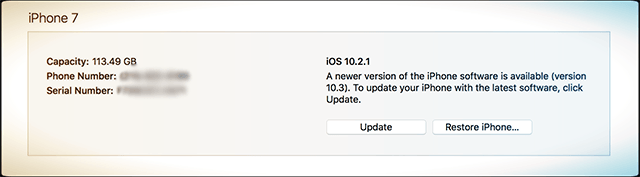
Update iOS Via iTunes
- Connect your iPhone/iPad to your computer running iTunes using the cable
- Make sure that your Mac or Windows PC is running the latest iTunes
- Open iTunes and select your device from the left panel
- Click on “Check for Update.” Find the new update
- Lastly, Click on Download and Update
Problems with iTunes and Updating?
If your having problems with iTunes and receive messages that your backup(s) is corrupt, check out our detailed article on this problem for tips to get things back into working order.
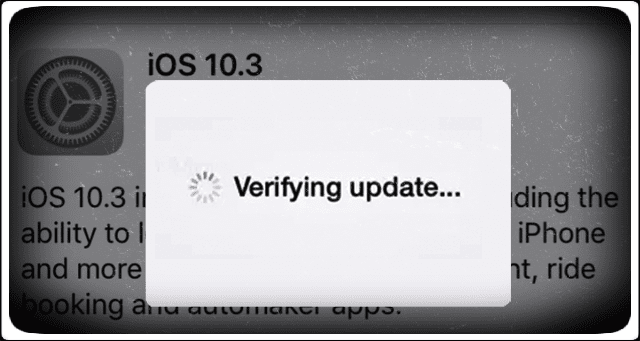
Stuck on Verifying Update?
If you attempted an update and all looked well until the iDevice seemingly got trapped in verify for more than 15 minutes and then failed, try the following. Deleted the update using the steps listed above in the delete failed update section, restart your device, and then try updating again using iTunes (preferred) or iCloud. For many, the second try is the trick that worked!
Other readers have success with doing a hard reset by pressing and holding power plus home (for mechanical home buttons) or volume down until Apple logo appears. And then going back to install the downloaded update.
iOS 10.3.1 – 10.3.3 Updates Drain Battery
Many readers report that since updating to 10.3.1 and 10.3.2, their iPhone’s and other iDevice’s drain power more aggressively. In particular, several users not that their iPhones use over 50% of their battery life by lunchtime and need charging before dinnertime. Battery problems are all too familiar to iPhone users. These draining problems have plagued iPhone users since the release of iOS 10 back in September 2016.
Unfortunately, there’s no one consistent fix here. However, some users report success when they let their iPhone battery fully drain until the phone shuts off, then fully charge it WITHOUT using the phone during charging. Yup–that’s pretty darn inconvenient.

- After updating to 10.3.3, my iPhone reverted to the main screen and kept telling it was up-to-date WHILE AT THE SAME TIME still telling me there was an update. Rebooted twice with no change, so after the third boot I also switch to Airplane Mode and Turned WiFi on. Finally, everything was kosher.
- When I got stuck on the 10.3 Verifying Update Message twice, I turned off WiFi and verified over LTE Data and bang, everything completed in minutes. So try to verify over your mobile data connection. It worked for me. Just remember, this is for the verify message not download!
- Turn WiFi off and then turn on cellular data. Go to Settings > General > Software Update and find the iOS update. Once located, keep this update window open and swipe up control center and then turn WiFi ON again. When it connects to WiFi, it finally allows you to update
- If you or someone you know has a Personal Hotspot, connect to their Hotspot and then download the update via Bluetooth, not WiFi
- This is what worked for me: download the update via WiFi then when the Install Now Button appears, switch to data and let the update verify. From there it successfully updates
- Try removing your SIM card when you update your iOS to the latest version. I had problems updating with my SIM installed. So I removed the SIM card and then was able to update my iPhone over Wifi. ONLY WIFI (OTA–over the air) NOT ITUNES. However, if your iPhone is not activated, and you have not configured it, your phone refuses to move forward in the configuration process without the SIM card. (Appletoolbox recommends proceeding with caution on. We do not have much experience with updating without a SIM on iPhones. Check with your mobile phone company before taking this action.)
- The only thing that worked for me was to Recover my iPad with iTunes using iOS10.3. Hold the Alt-Key when selecting the Update-Button and choose the Firmware to recover manually. Then setup your iDevice from a Backup
- Your download may be corrupt. Delete it and download it again and see if that works. If not, try updating with iTunes or use another WiFi network. Settings>General>Storage & iCloud Usage>Storage>Manage Storage. Your list of apps will load. Tap on the downloaded iOS software in the list and tap delete in the next screen
- It may have to do with 2-factor authentication in your Apple ID setup.I did 2-factor between last iOS update and this one. I was getting the same problem with 10.3.1 update until I logged into my apple ID to do a search on this discussions forum. When I did, it sent the 6 digit code to my iPhone 6s. I entered that into the Safari browser, and it asked me to trust the Safari browser. After I did that, I was able to run the 10.3.1 update on my iPhone 6s. Hope that helps
Wrap Up
We hope that the tips and steps above were helpful in resolving the iOS 10.3 upgrade issue. Please do keep in mind that sometimes when a new iOS is released, Apple’s servers may be slow and you may have to try the update a few times to get it working. You can always check the status of Apple’s servers by clicking here.