Many of us think that Archiving is an unnecessary step when it comes to our emails. Most of our colleagues here at AppleToolBox do not even do it. They prefer to leave their incoming emails in their inbox and use “Mark as Read” and other flags to indicate actions that need to be performed on incoming emails. The most common response to not archiving that we have heard is “I keep my emails in my inbox so that I can easily find them”.
Archiving emails make it easy to manage your time as well as provide some structure. When you archive the emails that you are finished with, you are left with a clean inbox that has the mails that merit your attention. Clutter Free! No more loosing important emails. In this post we will show you a step by step guide that you can use to set up your archive mailbox and also automatically archive your mails.
Step – 1. Open your Mail application and click on Mailbox > New Mailbox
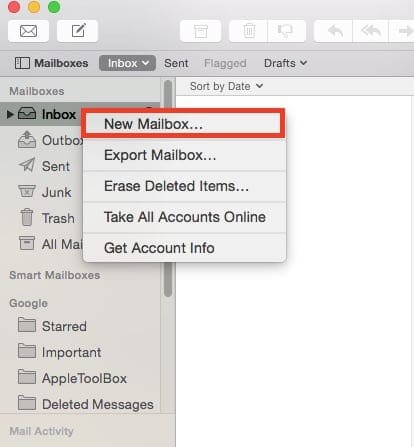
Step – 2 Designate a name for the new mailbox and choose a location from the dropdown. We suggest that you use “On my Mac” as the location and name it appropriately. We will use ATB_Archive as the folder name in this example.

Step – 3 Once you have set this up, the mailbox is available to you on the left side much like any other mailbox and you can drag and drop your emails manually once you are done with them.
Step – 4 Now comes the fun part of automating the archival process using Rules. Its pretty simple once you get the hang of it.
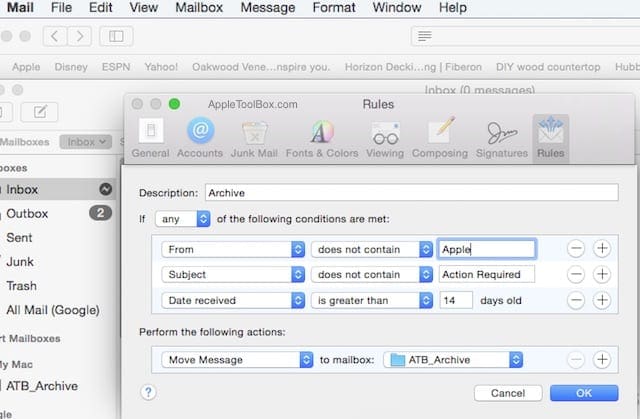
Step – 5 Click on Mail > Preferences. Click on Rules and choose Add rule

Step –6 Designate the mailbox folder to the one that you created in step 2.
Step – 6 Name the Rule in the description box and add conditions. You can add conditions such as email older than two weeks. Press the + button to add more conditions. You can get pretty specific here such as “All emails from sender x or sender y” is not archived. Save your rules.
Step – 7 Test it out and you are done. As soon as the emails in your inbox meet the rules that you have set up, your Mail will automatically move them out of your inbox into the local archive folder that you set up.
Sometimes, it’s the simple things that make us more productive. If you have ever opened your inbox and felt that you needed a drink, you are not alone. Please test the auto-archiving feature out and check it for yourself !
Welcome to Clutter free inbox days!