We have all been there at one point or the other. You start working on a Microsoft excel file for that important meeting that is scheduled for next week or you are trying to finish up that paper which is due next week on your Word and disaster strikes. For some unfortunate karma, your Mac gives up on you or the Application dies on you. How do you go back and look for these files if you had not saved the latest copy while you were working?
These files are not always the easiest to find and recover. Here are a few tips that may help you in finding these files on your Macbook.
Open your Finder Application on your Macbook.
Step – 1 Press Cmd + F keys to go to the Search Box. Type in This Mac and press Enter.
Step – 2 Go To little gear icon and make sure you check on “Show Search Criteria”.
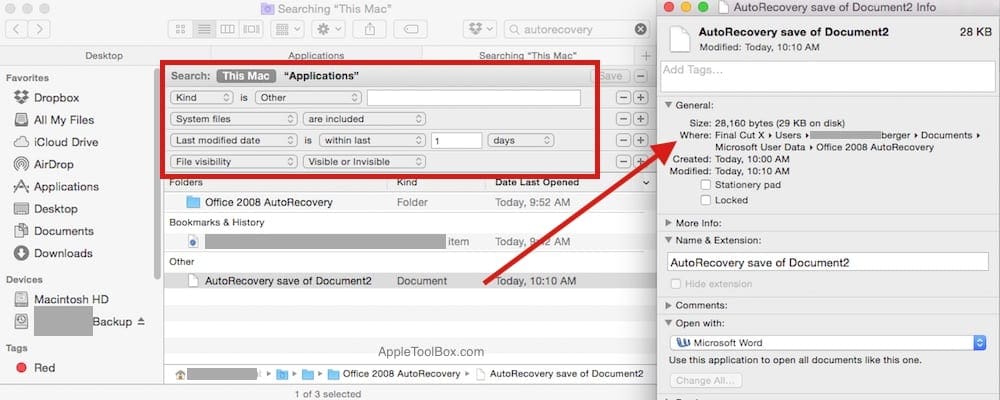
Step – 3 Lets set up the key aspects of your search criteria in order to look for the files. We will start by setting up “Kind” to “Other”. Press the ‘+’ button and next assign “Last Modified Date” to within 1 day.
Step – 4 We also want to make sure that we can get the list of all files that are visible and are hidden. In order to do so, click on the drop down and choose other. Search or scroll down till you find “File Invisible”. Select it and then set it to “Visible or invisible” as shown in the screen shot.
Step – 5 Press the “+” button to open a new criteria. On this one, lets set the kind to system files and flag it as “included”.
Step – 6. Now that the filters are set up, you can search in the search box for your .xlxs or .xlsb files if you lost that spreadsheet. You can also search for autorecovery and it may bring up the copy of the word document that you were working on as shown in the screenshot.
If the document/.docx that you were working on could not be located using the steps above, you can also try to locate the file in the $TMP directory on your Mac. In order to do so, Launch Terminal by Applications > utilities > Terminal. On the command prompt type in the following:
Echo $TMPDIR
and press Enter
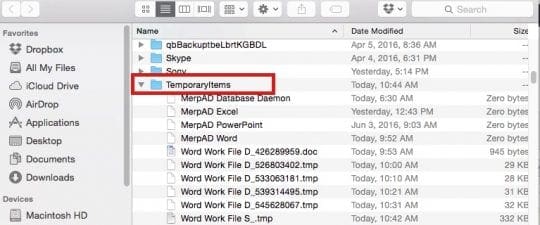
Next, type open $TMPDIR to open and browse the temporary folders. Usually the folder titled “Temporaryitems” will often house your document.
Please note that not all documents may be recoverable. It is therefore important that you take the steps and time to save your documents while working on the draft.
Most Windows and Mac editions of Microsoft Word include a setting that automatically makes a backup copy of a document.
This backup copy is one version back from the currently saved version of the document, so it will show the contents as they were just before your most recent save of the “live” file.
On the Mac, going to the Word menu to Preferences and clicking the Save icon gets you to the backup-copy checkbox in some versions of the program. Here you can set the time interval that you want the autorecovery feature to use to save your document. This is definitely a good idea to explore before you are hit with the next MS-Office disaster.
Please let us know if you have found other ways to recover a lost or unsaved document on your Macbook.