There are many times when we have to restore our iPads due to critical errors. You frequently encounter these errors after updating the iPad software. But occasionally, we see the message “iPad could not be restored.” So what gives??
Contents
Related articles
- How To Set Up An Appointment At An Apple Store
- iPhone X Series Apps Won’t Load After Restore, How-To Fix
- iPhone Stuck On Updating iCloud Settings During iOS Install or Restore?
- How to Successfully Restore an iPad to Factory Settings — A Complete Guide
Why My iPad? Why Now?
Sometimes this happens when you have updated an older model with the new iOS update, and at other times it happens because of a faulty connection or a faulty cable.
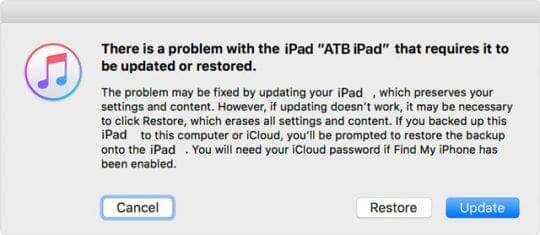
In either case, Apple is quick to point out saying that “ There is a problem with the iPhone/iPad, that requires it to be updated or restored.”
When you try to restore the iPhone or iPad, you get this weird error message that says iPad could not be restored as no device found.
To fix this problem, you may have to try the steps below a few times before it works. (Particularly the steps 4, 5 and 6)
What to do when your iPad cannot be restored?
First, Perform a Forced Restart
- On an iPhone 6S or below plus iPads with home buttons & iPod Touches, press Home and Power at the same time until you see the Apple logo

- For iPhone 7 or iPhone 7 Plus: Press and hold both the Side and Volume Down buttons for at least 10 seconds, until you see the Apple logo
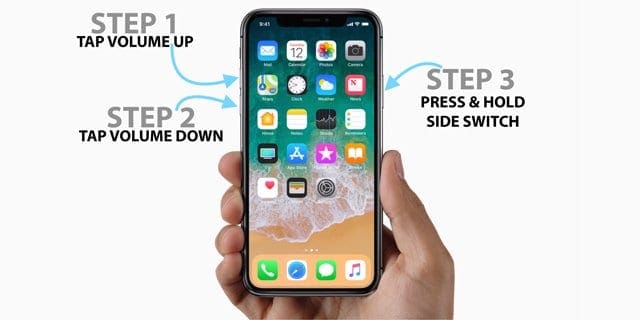
- On an iPad without a home button, iPhone X Series, or iPhone 8 or iPhone 8 Plus: Press and quickly release the Volume Up button. Then press and immediately release the Volume Down button. Finally, press and hold the Side button until you see the Apple logo
Next, Connect your device to your computer using a USB cable
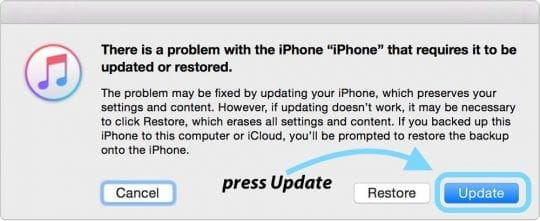
- When iTunes asks you to update or restore, click Update. This action reinstalls your iOS and keeps your personal data intact
If That Failed, Troubleshoot Your Connection to the Computer First
- First, try a different charging cable and/or a different USB port on your computer and then go through the process again. It’s surprising how many problems are cable or port-related! Reader Craig suggests you try a USB port that is NOT a powered one. He tried this only the non-powered USB port worked.

MacBook users are experiencing problems with their USB-C connections - Restarting both your device and your computer also often work.
Have you turned it off and on again? This trick really does work a lot of the time! - If changing your cable or USB port didn’t help, try another computer (Mac or Windows PC) and see if that makes a difference. Ask a friend, family member, or use a computer at work or school and see if that makes a difference.
If that didn’t help, follow these additional steps
Step – 1 Turn your iPad off completely.
Step – 2 Make sure your PC/Mac is running the latest iTunes. You can always find the latest version of iTunes at Apple’s site by clicking here.
You can go to iTunes on your computer and click on Check for updates. If there the latest update is available it shows you the message and asks you to update your iTunes.
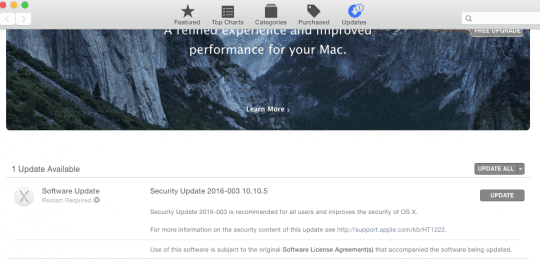
Step – 3 This step is also an essential iTunes troubleshooting step. This requires that you check if your computer is running the latest Operating software.
If you are using a Mac, it is easy to check this. Click on the Apple Menu > App Store.. > Click on Updates. You should be able to see the latest macOS that is available to you to update your Mac.
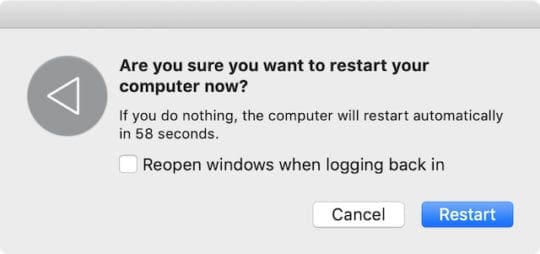
If you do decide to update your software, please make sure that you backup first and then restart your computer.
Step – 4 Remove any USB devices connected to your computer other than the basic devices such as your keyboard / mouse etc. Now, connect your lightning cable (NOT YOUR IPAD–YET) to USB on your Computer. 
Step – 5 *Important Step*. Please make sure that you press and hold the power button on the iPad. Now connect the cable to your iPad while continuing to press the power button. Release the power button once your computer recognizes your iPad.
Step – 6 Next, you can do the restore.
Please note that you may have to the steps a few times before it actually works.
Try recovery mode
Another option if the steps above did not do the trick is to put your device in recovery mode and set it up again.
Check out this article for detailed steps for putting your iPad into recovery mode. It also outlines how to do a DFU restore, if necessary.
Follow these quick steps for iOS recovery mode
- Update the computer you use to the latest version of iTunes
- If iTunes is already open, close it
- Connect your device and open iTunes
- While your device is connected, force restart it (follow directions above) BUT don’t release the buttons until you see the connect to iTunes screen appears

- When you see the option to Restore or Update, choose Update
- iTunes tries to reinstall iOS without erasing your data
- Wait for iTunes to download the iOS for your device
- If downloading takes more than 15 minutes AND your device exits the connect to iTunes screen, finish downloading, then repeat step 4 again
- After the update completes, set up your device
- If you cannot get this to work by choosing Update, try to Restore instead
Wrap up
Please let us know if this fixed your issue. If these steps did not address your issue, you might have to take your iPad to an Apple Store and get it checked out.
Check out this article to learn how to set up an appointment at an Apple Store to see if they can help.