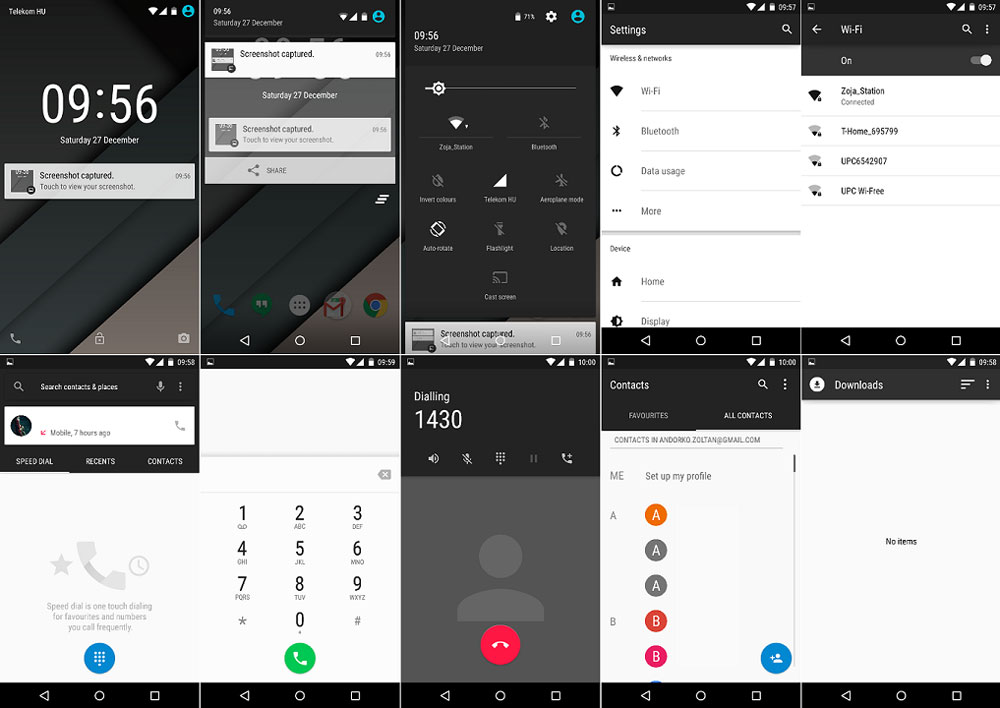
Themes are something that all Android users can install on their devices to completely change the user interface of the operating system. With each new version of Android OS, it has become easier and easier to customize devices.
Developers have added in number and each device has more mods, themes and custom ROMs. There are multiple ways of customizing your smartphone. You can install third-party launchers, icon packs, ROMs, and most importantly, themes.
Also Read: How To Enable Surround Sound Effect on Nexus 5 Speakers
If you are interested about third-party launchers, here’s an article about best launchers and how to install them on 5.0 Lollipop and other versions of Android. But if you are interested in themes, Elixium is one of the best and most elegant theme for the Nexus 5 and Motorola Moto G.
There are a plethora of themes that you can install on your Google Nexus 5 and Moto G, but one of the best one is without any doubts, Elixium. It is simple, minimal, stylish and makes the operating system user interface a lot better.
Here are all the system files that have been modified:
- Framework-res
- SystemUI
- Settings
- GoogleContacts
- GoogleDialer
Elixium is a simple, elegant and minimal theme for the Nexus 5 and Moto G which makes the phone look better.
It makes the user interface darker and removes a lot of unneccessary elements which shouldn’t really be there as they add no value to the user experience.
If you are an Android user who is looking for a good theme for their devices, Elixium is the way to go.
Also Read: Install Custom Boot Animations on Moto G (Flashable ZIP)
How to install Elixium theme on Moto G (XT1032) and Nexus 5
- Download Elixium theme for Nexus 6 and Moto G.
- Install a custom recovery if you haven’t already. TWRP is recommended.
- Turn off your phone and go to recovery mode.
- Make a system backup
- Flash the theme zip file.
- Wipe cache.
- Reboot phone.
Wait for the phone to boot up and enjoy the new theme. If you don’t like the new UI, turn off your phone again, go to recovery and restore the system backup that you have previously made.
