On the Surface, Apple’s new iOS 10.3 may appear to lack a lot of bells and whistles, but in reality, it’s a pretty sizeable update to the iOS ecosystem. This update is the first iOS to feature Apple’s propriety file system (APFS). And this update gives us great tools to help manage your Apple ID using iOS 10.3 new features!
Related Articles
- How to Log Into iCloud.com
- Apple ID Disabled? How to restore an Apple ID
- How to Delete An Apple ID
- Essential Tips for iCloud.com
Contents
- 1 How-To Be A Better iDevice Account Manager
- 2 Seven Tips to Manage Your Apple ID Using iOS 10.3
- 2.1 Tip # 1 Verify all the trusted devices linked to your Apple ID
- 2.2 Tip # 2 Manage Apple Announcements and Apple News Updates
- 2.3 Tip # 3 Manage Trusted Phone Numbers associated with your Apple ID
- 2.4 Tip # 4 Understand your iCloud Usage and easily upgrade your storage plan
- 2.5 Tip # 5 Obtain a Quick Overview iCloud storage used by Your Mac Desktop
- 2.6 Tip # 6 Verify Your Payment Information along with Shipping Address
- 2.7 Tip #7 Verify Apps that have been set up for Automatic Download on App Store
- 3 In Summary
How-To Be A Better iDevice Account Manager
First of all, Apple has dramatically simplified Apple ID account management with iOS 10.3. And that’s good news. In this article, we focus on seven easy things that you can do using this simplified Account Management setting.
Let’s get started….
Your New Apple ID Profile Section
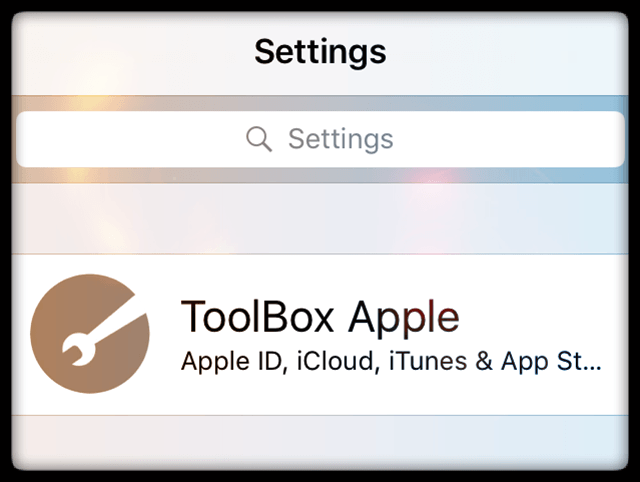
After you install iOS 10.3, Tap on Settings to review your new account management section. You’ll immediately notice the difference from your previous iOS version.

The first thing that you see in the new iOS is that your Apple ID is at the top of this section. You can now do a lot of things right from here without having to go anywhere else or search inside settings.
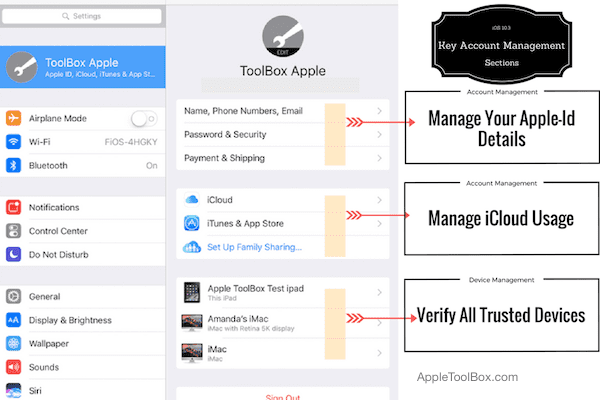
Tap on your Apple ID under the search box in settings to get started. There are essentially three key sections in this area.
Seven Tips to Manage Your Apple ID Using iOS 10.3
Tip # 1 Verify all the trusted devices linked to your Apple ID
The new setting allows you to see all the trusted devices that you connected to your Apple ID. You see all these devices listed at the bottom of the screen.
Tap on any one of these devices and check if you turned on Find My iPhone (or other Apple Product.) And verify it’s set to perform iCloud backups.
The device info section also confirms if you set it up to receive verification codes for two-factor authentication.
Tip # 2 Manage Apple Announcements and Apple News Updates
With iOS 10.3, you can use this new setting to manage all Apple announcements and product recommendations that come to your e-mail.
Tap on Name, Phone Numbers, Email in the top section.
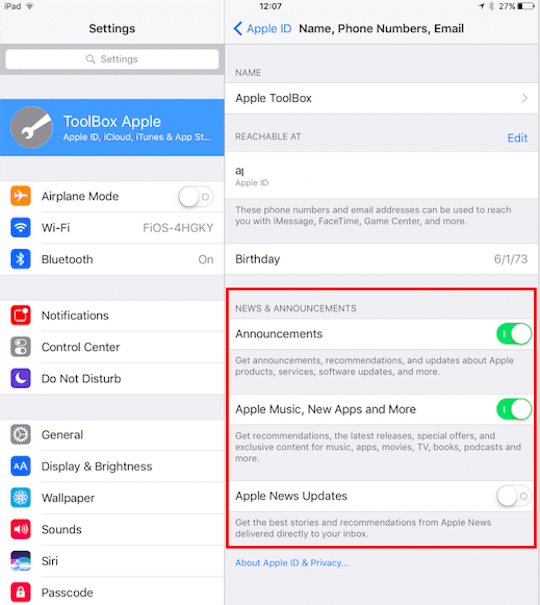
On the next screen, scroll down to News and Announcements section and enable or disable features related to Apple communication and Apple News.
This section is an easy place to manage all the communication that you receive from Apple including news stories from Apple News and other things that show up in your email inbox.
Tip # 3 Manage Trusted Phone Numbers associated with your Apple ID
Tap on “Password and Security” on the main screen of this setting, and you see the list of trusted phone numbers related to your Apple ID. This shows you if you have two-factor authentication set up for your account.
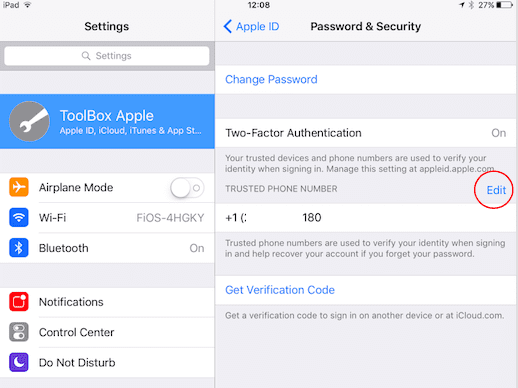
Tap on Add Phone Numbers to add in other numbers where you would like to receive the verification codes associated with 2FA (Two-Factor Authentication) setting. If you are using two-factor authentication, this makes it very easy for you to edit and add new phone numbers to receive the verification codes.
Take time to set up other trusted numbers for your Apple ID if you are using 2FA. This is a time saver and mitigates a lot of recovery headaches down the road.
By tapping on “Get Verification Code,” you receive the verification code from Apple.
Tap on Settings > Apple ID > Password and Security> Manage Passwords to make changes to the password associated with your Apple ID.
Tip # 4 Understand your iCloud Usage and easily upgrade your storage plan
With iOS 10.3, Apple offers a simple eye-pleasing graphic that shows how much iCloud storage you currently use and for what purpose. Tap on iCloud, and the next screen highlights your iCloud usage details.
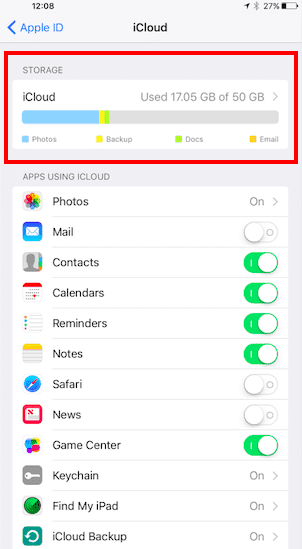
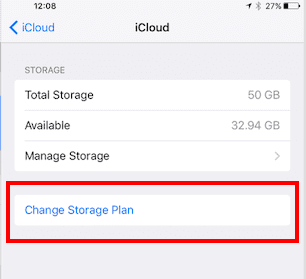
Tapping on the iCloud graph itself shows you various options on how to manage your iCloud storage. Select “Change Storage Plan” to easily upgrade your iCloud Storage.
Using the iCloud section here, you can also easily manage and set up various apps to use or not use iCloud, enable or disable your iCloud drive and manage settings related to Share My location.
Tip # 5 Obtain a Quick Overview iCloud storage used by Your Mac Desktop
If you are using a Macbook running Sierra and it is set up to store your desktop to iCloud, you can easily verify the documents and the space that they are consuming on your iCloud.
To do this, tap on iCloud > Manage Storage. Next, tap on Other Documents under DOCUMENTS & DATA and choose Desktop. This shows you all the documents that you have in your iCloud from your Macbook’s desktop.
Tip # 6 Verify Your Payment Information along with Shipping Address
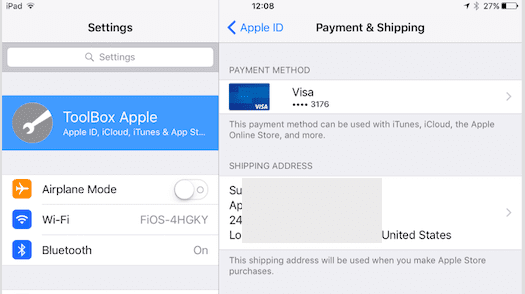
When you tap on “Payment and Shipping” associated, you see your current payment method and shipping address that you previously set up for your Apple ID. From this location, manage your credit card details and any changes to your shipping address.
Tip #7 Verify Apps that have been set up for Automatic Download on App Store
Tap on iTunes and App Store associated with your Apple-Id, and you will see the list of Apps that have been set up for Automatic downloads. You can enable or disable each of these apps including updates.
The centralized account management setting introduced in iOS 10.3 also allows you to set up family sharing, and make changes to the picture associated with your Apple ID. You can get started on setting up family sharing by clicking on “Set up Family Sharing.”
Changing your photo associated with your Apple Id is easy as well. Just tap on the current photo at the top of the screen, and you can take a new photo or choose an existing photo for your Apple ID.
In Summary
These features are not new to iOS by any means. You were able to do all of these in earlier iOS versions. We just like the fact that Apple has moved the core elements of account management into one central place. This makes it way easier to manage things associated with your Apple ID.
We wish that this Account Management Section had a quick way to verify and manage all our subscriptions, previous app purchases, and in-app purchase history. That would be super cool and would make life much easier for us regular iFolks.
So, what do you think of the new iOS 10.3 so far?