One of the frequent questions we get from our readers is how to sort songs in the Apple Music App. Surprisingly, Apple does not make it easy to do some of the most common things we use our iPhones and iDevices for–listening to (and managing) our music! 
Contents
Related Article
iOS Music App – Repeat, Shuffle, and Up Next
To access the Repeat, Shuffle, and Up Next Functions, just swipe up on the screen. If you don’t immediately see Shuffle or Repeat, scroll up to look at these functions, along with a list of what’s Up Next!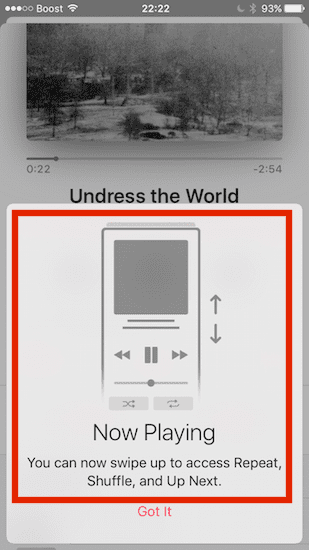
How-To Sort Songs on Your Apple Music App
In earlier versions of iOS, you set your music sorting options in Settings > Music. Starting with iOS 10.2, Apple moved these options to the Music app itself.
From your main Library screen in the Music app, tap on Songs or Albums. Find the Sort function in the top right corner of your screen. Tap on Sort, and you choose to select the sorting either by the Title or the Artist.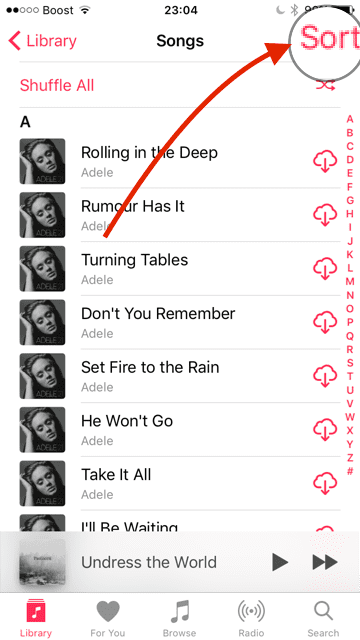
What About Sorting Playlists?
In the case of Playlists, iOS allows sorting either by the Playlist Type, Title or Recently Added.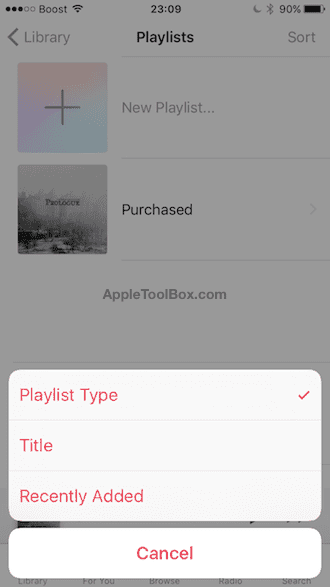
That’s not a lot of options!
Using Apple Music? Sort Your Playlists in iTunes!
If you subscribe to Apple Music, a better way to manage your playlists is via iTunes. First, make sure you are signed in with the same Apple ID on your device(s) and iTunes. And don’t forget to enable iCloud Music Library by going to Settings > Music > iCloud Music Library > On for iDevices and iTunes > Preferences > General or Edit > Preferences > General for your Mac or Windows PC. Don’t forget to enable iCloud Music Library on your devices and iTunes–this step is critical! 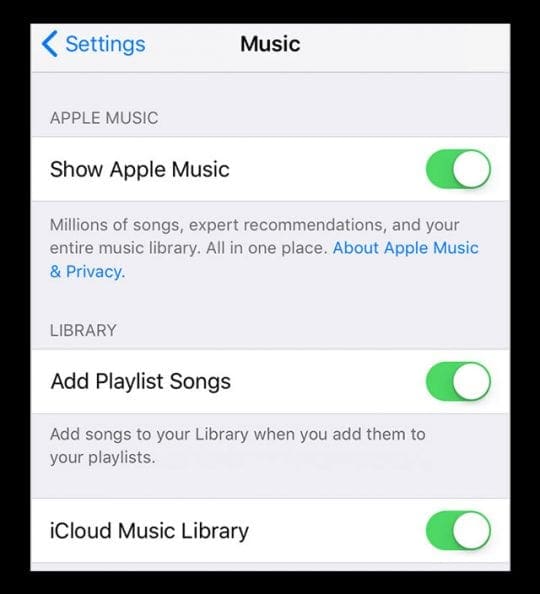
Once iCloud Music Library is turned on, any changes you make to your music library sync across all your devices (as long as you sign in with the same Apple ID.)
Turning on iCloud Music Library for the First Time?
- Already have music on your device? You get options to keep or remove and replace
- When you choose Keep Music, iOS adds your device’s music to your iCloud Music Library
- If you choose Delete & Replace, your music is replaced with the music from your iCloud Music Library
Create or Change an iTunes Playlist
- For New Playlists
- Choose File > New > Playlist
- Type a name for the playlist
- Click Edit Playlist
- To add items, drag the new items to the playlist on the right
- When you’re finished adding items, click Done
- Edit a Playlist
- Select the playlist
- Add items: Click Edit Playlist, drag items to the playlist on the right, then click Done
- Change the order of songs: Drag the songs into the order you want. If you can’t drag a song, click the column heading above the numbers
- Remove an item: Select the item and press the Delete key (this does not remove the item from your library or storage device)
Sort Apple Music Songs with Copy To Play Order
- Open iTunes and right-click your selected playlist and arrange the Play Order that you want
- Select the leftmost column of numbers to reveal the current play order. Then, drag your tracks up and down this list to rearrange them or use one of the other column headings to sort things
- Select Copy to Play Order to set the default order for this list when copied to a device
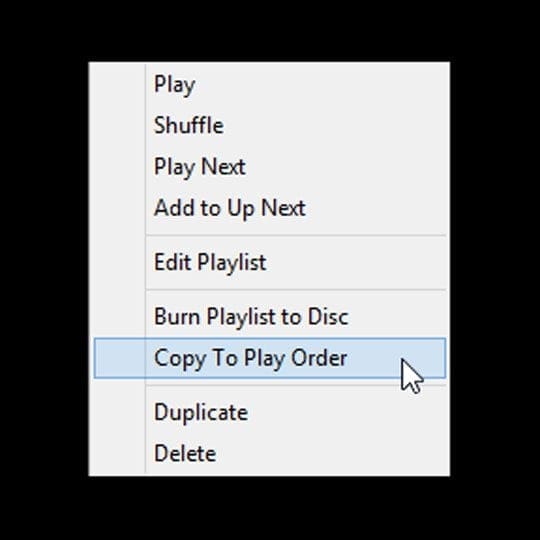
When you copy a playlist to a device, the tracks are ordered according to that new Play Order. Sorting the playlists the way you want in iTunes and then syncing with your iPhone (or another iDevice) changes the order of the tracks. As long as iCloud Music Library is turned on, Apple Music automatically rearranges that playlist’s songs based on the order you set in iTunes to all your devices.
Sort iTunes Smart Playlists
- Right-click on a smart playlist and select Edit Smart Playlist
- A new window opens displaying all the rules that particular smart playlist uses
- Select the box that says, Limit to (choose a number) items selected by (select preferred sorting type–like artists)
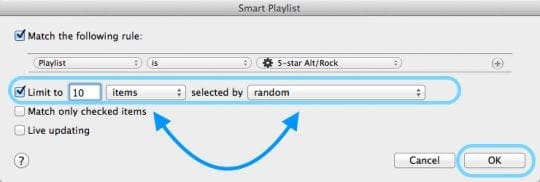
- All your iCloud Music Library connected device should sync to your preferred sorting order on this smart playlist