
On January 5, 2000, Steve Jobs announced a new service called iTools, a collection of free internet based tools for Mac users. The service re-launched on July 9, 2008 as mobileMe, a suite of paid services for Apple devices, including the iPhone, iPod, and Mac.
mobileMe was a bit ahead of it’s time, allowing users to do things like back-up files to the cloud and create photo libraries on the web. Apple acknowledged this and when it was finally time for mobileMe to become something most users could take advantage of, it was rebranded iCloud.
iCloud is a series of cloud services offered by Apple that are now an important part of the Apple experience. Enabling iCloud not only allows you to get your information anywhere, it also allows your devices to connect to one another with features like Handoff and Continuity.
Here is everything to do in iCloud and how to use it:
Contents
System Requirements
iCloud is included for no charge with every Apple account, and comes with 5GB of storage. To use it, your device must be running iOS 5 or later and be on OS X Lion 10.7.5 or later.
To enable iCloud on your iOS device, head into Settings, select iCloud, and sign in.
To enable iCloud on your OS X device, head into System Preferences, select iCloud, and sign in.
iCloud can also be accessed through the web, but will require a compatible web browser. Some features may not be available if you are running an older OS.
Additionally, iCloud can be installed on Windows machines with the iCloud control panel. This requires Windows 7 or later.
Storage
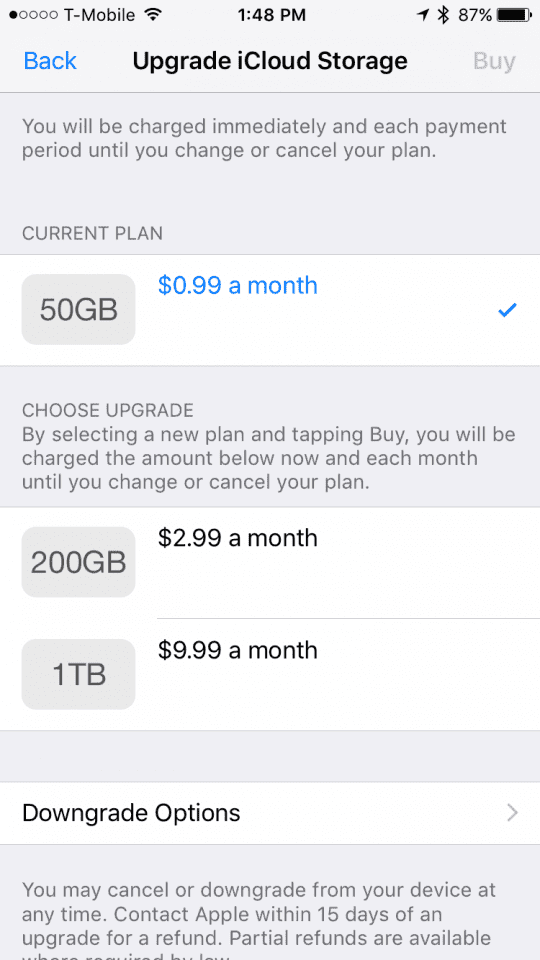
Again, most features of iCloud require iCloud storage, and the more devices you have, the more likely it is you’ll need to but some more storage. The pricing for storage is as follows:
50 GB – $0.99 a month
200 GB – $2.99 a month
1 TB – $9.99 a month
All accounts come with 5 GB free of charge. Please check our post to see a step-by-step guide on how you can set up your free 5GB storage.
Find my iPhone

One of the most important features of iCloud is Find my iPhone. This feature allows you to track any iOS device at any given time. To enable this feature, head into your iCloud settings, select ‘Find my iPhone’, and turn it on.
If you are ever in a situation were you have lost your device, you can easily find it assuming it is connected to the internet. To access the Find my iPhone control panel, grab an iPhone and open the Find iPhone app or log into iCloud.com and select ‘Find my iPhone’.
Once here, you’ll be given a list of devices. Clicking on one will give a number of options:
Play Sound – This will allow you to play a sound on the device at full blast in order to locate it.
Lost Mode – This will tell Apple the device is lost, and give you a notification whenever it is spotted. This will also allow you to leave a message on the device for whoever spots it.
Erase Device – For last resorts, iCloud can attempt to completely erase the device remotely.
Additionally, if you are using the phone app and it finds your device, it will give your driving directions to find it.
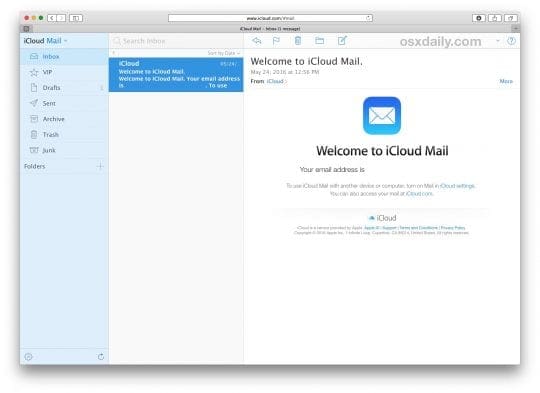
Beyond cloud storage, iCloud also is a full-blown email service, allowing you to create @icloud.com email addresses. The advantage of using an iCloud email is that it is made to work and sync with Apple’s mail app.
To create an Apple email, log onto iCloud.com and click on Mail. You will be prompted to make an iCloud email. Once created, you can access your email via the iCloud website and the Mail app on your Apple devices.
Backup
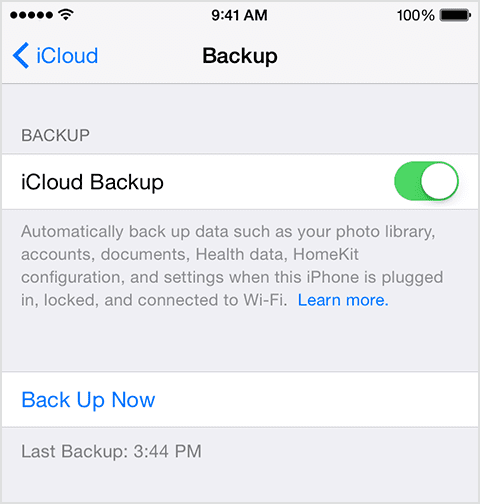
It is always important to have an up-to-date backup of all your devices, no matter what they are. iCloud makes this job super easy.
On any iOS device, click on Settings, then iCloud, and then Backup. Here, you’ll see the option to turn on iCloud Backup. Once turned on, iCloud will automatically back up your device when it is plugged in and on Wi-Fi, and if you ever need to restore or get a new device, you can sign into your iCloud account and restore through the internet.
Backups are often confusing for many users. It’s actually super easy. We have created a comprehensive iOS backup guide that provides you with a step-by step guide on how to set it up on your iPhone and iPad.
iWork

iWork, Apple’s suite of office tools, has long been available on OS X and iOS. But with iCloud, you can sync your documents seamlessly between devices, and even edit on any computer using the iWork for Web on iCloud.
When your first launch any of the iWork apps – Pages, Keynote, and Numbers – on any iOS or Mac device, you’ll be asked if you want to use iCloud for saving documents. Once this is turned on, you’ll be able to find all of your files locally in the iCloud folder/app, but also on the web via iCloud.com
By visiting iCloud.com, you’ll now see Pages, Keynote, and Numbers apps, all optimized for the web. The iCloud.com is best experienced using a computer. You can also learn how to use it on your iDevice by checking out our popular post.
iCloud Photo Library and Photo Stream

Photo Stream is a feature for iCloud that allows you to sync pictures into a special “Photo Stream” folder, automatically making that picture appear on all your iCloud enabled devices.
iCloud Photo Library, on the other hand, will sync your entire library to the cloud, and make it available on any device. While some users may be worried that this may lead to having to wait to see pictures, iCloud intelligently downloads smaller version of the photos, and quickly downloads them one at a time when you go and view.
To turn on iCloud Photo Library or Photo Stream, launch your Settings/System Preferences, click on iCloud, and then Photos. Your photos will automatically be uploaded.
If you have had issues in setting this feature up or need to refresh your basics around iCloud Photo library, we have got you covered. Please check out comprehensive step-by-step coverage of iCloud Photo Library.
If you want peace of mind by creating a backup of your precious photos into a thumb drive or external drive from the iCloud, you can learn about how to achieve it by checking out our post.
iCloud Music Library
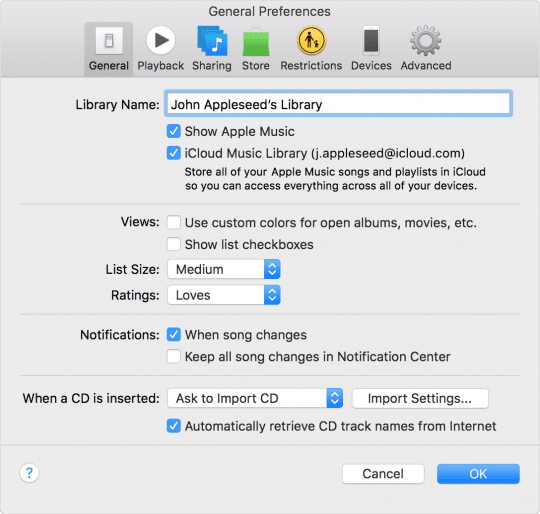
iCloud Music Library, a feature alongside Apple Music, allows you to create one content library and sync it across all your devices.
To turn it on, open your iPhone, click on Music, and turn on iCloud Music Library. On Mac, launch iTunes, click on ‘iTunes’, then Preferences, and check on iCloud Music Library.
Note that this feature does require an Apple Music subscription.
Once turned on, any sound you add from Apple Music on one device will be added on all, and, any song you add personally, whether it be something available on iTunes or not, will also automatically sync.
Find my Friends

Find my Friends allows you to select certain contacts to have your location at all times. This is particularly useful for families and relatives who you need to keep an eye on.
To turn on Find my Friends, launch the Find Friends app on your iOS device. Here, you’ll automatically see a list of family members on your iTunes account and the option to share your location, but you can also add people via there Apple IDs.
iCloud Drive

Possibly the most important iCloud feature, iCloud Drive is what you’d expect from a traditional cloud-storage service. This is where all your documents rest in the cloud.
All Macs with iCloud turned on will automatically gain an iCloud folder in the Finder sidebar, which contains all of their information. On newer iOS devices, the iCloud Drive app is pre-installed. Once in the app, you’ll see a library of all your cloud content, including folder for specific apps including the iWork suite.
With macOS Sierra, launching this fall, iCloud Drive will become infinitely more useful with a new feature that allows you to sync your Mac’s Desktop and Documents folder across all devices. We’ll update the guide with more, once the OS launches.
Family

iCloud allows you to add family members and share things like location, purchases, and payment with one another. To turn this on, go into your iCloud preferences and click Family, or on Mac click ‘Manage Family’. Here, you can add members by Apple ID. For a detailed guide around how to set up Family sharing, please check out our coverage on mastering this feature.
We hope this post provided you with a good understanding of some of the key and useful iCloud features. Please let us know in the comments below if there are any other topics that you would like us to cover on this subject. You can also check out our troubleshooting guides on iCloud if you have any problems while using the features.