The iPhone and iPad are powerful devices that do a lot of things. Being young and invested in technology, relatives and family friends often ask me how to do something on their phone. And I’m usually able to answer them pretty easily. Sometimes, however, I’ll notice a relative doing something completely unnecessary, like emailing a photo to themselves or plugging their phone into their computer to backup, that gets me to explain some even cooler tricks to them. These devices do a lot, but it’s hard to know everything they’re capable of. Here’s 7 tips and tricks for your iPhone or iPad that your kid probably never taught you
Contents
Tips Your Kid Never Taught You : Do Not Disturb
Once a couple years back, my Dad complained that I had texted him at three in the morning (not anticipating a response until morning) and it woke him up. I asked “Who leaves their phone’s ringer on at night”? And he replied that he needed to to use the alarm.
This is when it became clear to me that many people still don’t know that they can use “Do Not Disturb”, a feature introduced in iOS 8, to leave their alarm fully on while silencing all notifications, except for emergencies.
To Turn on Do Not Disturb, go into your Settings, and click on ‘Do Not Disturb’.
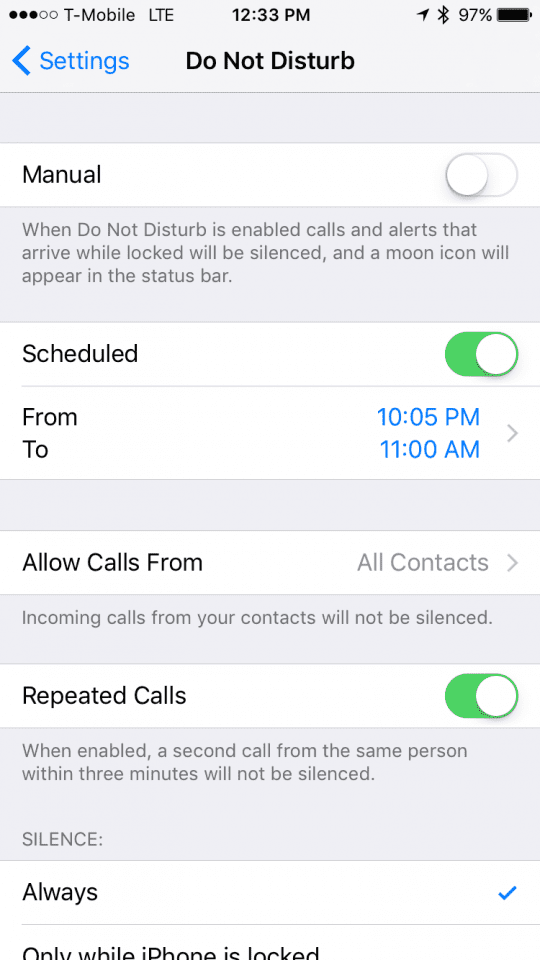
Here, you’ll see a number of options, and the first one you should head to is “Scheduled”. Here, you can set a time frame for all notification noises and vibrations, including messages and phone calls, to be completely silent during this time period.
Right below that, we see “Allow Calls From”. Here you can set which numbers will not be included in the ‘Do Not Disturb’ mode and will continue to go through.
Next, we have “Repeated Calls” which will allow all calls by the same person three times in a short period will automatically go through, as it will be assumed to be an emergency.
The last setting we see is ‘Silence’, which will allow you to leave Do Not Disturb on throughout the period you’ve set, or only when your iPhone is locked.
Do Not Disturb can also be enabled and disabled manually at any time by swiping up on Notification Center, and clicking on the moon in the top row.

Tips Your Kid Never Taught You : Night Shift
Keeping inline with the iPhone at night theme, Night Shift is an incredibly useful feature introduced in iOS 9.3 that changes the Color Hue’s after a certain time to reduce strain on eye sight before sleep.
To turn on Night Shift, go into Settings, click on Display and Brightness, and click on Night Shift. Here, you can set a time for Night Shift to turn on, or you can choose for it to automatically go on at sunset and off at sunrise every night.
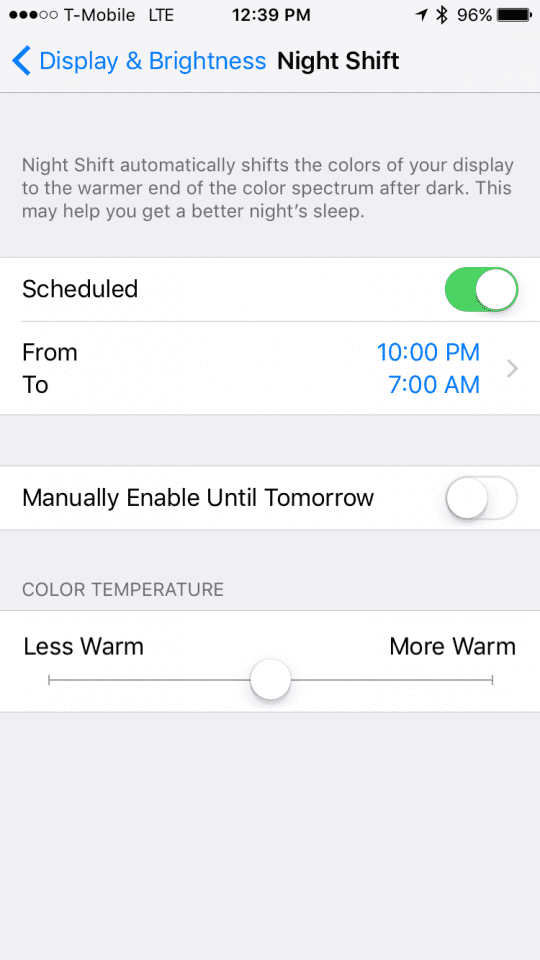
Right below that you can enable it temporarily, and you can change the color temperature to something you’re comfortable with.
AirPlay
I was once visiting a close family friend to help her out with a few things, and I noticed that she had Apple TVs throughout her home. I asked her if she liked them, and she explained she could never get them to work.
It turned out they all needed to be updated, but once they were she still had little idea of what to do with it. She mainly wanted to use it to display pictures on her TV, but I showed her it can do much more.
With AirPlay, your iOS device can send content directly to your Apple TV, and there are a few ways to use it.
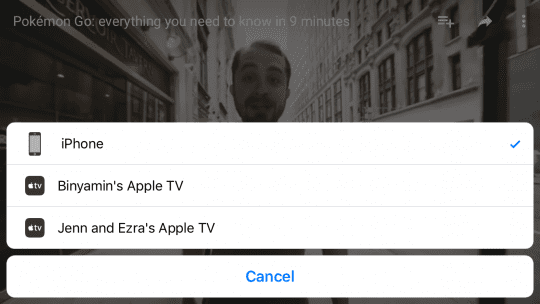
The first is when you are watching something on your phone, like a video, or listening to a song, and you see a little AirPlay icon. Simply click on that icon, select your Apple TV, and it will automatically send it over.

The second is AirPlay mirroring, which can be enabled by opening control center, clicking AirPlay, selecting your Apple TV, and turning on mirroring. This will mirror your iOS devices screen directly to your TV, allowing you to share anything with the people around you.
if you have tried this feature in the past but ran into some challenges, please check out the easy video below. This will help you get this feature up and running.

AirDrop
A couple week ago, I was out to lunch with some more relatives, this time visiting from out of town, that wanted to take a picture together. The waitress took her phone, captured the picture, and returned the phone. The other relative with us asked to see it, and then said “You’ll have to get me a copy”, and she replied “I’ll email it to you when we get back”. I asked her “why don’t you just use AirDrop”, as they both had iPhones, and she replied “I don’t think I have that”.
With AirDrop you can easily share most content from one iOS device to another, and it couldn’t be more simple.
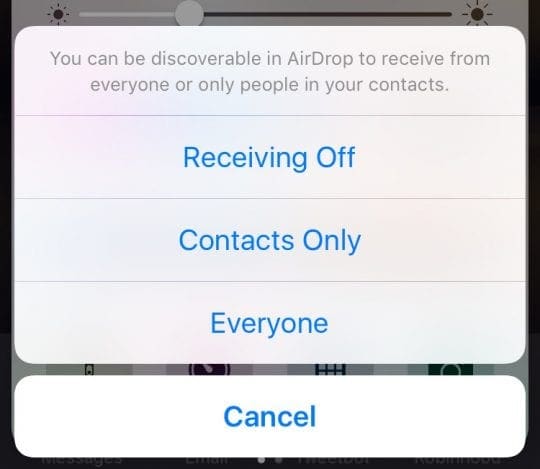
First, open Control Center, and click on AirDrop to make sure it is enabled. You’ll be given options like Contacts Only, and Everyone. Select the appropriate option, and make sure your Bluetooth is enabled.
Next open any piece of content, for this example we’ll use a photo, and select the share sheet. Assuming your contact also has AirDrop turned on and is within distance of you, you’ll see a picture of their face pop up. Push it, and they will instantly receive what you are sending, no email required.

Tips Your Kid Never Taught You : Multitasking
For years, Apple fans complained that the iPad was so much more powerful than the iPhone, but did mostly the same things. With iOS 9, Apple finally responded by bringing multitasking to the iPad, allowing users to run two apps side by side at the same time. I recently told my mother about this feature and she had no idea of its existence.
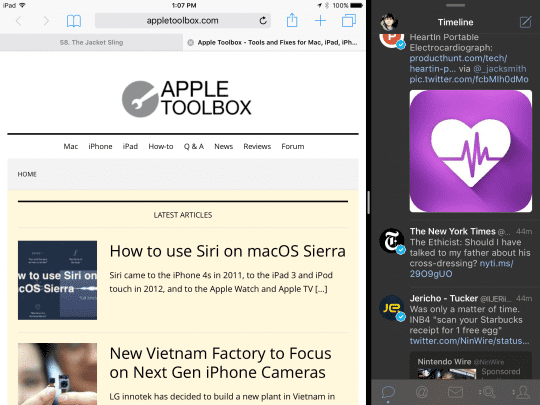
iPad Multitasking is really a very useful thing, and can allow you to do things like paint in a painting app while watching a video, or keeping even keeping your favorite Twitter client open to the side while browsing the web.
iPad Multitasking is automatically enabled and to use it, simple open an app, and then slide your finger from the middle of the right end of the screen towards the left. This should bring up the Multitasking app switcher. Once you’ve selected an app, you can drag the black bar in between to change the sizes of each app.
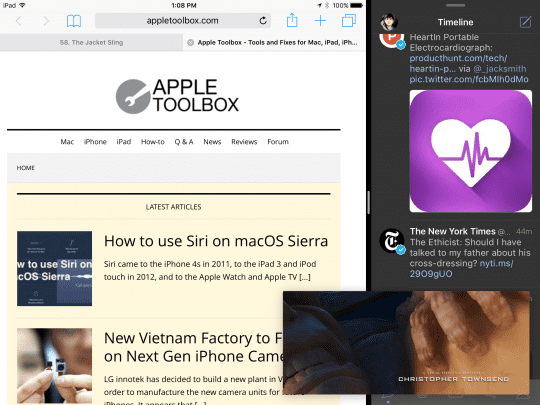
Additionally, you can have one-two apps open, and also have a video playing in the background. To do this, open a video, and wait until you see this icon ![]() . Click it, and the video will pop out and hover over your work as you do other things.
. Click it, and the video will pop out and hover over your work as you do other things.
Orientation Lock
This is a simple one, but one that I’ve seen people be unaware of before and one that is incredibly important, especially if you have an iPad.
Have you ever been laying in around, and held your iPad a certain way that made the orientation change? You can easily turn that off by using a simple button.

Just open Control Center, and click on the little lock with the loop on the first row. This will stop your iPhone or iPad from changing orientations until de-selected.
Tips Your Kid Never Taught You : Third Party Keyboards
Up until iOS 8, all users were stuck with the stock Apple keyboard shipped with their iPhones. Now, however, there are a number of third-party keyboards that can replace your Apple keyboard system wide.
To do this, open the App Store and search for ‘Keyboard’. Here, you’ll see a number a number of third-party options “I personally recommend G-Board”. Select one you like then download it.
Once downloaded, you’ll be guided through a number of steps to fully enable the keyboard, don’t worry, these are standard steps for third-party keyboards.
Once it’s enabled you’ll see a little globe on your keyboard, allowing you to switch between the stock keyboard and the one you just installed.

These are just seven of the many tips and tricks you should know about your iPhone or iPad, the next time you see your kid, make sure to ask him or her to teach you about the more complicated stuff, because the more complicated it is to learn, the more powerful it is.