You press your iPad’s power button (the sleep/wake button), and nothing happens. There’s no apple logo. Your screen locks off. And you quickly learn that your iPad will not turn on.
If your iPad shows a black screen and will not turn on when you press any button, you might think that your iPad is broken and that you now need to replace it. But don’t panic. There are lots of things to do to fix your device. Usually, there is an easy solution. Here is what you can do if your iPad will not turn on or is unresponsive (dead), meaning nothing shows up on the screen (black screen).
Contents
- 1 Quick Tips
- 2 Turn on Your iDevice
- 3 Reset the device
- 4 Charge your iPad
- 5 Try Siri
- 6 Try Burping Your iPad
- 7 Connect to iTunes
- 8 Try Another Computer with iTunes
- 9 Check the iPad Cable and the Port
- 10 No Time? Check Out Our Video!
- 11 iPad Stuck in a Reboot Loop?
- 12 Home Button Not Working?
- 13 Reader Tips
- 14 Contact Apple
Quick Tips 
- Restart
- Force Restart
- Charge using Apple certified charger and cable
- Use Siri to adjust the display
- Use iTunes Recovery Mode
- Try DFU Mode to recover iPad
Related Articles
Turn on Your iDevice
The first thing to do is to make sure that your device is not off. Okay, you probably did try this but just in case. To do this, just press and hold the Side/Sleep/Wake (aka power) button again and KEEP HOLDING until you see the Apple logo.

Reset the device
If the above steps do not fix your iPad will not turn on problems, reset your iPad. There are cases where your iPad freezes entirely or just become severely unresponsive.
Alternatively, perform a hard restart by pressing and holding both the HOME button AND the POWER/SLEEP/WAKE button until the Apple logo appears. Remember, keep holding both those buttons until that Apple logo shows up on screen.
If your issue is on an iPhone or another device with a haptic home button or no home, follow the guidance based on your model:
Perform a Forced Restart
- On an iPhone 6S or below plus all iPads & iPod Touches, press Home and Power at the same time until you see the Apple logo
- For iPhone 7 or iPhone 7 Plus: Press and hold both the Side and Volume Down buttons for at least 10 seconds, until you see the Apple logo
- On an iPhone X or iPhone 8 or iPhone 8 Plus: Press and quickly release the Volume Up button. Then press and promptly release the Volume Down button. Finally, press and hold the Side button until you see the Apple logo
Once you see the Apple logo, it remains there for a few seconds, and then your iPad should return to normal again.
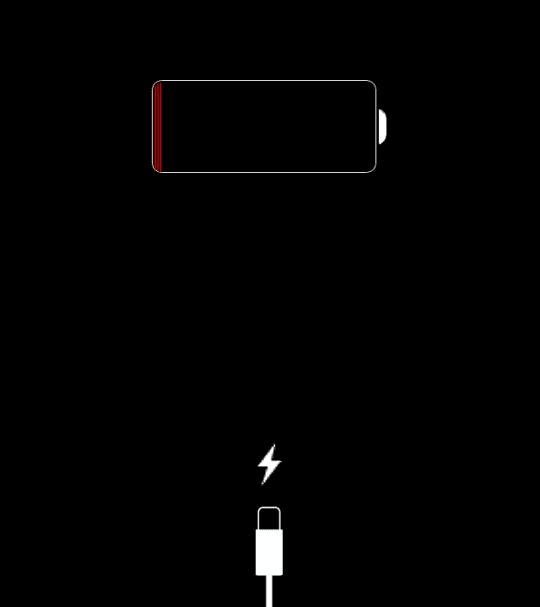
Charge your iPad
Sometimes, when you try to turn on your iPad and your iPad, it just doesn’t power up at all. If it doesn’t show anything except a black screen, then most likely your tablet just ran out of battery. All you have to do is connect your iPad to a wall charger for at least 1 hour, preferably more. Make sure you do not use your device during this charging–that’s critical.
Also, some readers report success when charging their iPads (or another iDevice) for a full two days! This case seems especially true for people who recently updated their hardware, like replacing a cracked screen or another hardware update.
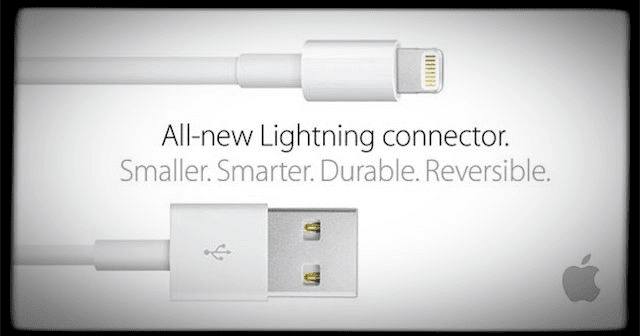
Make sure that your charger and cable is Apple Certified (MFI) and working effectively. Additionally, check your charger model–are you using the correct type of charger for the particular device? Most iPads use 10w or 12w chargers while iPhones use smaller 5 W or even 2.5w chargers. So make sure you choose the right charger for your device. If unsure, visit the Apple Product page for your specific model of iPhone,iPad, or another iDevice.
And rest assured, even if you accidentally charge your iDevice with the incorrect charger–it won’t destroy your device or brick it.
Try Siri
Sometimes, your screen brightness somehow gets set to its minimum, making your screen very dark, looking almost entirely black. If your screen is black, but you still hear sounds and other indications that the iDevice is on then try asking Siri to increase your screen brightness.

So, connect your iPad or iDevice to power and say “Hey Siri.” This command only works if you have “Allow Hey Siri” activated. If “Hey Siri” isn’t enabled on your iDevice, connect to power and press and hold the Home button for 30 seconds to activate Siri or press the side button for iPhone X.
Then ask Siri to turn up your screen brightness, and hopefully, your screen (and your iPad) is back!
If Siri shows up on your iPad or iDevice, that’s excellent news. It means your iDevice is working; you just can’t see the screen. So you’ve isolated the problem.
If Siri is working, but that command had no effect, you may have VoiceOver enabled (Settings > General > Accessibility > VoiceOver.) VoiceOver speaks items on your screen, and sometimes this feature affects your screen. So, again use Siri to disable VoiceOver. Ask Siri to “Turn VoiceOver Off.”
If Siri increased screen brightness to the maximum and turned off VoiceOver, BUT there was no effect, chances are your screen connector cable is loose or disconnected and out of its usual place. Fixing this isn’t difficult but does involve taking the iDevice apart to access that display connector. Contact Apple Support for further assistance or visit a nearby Apple Store or Apple Service Provider. If you are a Do-It-Yourselfer, google this particular problem (screen or LCD connector) to find step-by-step instructions and videos.
Try Burping Your iPad
Okay, it sounds weird, but readers tell us it often works! Burping your iPad (or another iDevice) helps in the situation when cables aren’t making good connections or contacts—like a loose display cable or connector. So if you’re game, here’s how you burp an iPad.
First, make sure your iPad is completely off and grab a towel and cover both sides of your iPad (front and back.) Then turn the iPad, so the backside is facing you, then pat the backside of the iPad as if you are burping a baby—not too hard, not too gentle. Do this for a minute or so and then unwrap the iPad and see if it turns on.
Connect to iTunes
If your iPad’s screen is black, showing the Apple logo, try connecting your iPad to iTunes. First, update iTunes on your computer to the latest version. Then connect your iPad to your computer. If your iPad shows up in iTunes normally without any messages or warnings, that means your device is working, and the most likely culprit is your screen or the display connecting cable. These are hardware problems that need repairs and/or replacement.
Recover and Restore with iTunes
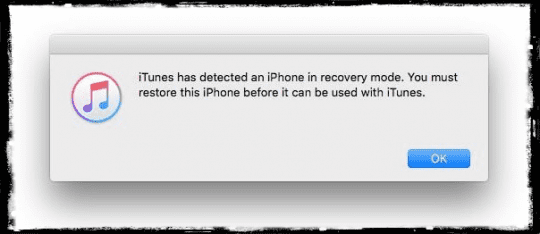
If iTunes shows a message or warning when you connect your device, follow the on-screen instructions to Update or Restore your iPad. It’s possible that a software issue is causing your problem. If so, iTunes attempts to fix it.
If nothing happens when you connect your device to iTunes, try Recovery Mode.
Using Recovery Mode
- Turn OFF your iPad or another iDevice
- Turn ON your computer (make sure it’s running the latest iTunes)and open iTunes
- Connect the Lightning cable to your computer. Leave the other end unplugged
- For iPhone X, iPhone 7/8, and devices without a home button
- Connect your device to iTunes and force restart your device
- On an iPhone X, iPhone 8, or iPhone 8 Plus: Press and quickly release the Volume Up button. Press and immediately release the Volume Down button. Then, press and hold the Side button until you see the connect to iTunes screen
- For an iPhone 7 or iPhone 7 Plus: Press and hold the Side and Volume Down buttons at the same time. Keep holding them until you see connect to iTunes screen
- When you see the option to Restore or Update, choose Update. iTunes tries to reinstall iOS without erasing your data
- For iPads, iPods, and Older Model iPhones
- On the iPad or iDevice, press and hold the Home button and attach the lightning cable AT THE SAME TIME
- Press the Home button until you see “Connect to iTunes screen” on your iPad OR until iTunes detects your iDevice
- After iTunes detects your device, a message pops up letting you know that iTunes has found a device and is currently in recovery mode
- Follow any on-screen directions
Restoring your iPad from iTunes may lead to data loss. Hopefully, you have a backup available via iCloud or iTunes (or another backup option of your choice.) If you do not have a backup, your current data might be lost for good.
Don’t know where iTunes stores your backups? Head over to this tutorial to find out.
Sometimes, while restoring using iTunes, you might get a weird error saying that “iPad Could not be Restored, No Device Found.” If you see this message, check out our article for a step-by-step guide to solving this problem and restore your iPad.
If you do not see your iPad in iTunes, consider putting your iPad into DFU Mode
DFU mode is a mode where the iPad is forced to restore the firmware. Getting your iPad into DFU mode is a little challenging, requiring patience and practice. Timing is essential when placing iDevices into DFU mode so carefully follow the instructions.
Try Another Computer with iTunes
Are you unable to restore your device or enter DFU mode? It might be worth trying another computer with iTunes installed. There could be a driver problem which prevents your computer from recognizing your iOS device. Reach out to that special friend of yours and check your iPad or iDevice out on his or her’s computer.
Check the iPad Cable and the Port
We have seen that sometimes when your device is old, and your cable connector is worn out, you may have the issue. This happens because your iPad is not getting the charge it needs from your old cable. Use a wall power outlet and check for firm connections between your charging cable, USB wall adapter, and wall outlet, or try a different outlet.
With older devices, you may also want to check out the charging port and make sure that there is no debris in the port. Remove any debris from the charging port on the bottom of your device by using a Q-Tip, plastic paperclip, or toothpick, then firmly plug your charging cable into your device. If the charging port is damaged, your device probably needs service.
The chances are that your iPad Battery is still functioning and may not need a replacement. If you have tried all the steps and had no success, it may indicate that you are having a worn out battery issue. The best way to confirm this is to check with Apple so that they can run a Battery Service on your iPad. If your iPad is out of warranty, the battery Service costs about $99. Please make sure to try all the above steps before you decide to contact Apple and spend extra.
No Time? Check Out Our Video!

iPad Stuck in a Reboot Loop?
If your iPad starts to boot but then flashes to a black screen over and over again, it’s locked into a Reboot Loop. The chances are that your iPad has so little battery charge that it cannot complete even a startup. Usually, iPads don’t ATTEMPT to restart until there is enough battery power. But for the unlucky few, something is telling the iPad to try to boot even though the battery can’t last long enough to finish the process. Hence, the loop you experience–charging a little, attempting a boot, shutting off, charging a little, trying to boot and so forth again and again.
We need to get your iPad sufficiently charged to complete a normal and full boot cycle
- Plug the iPad into a power source. Ideally, use the charger that came with your iPad. DO NOT plug it into your computer
- Next, hold down the home button and the power button simultaneously for as long as you possibly can–the longer, the better–and ideally at least 30 minutes to 1 hour. Holding down these two buttons prevents that loop cycle. That allows your iPad to charge up a bit. Think creatively about how to hold these buttons down for a length of time
- As soon as you release these buttons, your iPad tries to boot. If you don’t hold Home and Power long enough for a sufficient charge, that loop pattern continues. So try and hold down these buttons for as long as possible–or create some makeshift tools to assist–just keep these gentle, so they don’t cause other damage
Home Button Not Working?
If your home button is broken or not responding and you’re stuck with a no-responsive iPad (or another iDevice), your best bet is to completely disconnect your iPad from any power source and wait for your iPad to run out of battery on its own. Once that completes, connect via iTunes and try to update or restore.
Reader Tips 
- One reader found success toggling the side button (mute/vibrate) back and forth a few times. Don’t ask us why or how this worked, but for her, that was the trick that did it!
- Another reader tried the following and best of all; it didn’t erase any data! (as a caution, that might not be the case for you)
- Plug your iDevice into your computer via the Lightning cable
- As iTunes opens, press and hold both the power/wake/sleep button and the home screen button
- When the Apple logo appears, release the power/wake/sleep button and then the home button
- This forces a reboot on your connected iDevice. It should boot up normally
Contact Apple
You guessed it correctly; it’s time that you give Apple a call or go to a retail store nearby. If none of these solutions work for you, something might be wrong with its hardware and need replacement. The most common reasons are the backlight on the screen assembly, or the backlight coil on the logic board is damaged.

If you are under warranty with Apple, give them a call or set-up an in-store appointment so for diagnostic services. If you are no longer under warranty, contact Apple and find out what options are available for you.