iPhone, iPad, and iPod touch users are finding they can’t sync their device in iTunes. When trying to do so, they get the following error message:
“The iPhone could not be synced because the sync session failed to start.”

What’s going on? Why is my iPhone not syncing with iTunes? And why does the iTunes sync session fail to start?
We’ve put this post together to give you answers to all those questions and, most importantly, to tell you how you can fix it.
Contents
- 1 What happens with this iTunes error?
- 2 Why does the iTunes sync session fail to start?
- 3 How do you fix iTunes not syncing with your iPhone, iPad, or iPod touch?
- 3.1 1. Close every app and force restart your device
- 3.2 2. Restart iTunes while your device is connected
- 3.3 3. Delete your device backups from iTunes
- 3.4 4. Update to the latest iOS and iTunes software
- 3.5 5. Test your cables and ports
- 3.6 6. Remove and reinstall iTunes on your computer
- 3.7 7. Restore your iPhone, iPad, or iPod touch using DFU mode
Quick Tips:
- Close every app and force restart your device.
- Restart iTunes while your device is connected.
- Delete your device backups from iTunes.
- Update to the latest iOS and iTunes version.
- Test your cables and ports.
- Remove and reinstall iTunes on your computer.
- Restore your device using DFU mode.
An iTunes sync session that failed to start is hardly the only problem people have with Apple’s iTunes software. While our troubleshooting tips could resolve a wide range of issues, if you’ve got a different error message to the one above you might want to check out this iTunes troubleshooting post as well.
Related:
- iTunes not recognizing iPhone XR or iPhone XS on Windows?
- “Item(s) could not be synced. See iTunes for more information” error fix
- Back up / Sync not working: “Session could not be started with iPhone” iTunes error fix
- iTunes wireless sync not working, fix
What happens with this iTunes error?
iPhone, iPad, and iPod touch users might want to sync their device to iTunes for a number of different reasons: to create a backup, to update iOS, or to transfer content like photos, videos, and music.

It’s possible to sync to iTunes over Wi-Fi, but for simplicity in this troubleshooting guide, we suggest connecting your device with a lightning cable. After doing so, you’ll be prompted to unlock your device and may be given the option to Trust this computer.
iTunes then attempts to transfer data between your computer and your iOS device. It may take a couple of minutes to load, but eventually the sync fails and you get the following error message:
“The iPhone could not be synced because the sync session failed to start.”
Why does the iTunes sync session fail to start?
There are many different reasons an iTunes sync session might fail to start.
The software on one device or the other might be outdated or faulty. The physical connection might be impaired by damaged cables or dirty ports. Or the data iTunes is attempting to sync might have become corrupt.
The end result is the same: iTunes is unable to sync data across devices.
Fortunately, most of these problems are fixable. And unless there is physical damage, you should be able to fix it yourself.
How do you fix iTunes not syncing with your iPhone, iPad, or iPod touch?
Follow the troubleshooting steps below if your iPod touch, iPad, or iPhone is not syncing with iTunes. We’ve listed them in order from quickest to longest to save you time.
Begin each step with your device disconnected from iTunes and be sure to attempt syncing again after every section.
1. Close every app and force restart your device
Close down every app on your iPhone, iPad, or iPod touch then restart it before attempting to sync again. Some users found they had to do this step twice before their iPhone would sync with iTunes again.

On iPhone X or later and iPads, swipe up from the bottom of the screen and pause in the middle. On iPod touch or earlier iPhone models, double click the home button.
You will see every app that is open on your device, push them off the top of the screen one by one to close them.
Follow the instructions below to force restart your device.
How do I force restart an iPhone 8 or later, an iPad Pro 11-inch, or an iPad Pro 12.9-inch?
- Quickly press the Volume Up button.
- Quickly press the Volume Down button.
- Press and hold the Sleep/Wake button.
- Keep holding until you see the Apple logo.
How do I force restart an iPhone 7?
- Press and hold the Volume Down button and Sleep/Wake button.
- Keep holding both buttons until you see the Apple logo.
How do I force restart an iPhone 6S or earlier, an iPad, or an iPod touch?
- Press and hold the Home button and Sleep/Wake button
- Keep holding both buttons until you see the Apple logo.
2. Restart iTunes while your device is connected

Whether using a Mac or Windows PC, close and re-open iTunes after connecting your device to the computer.
Connect your iPhone, iPad, or iPod touch to iTunes using a lightning cable. Unlock your device and choose to Trust this computer if a prompt appears. Wait a moment and close iTunes if it opens automatically.
Open iTunes again manually. Wait a minute for it to fully load then close it one more time. Open iTunes once more and attempt another sync session.
3. Delete your device backups from iTunes
Before doing this step you should ensure you have a second backup of your iPhone, iPad, or iPod touch. You could make a backup to iCloud, make a backup on a different computer, or make a copy of your current iTunes backup and save it elsewhere on your computer.
To copy your iTunes backup elsewhere, you need to locate the Backups folder on your computer.
If you’re struggling to do this, right-click the backup from the iTunes Devices page mentioned below. You then have the option to Show in Finder.

When you have a secondary backup of your device, delete the backups in iTunes using the following instructions.
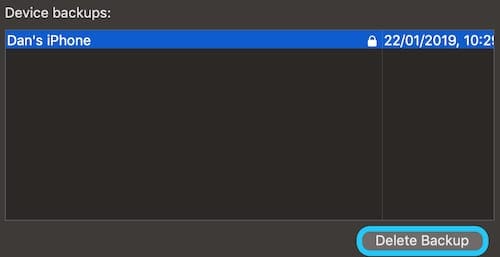
How do I delete backups in iTunes?
- Open iTunes.
- On macOS: Go to iTunes > Preferences.
- On Windows: Go to Edit > Preferences.
- Click Devices and select a device backup.

- Hover over a backup for additional details.
- Click Delete Backup, confirm Delete.
How do I reset the sync history in iTunes?
When iTunes fails to sync, Apple used to recommend resetting the sync history in iTunes.
This could be done by going to Preferences > Devices > Reset Sync History. Doing so wouldn’t delete any data, but may have prompted you to merge or replace content the next time you synced.
However, this is no longer an option in iTunes 12.8 or later. Apple has removed the Reset Sync History button, at least from the macOS version of iTunes.
Presumably, they found it didn’t serve as a useful troubleshooting tool.
4. Update to the latest iOS and iTunes software
It’s common for software to develop bugs that can result in problems like your iPhone not syncing with iTunes. The best and only solution to this is to use the most up-to-date software available as developers frequently release updates to patch those bugs.
Ensure you’re running the latest version of iOS on your iPhone, iPad, or iPod touch and that you have the latest version of iTunes on your Mac or PC.
How do I update the software on my iPhone, iPad, or iPod touch?
- Go to Settings > General > Software Update.
- Wait for your device to check for updates.
- Download and install any updates it finds.
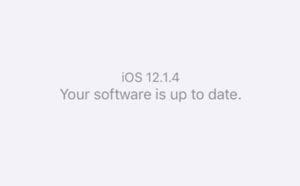
Check your iOS software is up to date.
How do I update iTunes on my Mac?
- Go to Apple > System Preferences > Software Update.
- Wait for your Mac to check for updates.
- Download and install any updates it finds.
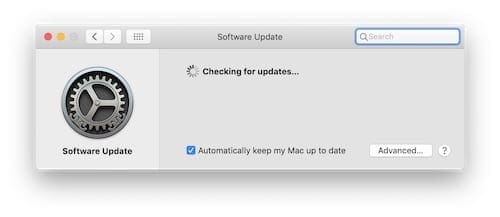
Check your macOS software is up to date.
How do I update iTunes on my Windows PC?
- Open iTunes and go to Help > Check for Updates.
- Follow the prompts to download and install updates.
- If there is no Check for Updates option: Open the Microsoft Store.
- Go to More > Downloads and updates > Get Updates.
- Follow the prompts to download and install updates.
5. Test your cables and ports
It’s time to test your hardware. Faults in your lightning cable, computer USB port, or iOS device lightning port could be the reason your iTunes sync session failed to start.
It’s relatively easy to test your hardware, but it could be troublesome or expensive to fix if there is a problem.
Start by connecting the lightning cable to a different USB port on your computer. Use one that you are certain works.
If possible, test a different USB device in the same port to check it has full functionality.

Now inspect the lightning port on your iPhone, iPad, or iPod touch.
Shine a flashlight in there and check for a build-up of lint or debris. This dirt can interfere with the connection and should be carefully removed using an anti-static brush or a compressed air duster.
Finally, try using a different lightning cable. Even if yours works to charge a device, it might still be unable to transfer data.
Check for fraying or kinks along your cable, which may be a sign of damage. If you’re using a third-party lightning cable, search for it on Apple’s MFi certification database to ensure it’s authenticated by Apple.
6. Remove and reinstall iTunes on your computer
It’s possible iTunes has become corrupt and you need to reinstall it. There are a few different ways to remove and reinstall iTunes depending on whether you use a Mac or a Windows PC and where you downloaded it from originally.
How do I reinstall iTunes on my Mac?
iTunes is baked into macOS, which means you can’t easily uninstall it. Instead, the best solution is to reinstall the entirety of macOS using Recovery Mode. This could take several hours.
It shouldn’t affect your data but we highly recommend you make a backup of your Mac before proceeding.
- Go to Apple > Shut Down and wait for your Mac to power off completely.

- Turn on your Mac and hold command+R.
- Keep holding both keys until you see the Apple logo or a spinning globe.
- Enter your firmware password if prompted.
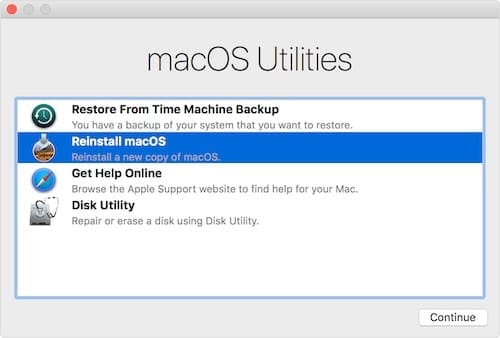
- When the macOS Utilities window appears, select Reinstall macOS.
- Follow the on-screen instructions and wait for the reinstallation to finish.
How do I reinstall iTunes on my Windows PC?
The instructions to remove and reinstall iTunes on a Windows PC vary depending on your version of Windows and where you downloaded iTunes from. Partly as a result of this, the instructions can be long-winded and a little more complicated.
For that reason, we suggest you follow the guide on Apple’s website to remove and reinstall iTunes on a Windows PC.
7. Restore your iPhone, iPad, or iPod touch using DFU mode
The final step is to restore your iOS device to its factory settings. Doing so erases all content and data from it, therefore you should make sure you have a backup before going further.

We suggest a restore using Device Firmware Update (DFU) mode because it removes and reinstalls every piece of software and firmware on your device. It’s the most complete level of restore possible.
We’ve made a totally different post explaining exactly how to enter DFU mode on any iPhone, iPad, or iPod touch. Follow the instructions there and restore your device from a backup afterward.
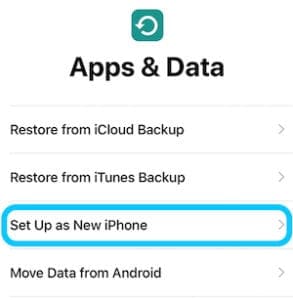
If the iTunes sync session still fails to start, we suggest repeating the DFU mode restore but not recovering any data from a backup. Set up your device as new and try to sync with iTunes again.
Should that work, then your backup is the problem.
You’ll still be able to import data through iCloud, sync over iTunes, or install apps from the App Store. But unfortunately you won’t be able to recover everything from a backup.
Hopefully, this comprehensive guide answered all your questions and fixed the “Sync session failed to start” iTunes error message. Let us know what step worked for you or reach out to us in the comments if you’re still having trouble.