Alright, you got a Mac (Hackintosh works too), and you want to try your hands writing some applications for the iPhone. There are tons of tutorials available on the net, but the easiest way to learn an unknown programming language or a framework or an IDE is to simply get into it and get your hands dirty. Lets begin at the bottom and work our way up, which is why this tutorial is going to show you how to create a basic ‘Hello iPhone’ application with the help basic wizards and visual builders that are supplied out of the box by Apple.
When we have any new framework that includes a visual builder, it’s good to give a try building simple applications to get an understanding of what the framework provides before getting a deep dive into the code. The Interface Builder provided by Apple is one of the most useful designers I’ve ever used and it works out some magic if you do not want to get your hands into code level which is perfect for a beginner.
To start with application development for the iPhone, firstly you will need to download and install the iOs SDK. This will install everything you need in order to build apps – XCode (Apple’s IDE), iPhone Simulator (helps you test your apps without an iPhone), and Interface Builder (Apple’s User Interface Builder for developing iPhone applications).
Once you have got everything installed, you are ready to jump in. Start by launching XCode. By default it’s installed in the Developer folder.
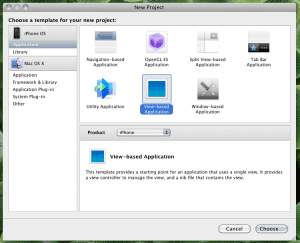
When we launch XCode we will be presented with a welcome screen. You can either look through that or just dismiss it. You can choose the Create a New XCode Project button highlighted in the image shown below to bring up the project templates.
The View-Based Application is the simplest to start with as simple as it provides a complete barebones application which can readily run on an iPhone and display an empty view. What this template is going to give is a View, and an application delegate. An application delegate simply put is an entity that responds to messages from an application object. There can be only one application object per iPhone application, and the project template takes care of creating it for us.
When you click the Choose button, you will be prompted for a project name. Let’s name it “Hello iPhone”.
Once the project is created using the template, the XCode interface comes up and shows all of the files the project template has generated for you in a nice and usable view.
The most important file for us here is MainWindow.xib, which contains our application delegate. The template we used created this nib file for us (MainWindow.xib) and this takes care of forming all the object relationships needed for this application to run. We can take it for granted that modifying anything in the related view will show up on our application when we launch it.
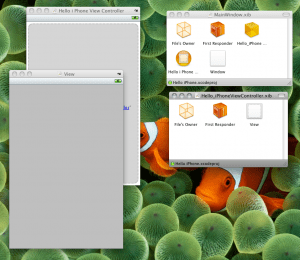
Double clicking on the MainWindow.xib file will launch the interface builder and brings up the next view for us showing the View Controller involved. If we want to make any changes to the view which we want to make in this case, we should click on the Link provided in the controller view as shown highlighted in the image below.
Clicking on the link will open another nib file called Hello_iPhoneViewController.xib as shown in the image below and also opens up the actual View that will be shown when the application is launched. Any changes we make on this view will directly reflect on it when the application is run.
Since we call our project “Hello iPhone” lets put the same text with a bang (!) on our view in a Label. If we have to add a user interface element to the view, we can do so by picking the component from the Library window. The library window can be launched from Tools > Library menu on the interface builder menu.
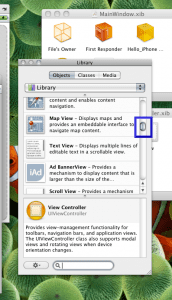
Clicking on the Library menu item will bring up the library dialog which lists the components available and can be scrolled using the scrollbar as highlighted in the image below.
Scroll down/up to locate the “Label” component which is shown highlighted in the image below.
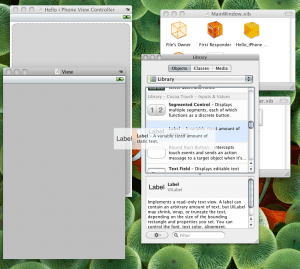
Getting a component onto the view is very simple and straightforward. You will have to drag and drop the component from the Library dialog onto the view as shown in the image below.
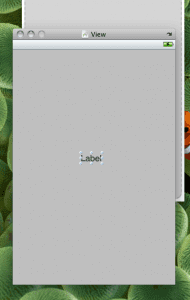
Once the label component is dropped onto the view, it will show up as shown below and the text can be edited inline.
Lets double click on the text “Label” and change it to what we desire, “Hello iPhone!” in our case since this is the application by the same name. The editing will show up as in the image below.
Close all the views and when you close the dialog titled “Hello_iPhoneViewController.xib”, you will be prompted to save the changes. Click on “Save” button to apply and save the changes that we just did.
Important Note: Please remember that the Interface builder is not integrated into XCode and changes made in it are not saved when you either save or build your project in XCode so it is always important to save interface builder changes before building and running the project in XCode.
Next we are back on the XCode window and all set to run out “Hello iPhone” application. Let’s see how to do it. An application can be built and launched in the simulator after build by clicking the “Build and Run” button shown on top middle section of the XCode window as shown highlighted in the image below.
This will try to build the app and in our case should successfully build and launch our application in the iPhone simulator as shown in the image below.
Well, here we are, saying “Hello iPhone!”, Congrats on just popping up your very first iPhone application on the simulator. We look forward to listen from you in case you find any issues or want to share some feedback.

